One way to change the appearance of text in a document is by changing its font type. A font is a set of letters, numbers, and punctuation symbols designed around a shared appearance. A font will have variations for size and styles, such as bold and italics.
Changing a font itself will have the greatest effect on the appearance of text.
- Select the text you want to change.
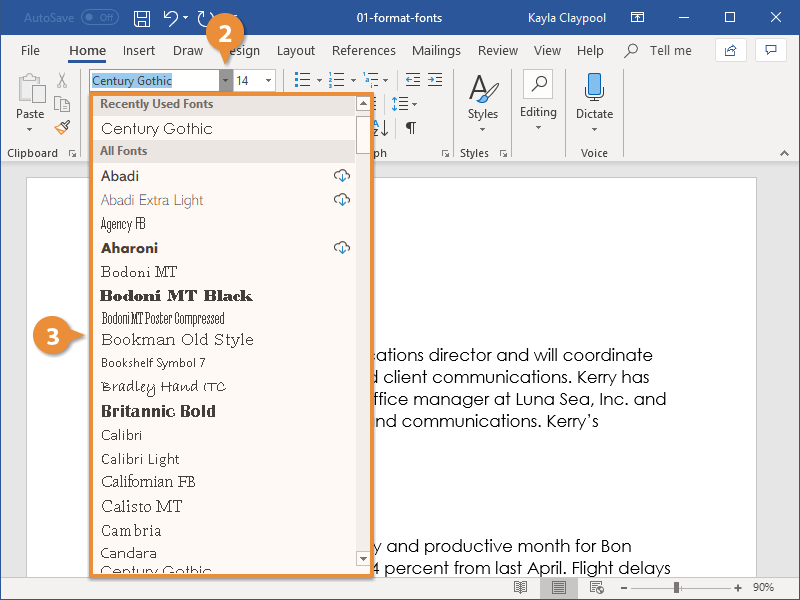
- Click the Font list arrow on the Home tab.
You can also click the Font list arrow on the Mini Toolbar that appears when text is selected.
- Select a new font from the list.
The text is now set in the selected font.
When changing fonts, be sure to choose the right font for the tone of your document. Don’t use casual script fonts in a professional document, and also avoid using too many fonts at once.
| Font Type |
Examples |
Description |
| Serif |
Times New Roman, Garamond, Cambria, Georgia, Palatino |
Serifs are small details at the ends of some letter strokes, meant to improve legibility. Suitable for both header and body text. |
| Sans Serif |
Arial, Calibri, Helvetica, Verdana, Trebuchet MS |
Sans serif fonts lack the small details at ends of letter strokes, leading to a plainer look. Suitable for both header and body text. |
| Script |
Brush Script, Zapfino, Lucida Handwriting |
These fonts are meant to mimic handwriting, either calligraphic or casual. Useful in very specific designs, but unsuitable for body text and most headers. |
| Monospace |
Courier New, Consolas, American Typewriter |
All letters and symbols use the exact same amount of space. Useful when displaying computer code, or when precise horizontal alignment between lines is important. |
Changing the font size helps differentiate between titles, headers, and body text.
- Select the text.
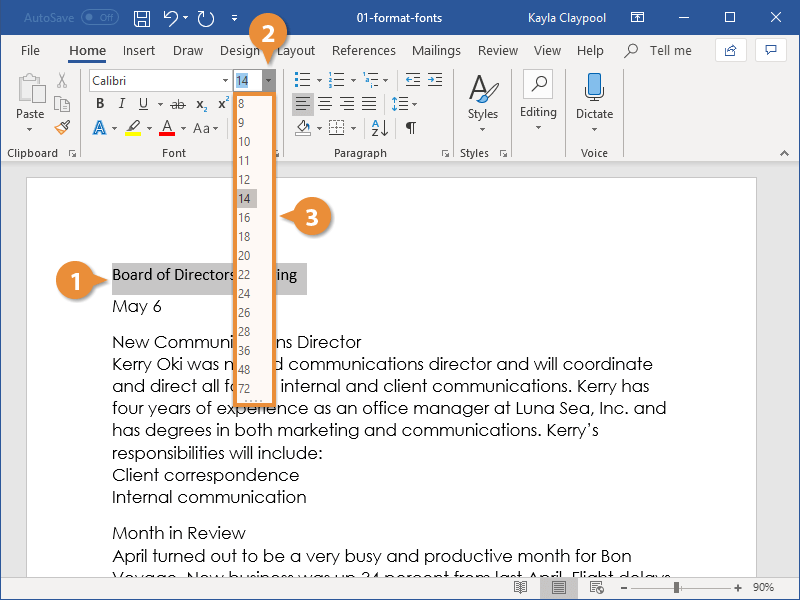
- Click the Font Size list arrow on the Home tab.
- Select a font size.
The font size changes.
Click the Increase Font Size or Decrease Font Size buttons to increase or decrease by one point at a time.
Font size is measured in points (pt) that are 1/72 of an inch. The larger the number of points, the larger the font.
You may need to change font color to make text stand out, comply with brand standards, or add visual appeal.
- Select the text you want to change.
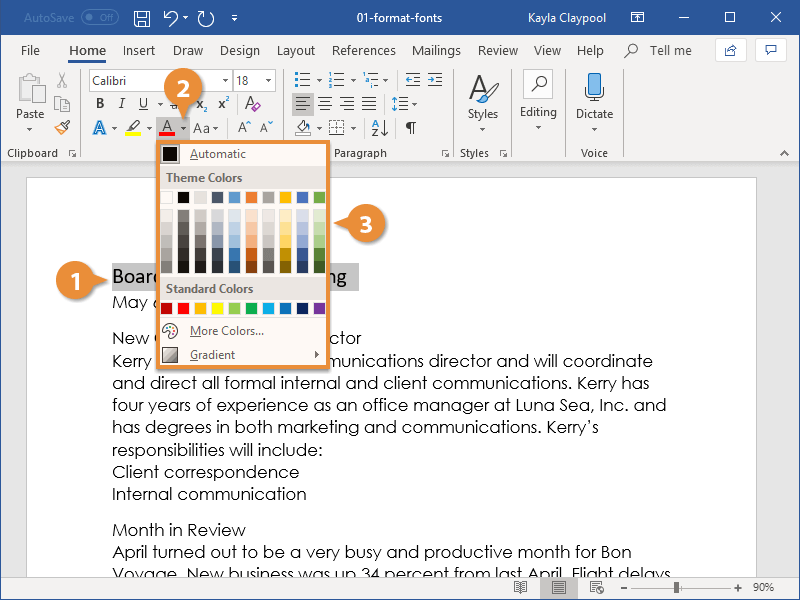
- Click the Font Color list arrow.
You can also click the Font Color list arrow on the Mini Toolbar.
- Select a new color.
If you don’t like any of the available theme colors, select More Colors to display the Colors dialog box.
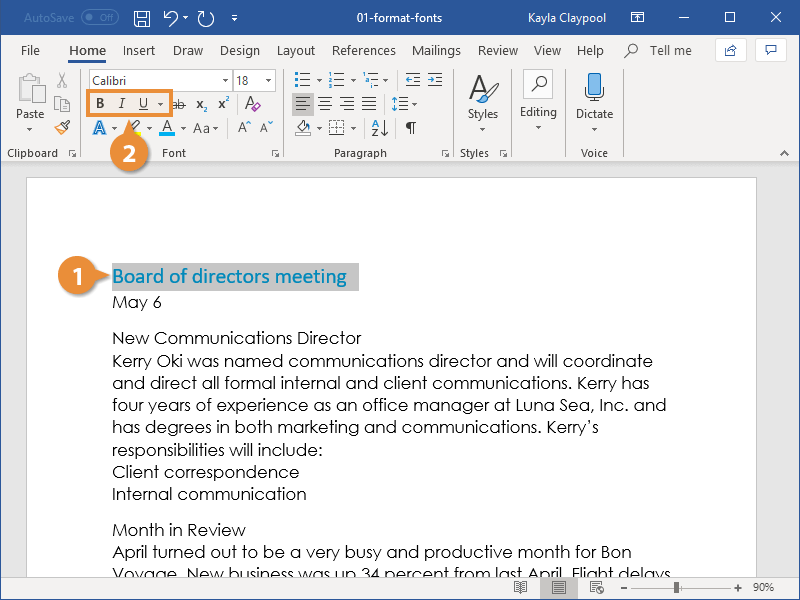
In addition to changing font type, size, and color, you can also enhance the text further by using other features in the Font group like bold, italic, or underline.
- Select the text you want to change.
- Select Bold, Italics, or Underline.
Shortcuts:
- To bold: Ctrl + B
- To italicize: Ctrl + I
- To underline: Ctrl + U
The effect is applied.
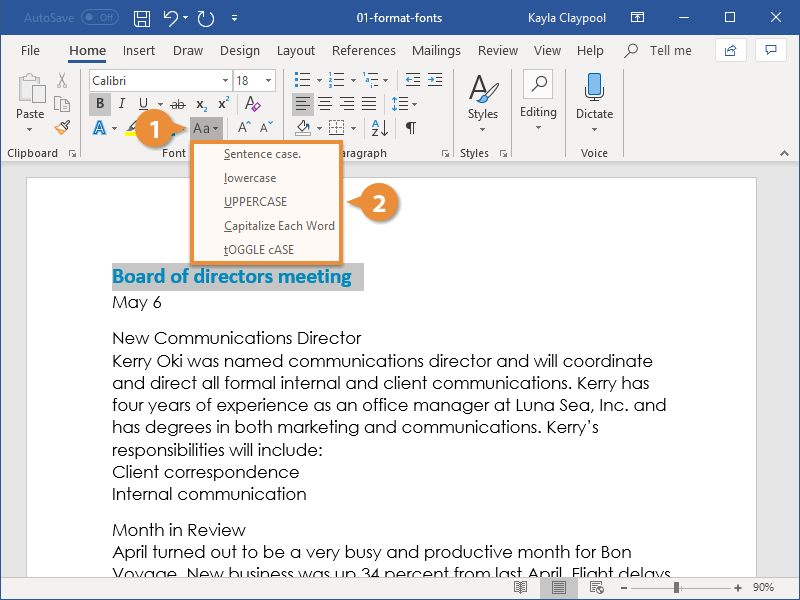
If you want to change the case of a block of text, you don’t need to retype the whole thing. You can easily change the case of selected text with the Change Case menu.
- With the text selected, click the Change Case button.
- Select a case option:
- Sentence case
- lowercase
- UPPERCASE
- Capitalize Each Word
- tOGGLE cASE
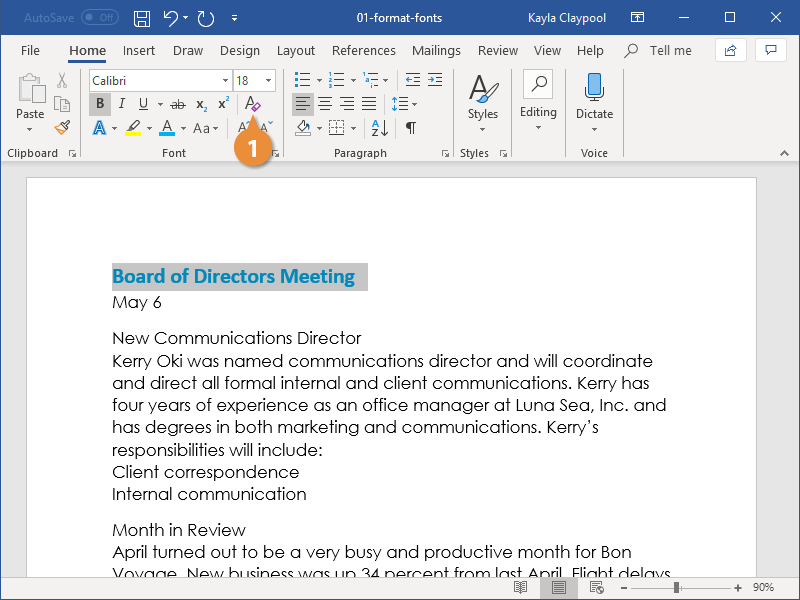
If you change your mind and want to remove all formatting from text, you can easily clear all formatting at once.
- With the text selected, click Clear All Formatting.
The extra formatting is removed, and the text is reset to the default style.

