
Interactive Tutorial
Pivot Table Timeline
Learn How to Use Pivot Table Timelines in Excel to Filter Data by Date and Analyze Trends Efficiently
-
Learn by Doing
-
LMS Ready
-
Earn Certificates

Try this Course with a Free Trial
Timelines are interactive filters that let you quickly filter by date. They make it quick and easy to see PivotTable data for only the time period you specify. They are similar to slicers in that you can insert them once and keep them with the PivotTable to update at will.
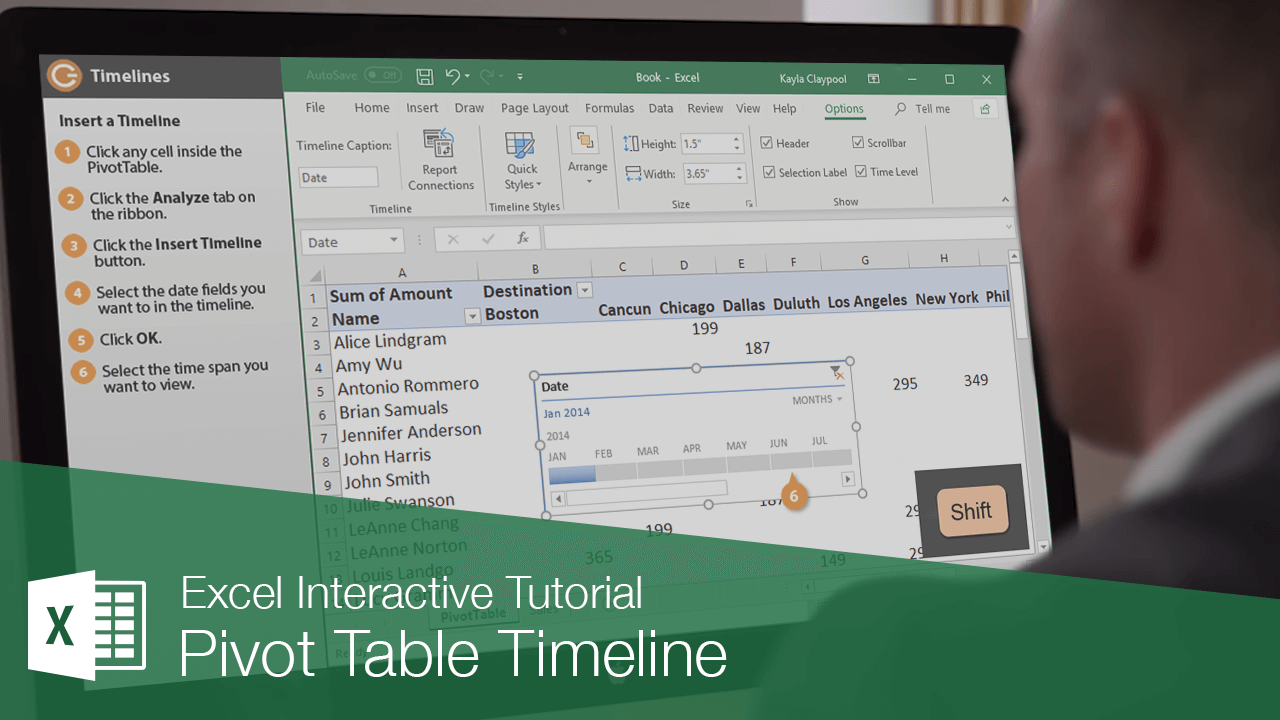
Insert a Timeline
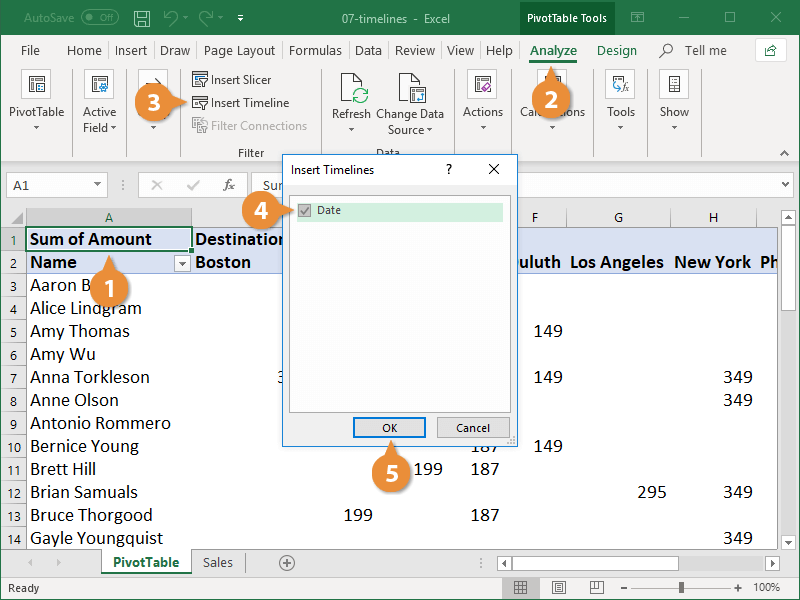
- Click any cell inside the PivotTable.
- Click the Analyze tab on the ribbon.
- Click the Insert Timeline button.
You can also insert a Timeline for PivotCharts and cube functions.
The Insert Timelines dialog box appears. It automatically detects the date fields used in the PivotTable and has them available for you to select from. Many times, there will only be one available field.
- Select the date field you want to use for the timeline.
- Click OK.
- Select a time span in the Timeline you want the PivotTable to display.
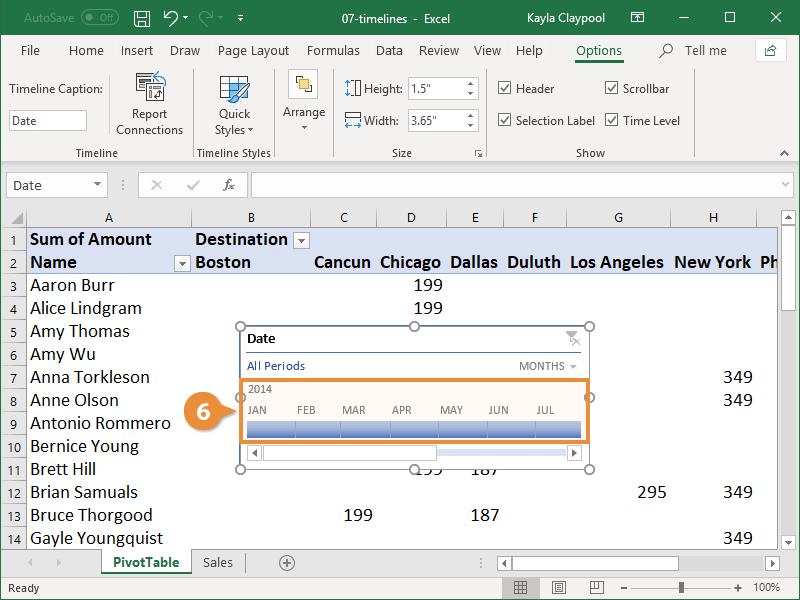
To select multiple intervals, you can click and drag along the timeline or click the first interval you want to include and hold the Shift key while clicking the last interval in your chosen span.
Clear a Timeline
You can clear the Timeline at any point to restore all the data in the PivotTable.
- Click the Clear Filter button at the top-right corner of the Timeline.
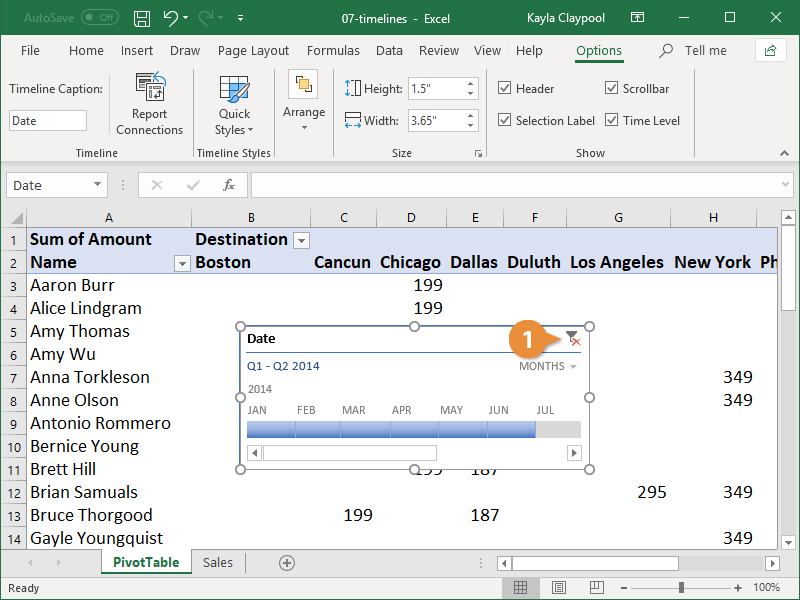
All the PivotTable data is visible once again.
Remove a Timeline
If you no longer need to use the Timeline, it can be removed from the sheet entirely.
- Right-click the timeline.
- Select Remove Timeline
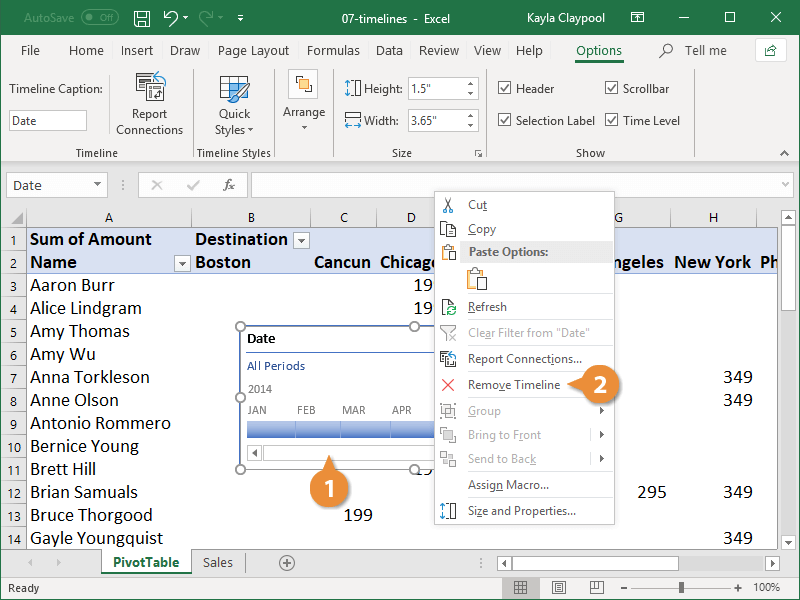
The timeline is removed from your PivotTable.