Interactive Tutorial
How to Import Data Into Excel
Learn How to Import Data into Excel from CSV, Text, and External Sources for Easy Analysis
-
Learn by Doing
-
LMS Ready
-
Earn Certificates

Try this Course with a Free Trial
Excel can import and export many different file types aside from the standard .xslx format. If your data is shared between other programs, like a database, you may need to save data as a different file type or bring in files of a different file type.
Export Data
When you have data that needs to be transferred to another system, export it from Excel in a format that can be interpreted by other programs, such as a text or CSV file.
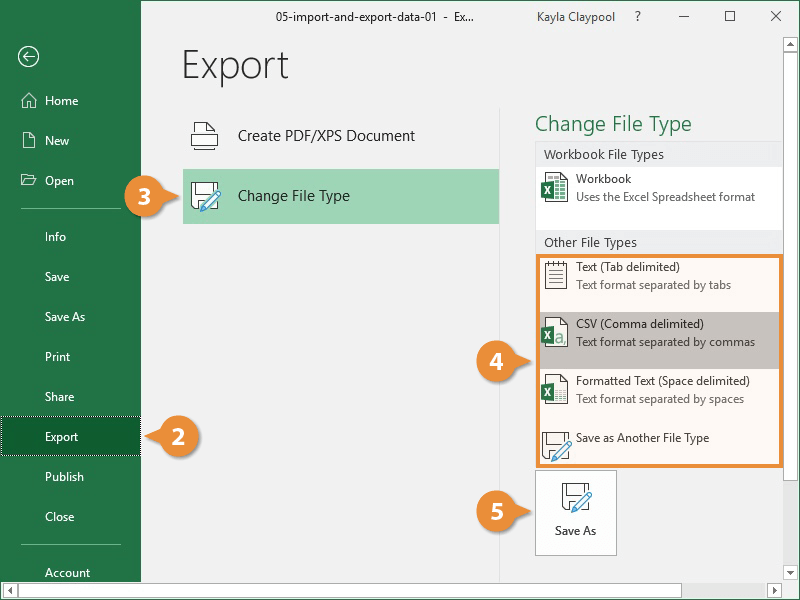
- Click the File tab.
- At the left, click Export.
- Click the Change File Type.
- Under Other File Types, select a file type.
- Text (Tab delimited): The cell data will be separated by a tab.
- CSV (Comma delimited): The cell data will be separated by a comma.
- Formatted Text (space delimited): The cell data will be separated by a space.
- Save as Another File Type: Select a different file type when the Save As dialog box appears.
The file type you select will depend on what type of file is required by the program that will consume the exported data.
- Click Save As.
- Specify where you want to save the file.
- Click Save.

A dialog box appears stating that some of the workbook features may be lost.
- Click Yes.
Import Data
Excel can import data from external data sources including other files, databases, or web pages.
- Click the Data tab on the Ribbon..
- Click the Get Data button.
Some data sources may require special security access, and the connection process can often be very complex. Enlist the help of your organization’s technical support staff for assistance.
- Select From File.
- Select From Text/CSV.
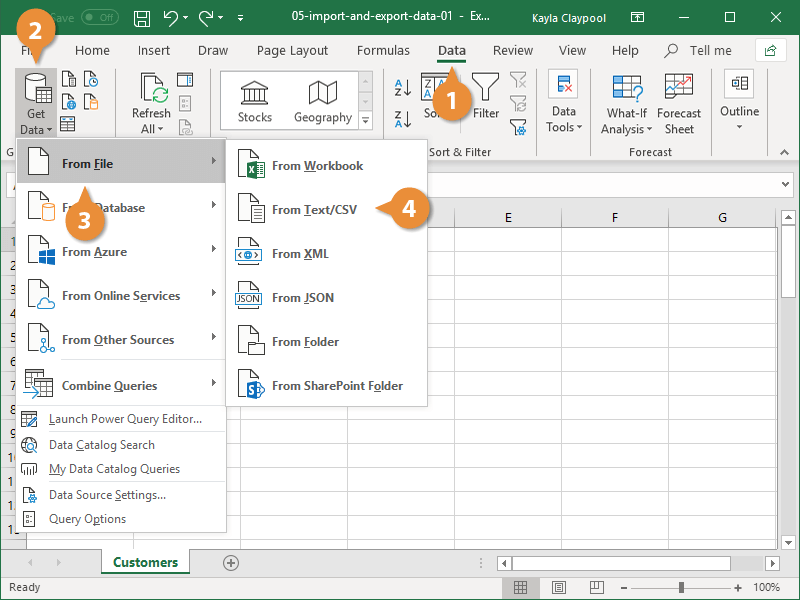
If you have data to import from Access, the web, or another source, select one of those options in the Get External Data group instead.
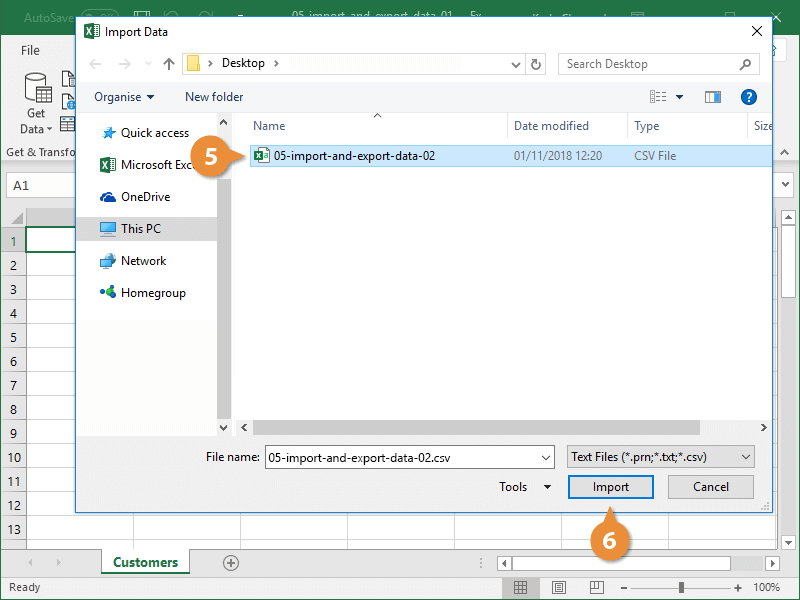
- Select the file you want to import.
- Click Import.
If, while importing external data, a security notice appears saying that it is connecting to an external source that may not be safe, click OK.
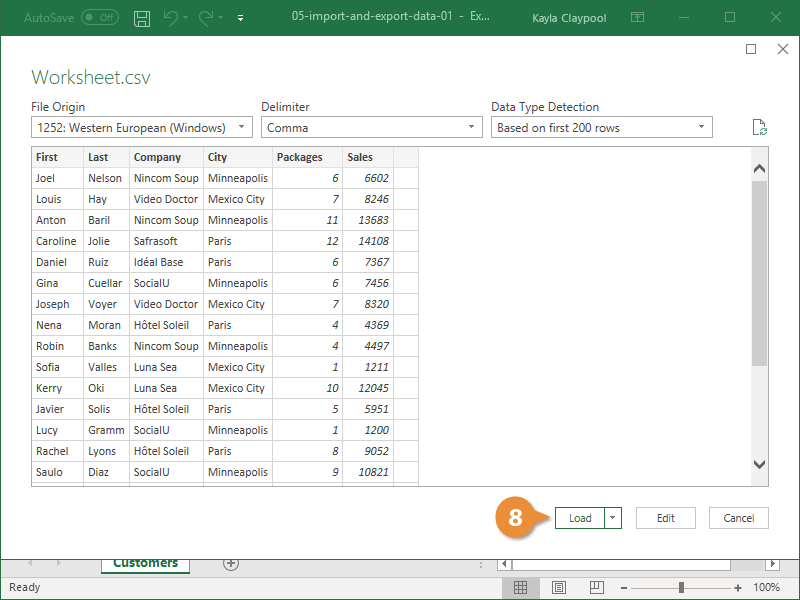
- Verify the preview looks correct.
Because we've specified the data is separated by commas, the delimiter is already set. If you need to change it, it can be done from this menu.
- Click Load.