
Interactive Tutorial
How to Consolidate Data in Excel
Learn How to Consolidate Data from Multiple Sheets in Excel to Summarize and Analyze Information Efficiently
-
Learn by Doing
-
LMS Ready
-
Earn Certificates

Try this Course with a Free Trial
Excel can automatically summarize or consolidate information from multiple worksheets into a single, master worksheet using the Consolidate feature. For example, if you have sales data for multiple sales agents on different worksheets, Excel can total them for you on another worksheet.
Excel can consolidate information in a couple different ways: by position or by category.
- Consolidate by position: Used when data in all the worksheets is arranged in exactly the same order and location.
- Consolidate by category: Used when the worksheets have the same row and column labels, but the rows and columns aren’t arranged in the same order on all the worksheets. Excel uses the labels to match the data. You’ll have to make sure the label spelling and capitalization are identical on each of the worksheets you want to consolidate by category.
Consolidate Data
Before you begin consolidating by position or category, make sure the data is arranged in labeled rows and columns without any blank rows or columns. Each of the ranges you want to consolidate needs to be on a separate worksheet, with a blank worksheet for the consolidation’s destination.
When consolidating, you don’t actually specify whether you are consolidating by position or category—Excel knows how to consolidate based on the data range you select and whether or not the consolidating worksheets are arranged identically.
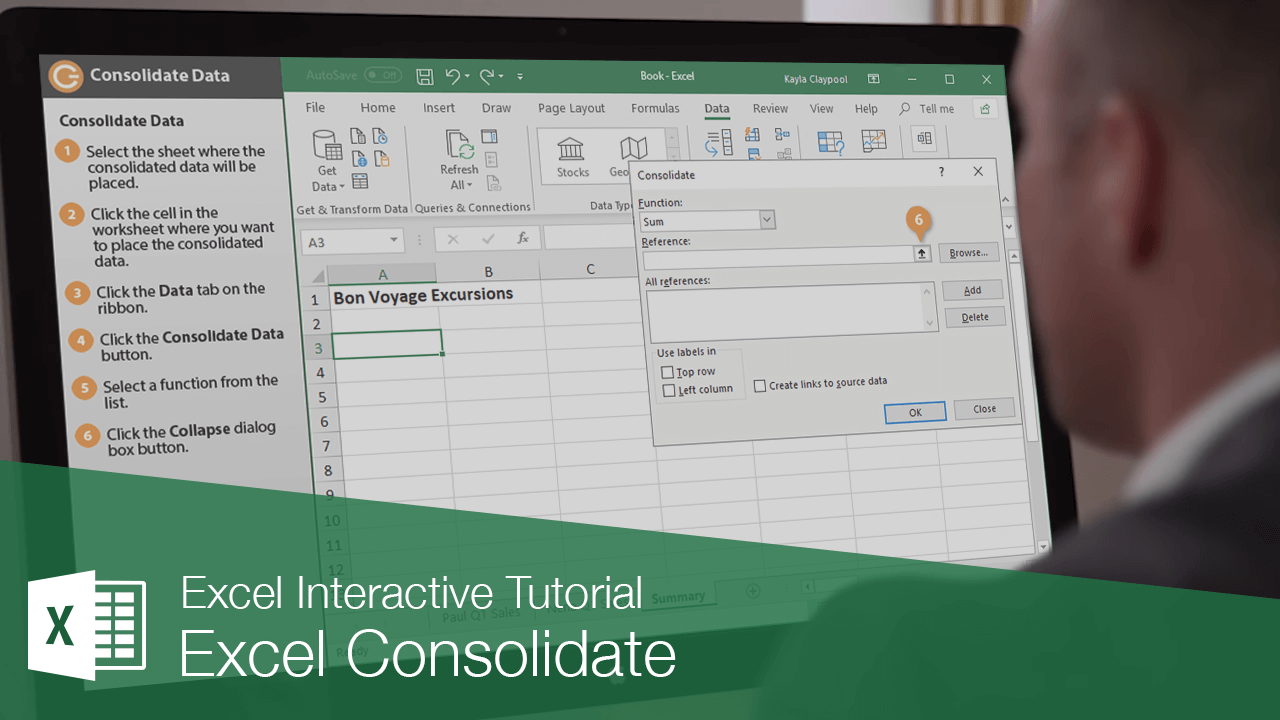
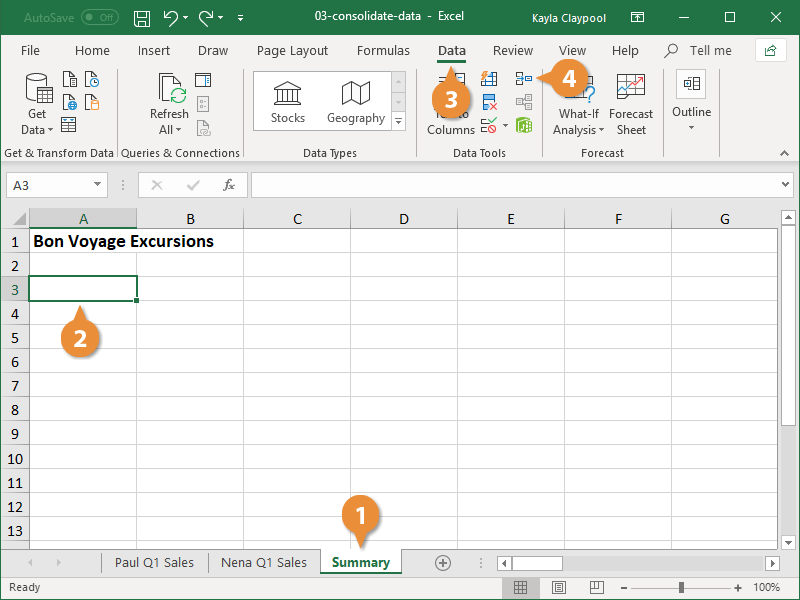
- Select the sheet where the consolidated data will be placed.
- Click the cell in the worksheet where you want to place the consolidated data.
- Click the Data tab on the ribbon.
- Click the Consolidate Data button in the Data Tools group.
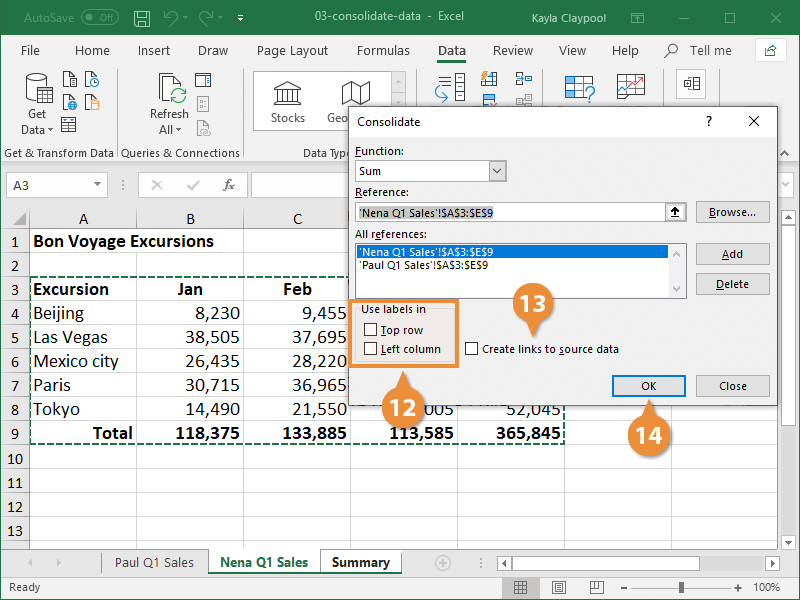
The Consolidate dialog box appears. Here you can choose what you want to do with the data, like find the sum, count, or average.
- Select a function from the list.
If source data is in a different workbook, click Browse to locate the file and click OK.
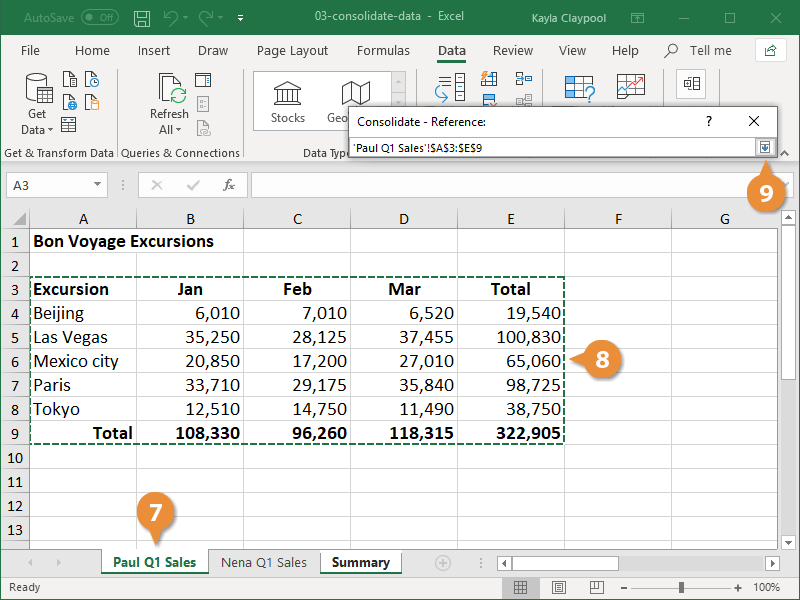
- Click the Collpase Dialog Box button.

- Navigate to the worksheet with the set of data to be consolidated.
- Select the data you want to include in the consolidation.
Be sure to select the data as well as any headings and totals to be included.
- Click the Expand Dialog Box button.
- Click the Add button.
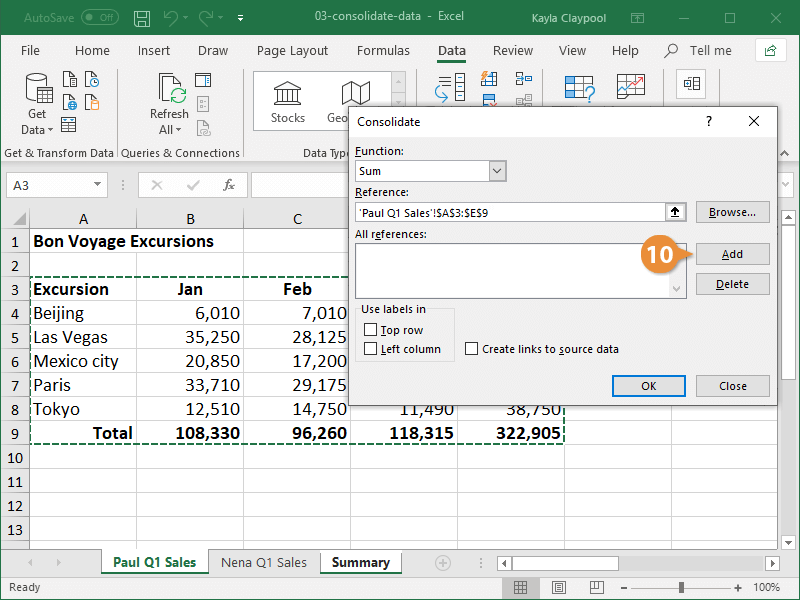
- Repeat Steps 6-10 until all data ranges you wish to consolidate are added.
- (Optional) Check the Top row and/or Left column check box to use the label from the referenced data in the worksheet containing the consolidated data. This tells Excel where the labels are located in the source ranges.
- (Optional) If you want the consolidation to update automatically whenever the source data changes, check the Create links to source data check box.
- Click the OK.
The worksheet’s values are changed to the values you specified in the scenario. You can select any scenario here to update the values in your spreadsheet.