
Tutorial interactivo
How to Enable Macros in Excel
Learn How to Enable Macros in Excel to Run Automated Tasks and Improve Workflow Efficiency
-
Aprender haciendo
-
LMS listo
-
Obtenga certificados

Pruebe este curso con una prueba gratuita
A macro is a series of Excel commands and instructions that are recorded so that they can be executed as a single command. Instead of manually performing a series of time-consuming, repetitive actions in Excel yourself, you can create a macro to perform the task for you. In order to use macros in a workbook, you’ll need to enable them, either on a case-by-case basis, or by adding a trusted save location to Excel.
Enable Macros in a Single File
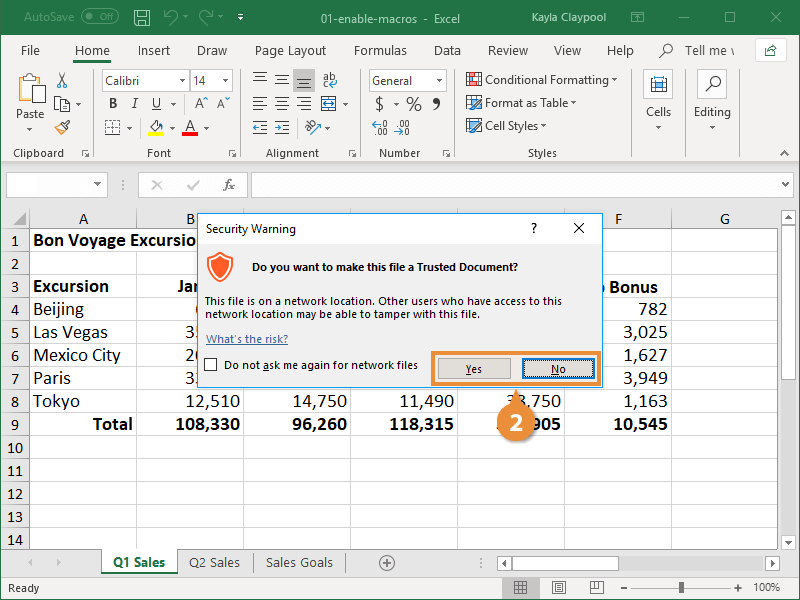
Macros are disabled by default because they are created with Visual Basic code that could negatively affect your computer if written or recorded with malicious intent. If you choose to enable content on a file-by-file basis, a yellow security warning will appear above the worksheet data for any file containing a macro.
- Click the Enable Content button in the security warning above the formula bar.

- Choose if you want to make this a trusted document.
- Yes: Macros are enabled automatically each time this file is opened.
- No: Macros must be enabled each time this file is opened.
Set Trusted Locations
If you have a lot of macro files in one location, like a network drive, and you don't want to continually enable content in every file, set up a trusted location instead.
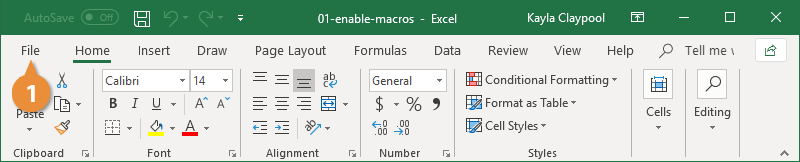
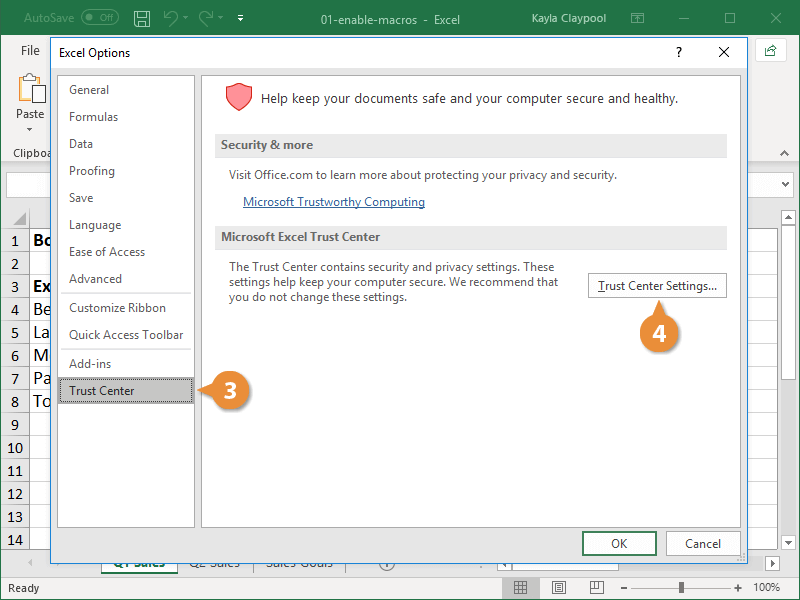
- Click the File tab.
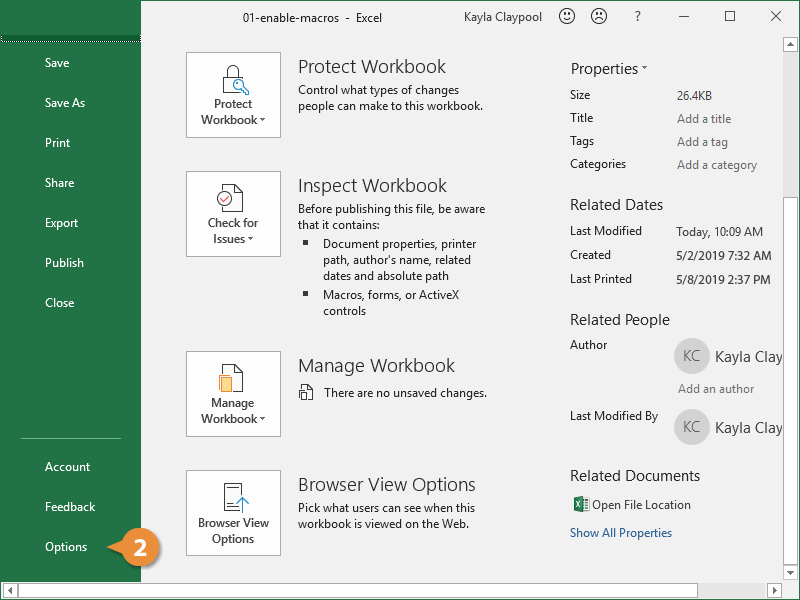
- Select Options.
- Select Trust Center.
The Trust Center in Excel contains all the security and privacy settings used to keep your computer secure.
- Click the Trust Center Settings button.
The Trust Center dialog box opens.
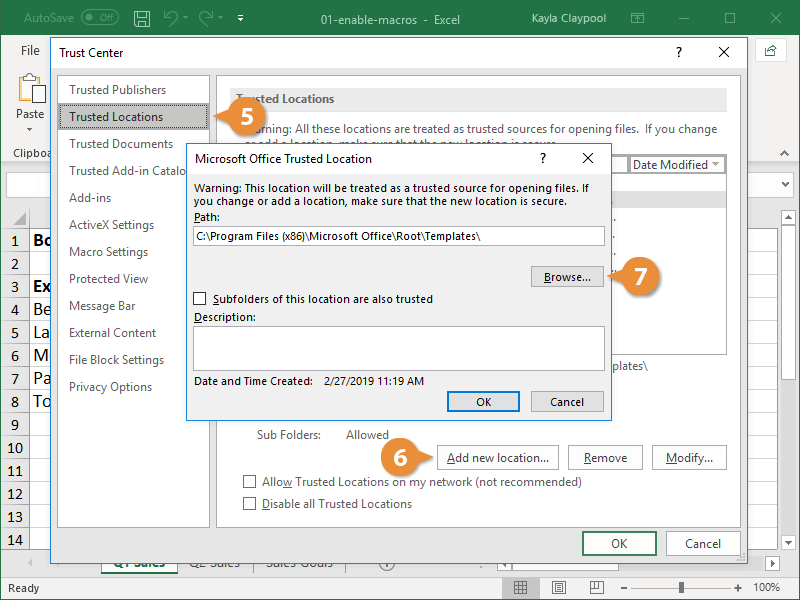
- Select Trusted Locations in the left column.
Depending on your setup, you may have a number of trusted locations already added. You can make changes or add additional locations here.
- Click the Add new location button.
- Click the Browse button.
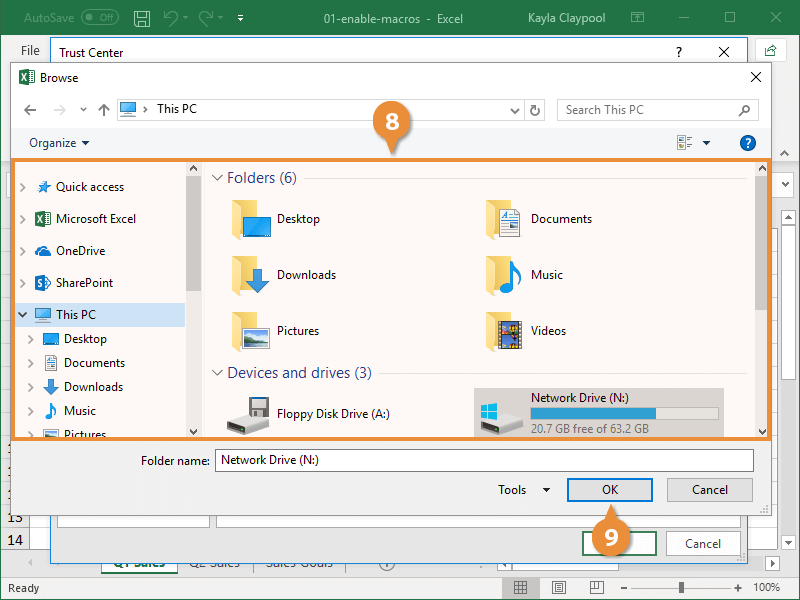
- Navigate to and select the trusted location in the Browse window.
- Click OK.
Excel adds the specific folder you selected as a trusted location. If the folder is moved or modified, you’ll have to return to the Trust Center and update the location.
- (Optional) Select the Subfolders of this location are also trusted checkbox.
With this option selected, any folders within the location you’ve selected in the Browse dialog box will also be trusted.
- Click OK.
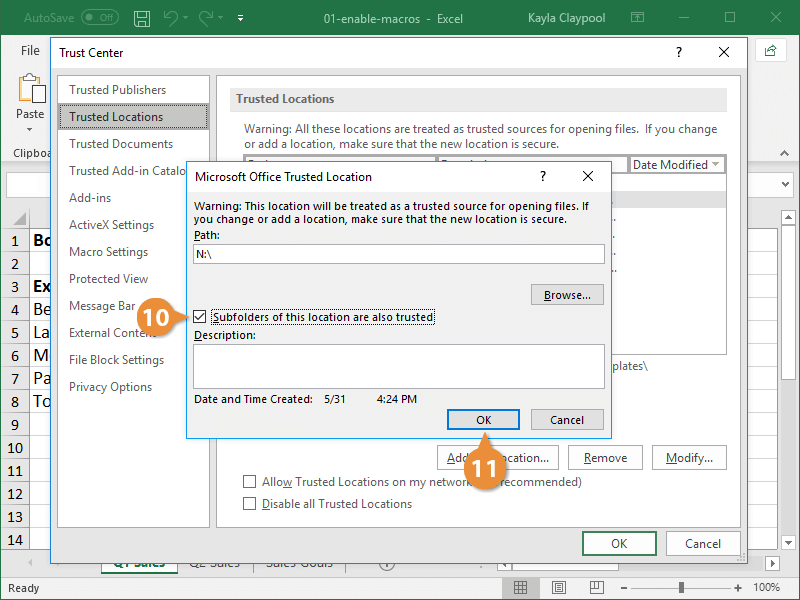
The trusted location is added. You will no longer get a security warning when you open any file saved in the specified folder.
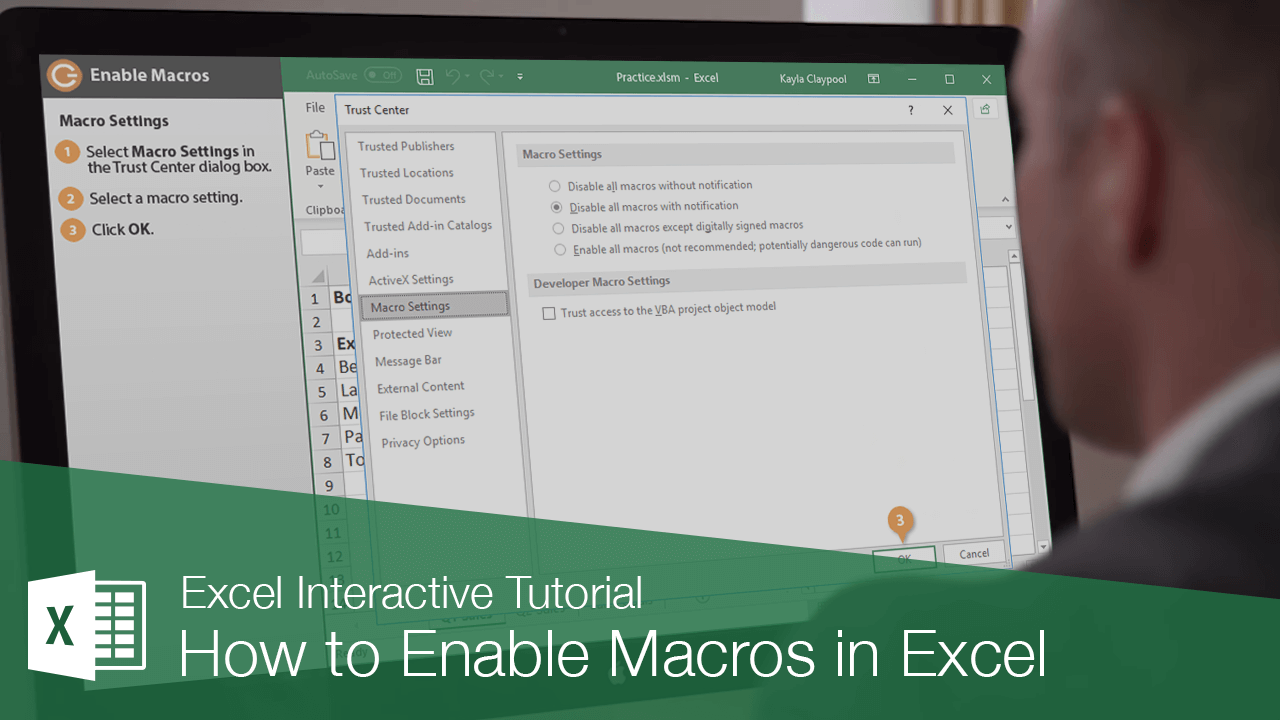
Macro Settings
You also have the ability to globally change the settings for all files containing macros within the Trust Center. This can be risky, so if you work in an organization with a system administrator, you may find you are unable to change these settings.
- Select Macros Settings in the Trust Center dialog box.
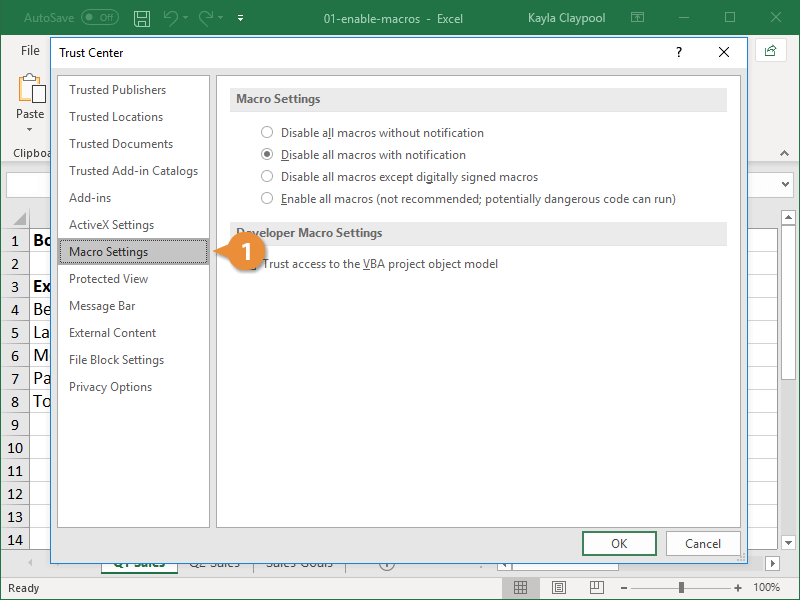
There are four levels of macro security:
- The first level disables macros entirely, blocking them without a notification. This option is the safest but doesn’t allow you to run macros at all—even macros you record yourself.
- The default setting blocks macros but displays a notification. This notification allows you to enable macros on a case-by-case basis. This option is safe, as long as you know that you can trust the macros you allow.
- You can automatically enable digitally-signed macros. You'll still be prompted for most macros, but trusted macros will be allowed without a prompt.
- Finally, you can enable all macros without a prompt. This can be dangerous, so use this command with caution.
- Choose the proper security level.
- Click OK.

The Trust Center dialog box closes, and the settings are applied to Excel.