
Interactive Tutorial
How to Insert Text Box in Word
Add and Format Text Boxes in Word to Highlight Important Information or Design Elements
-
Learn by Doing
-
LMS Ready
-
Earn Certificates

Try this Course with a Free Trial
A text box is an element you can insert and position anywhere in a document. Text boxes are great for calling special attention to a quote or a whole block of text.
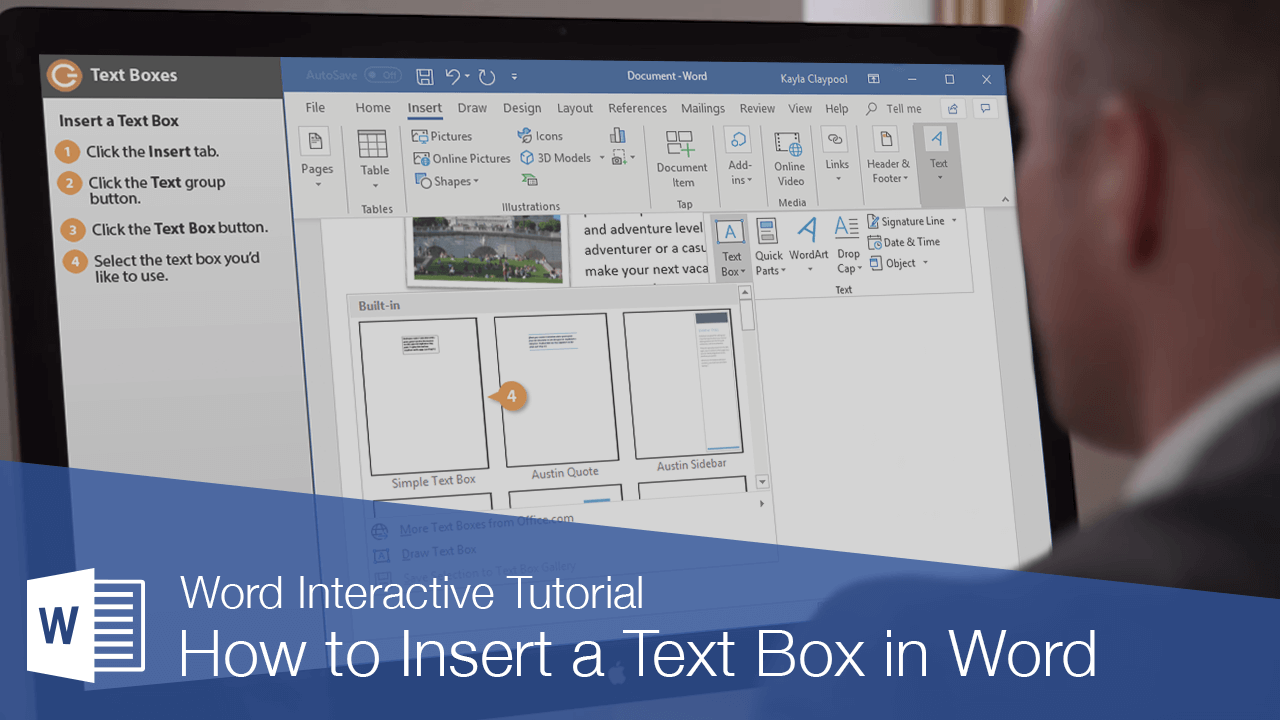
Insert a Text Box
- Click the Insert tab.
- Expand the Text group, if necessary.
- Click the Text Box button.
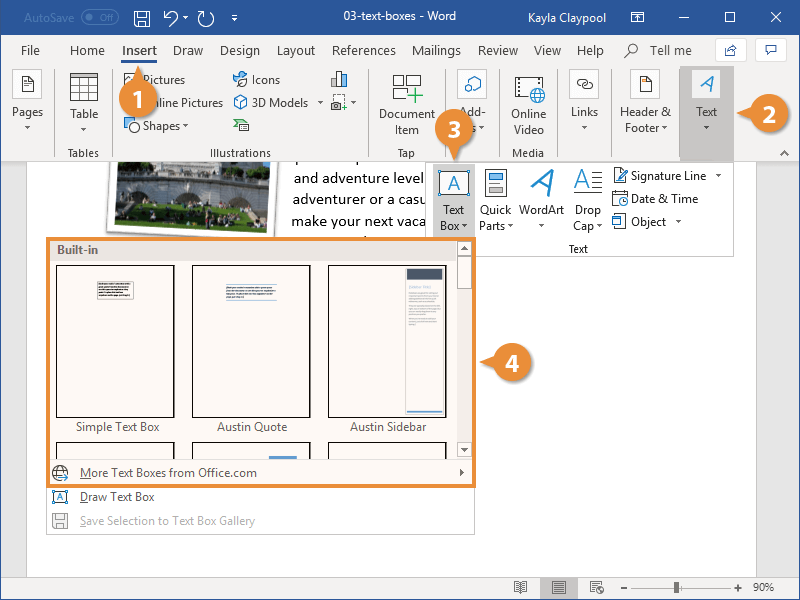
- Select the text box you’d like to use.
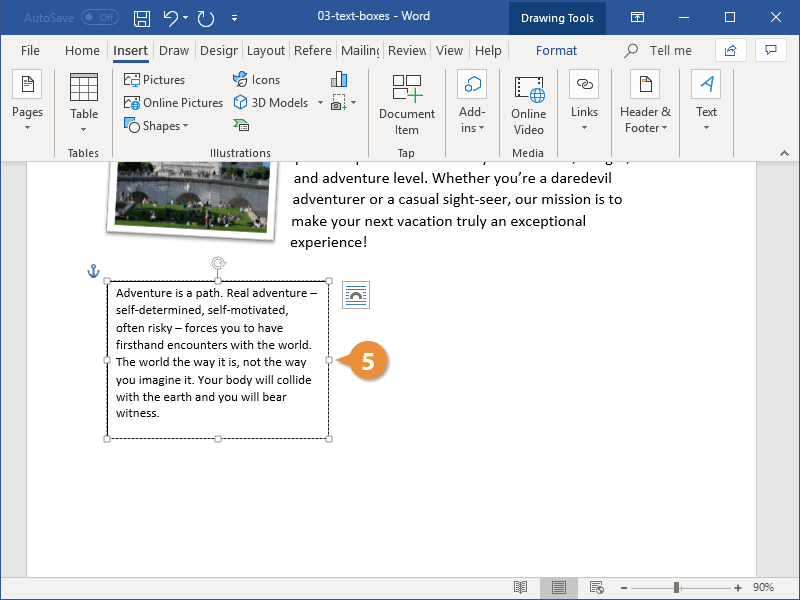
- Click the text box and type to replace the placeholder text.
A gallery of text box styles appears. The styles range from simple text boxes to stylized sidebars.
The text box is automatically inserted.
The placeholder text disappears as soon as you start typing.
Text boxes can be sized, moved, arranged, and styled just like shapes and pictures.
Draw Text Boxes
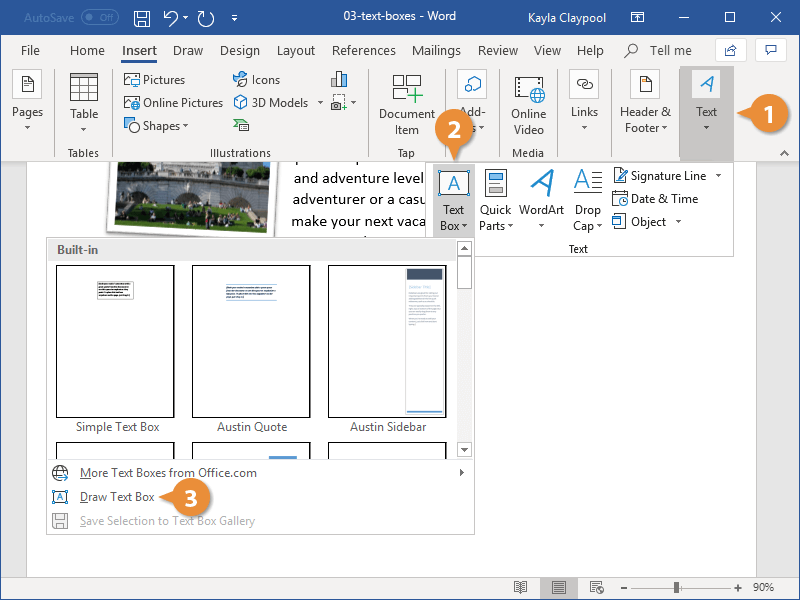
You don’t have to use one of Word’s built-in text boxes; you can create one from scratch.
- From the Insert tab, expand the Text group, if necessary.
- Click the Text Box button.
- Select Draw Text Box.
- Click and drag in your document to create the text box.
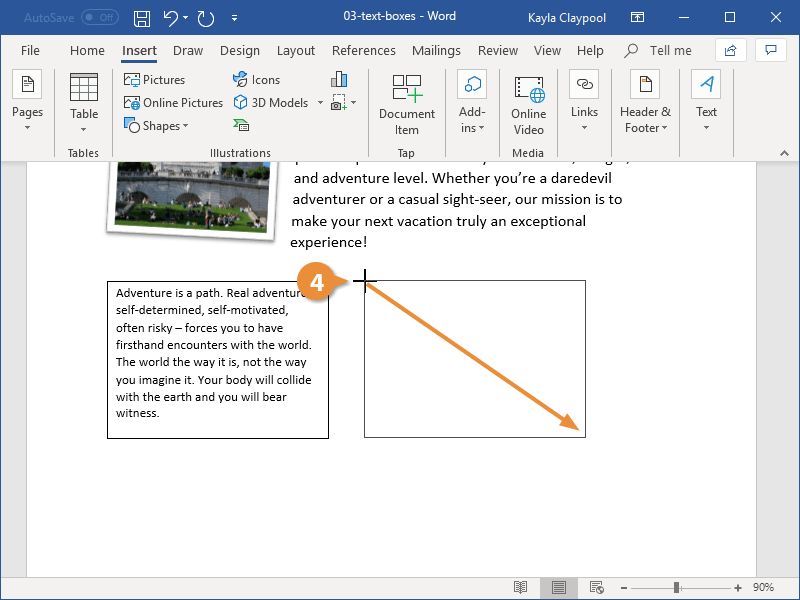
The pointer changes to a crosshair, indicating that you can draw the text box.
The text box is inserted.
Link Text Boxes
Linking text boxes allows text to flow between them. For example, you could make the text of a long article flow through several smaller text boxes in a more advanced layout.
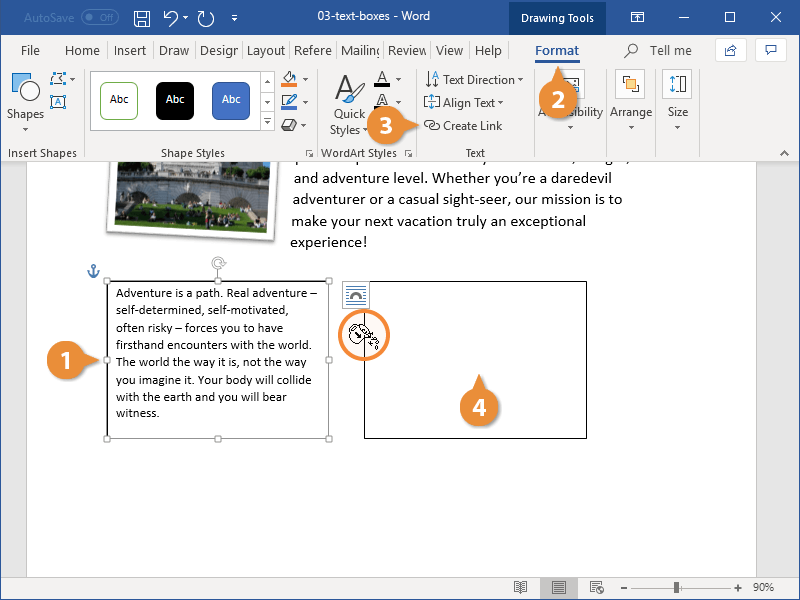
- After you have created two or more text boxes, select the first one.
- Click the Format tab in the Drawing Tools ribbon group.
- Click Create Link from the Text group.
- Click the second text box with the new cursor.
- Switch back to the first text box and type into it.
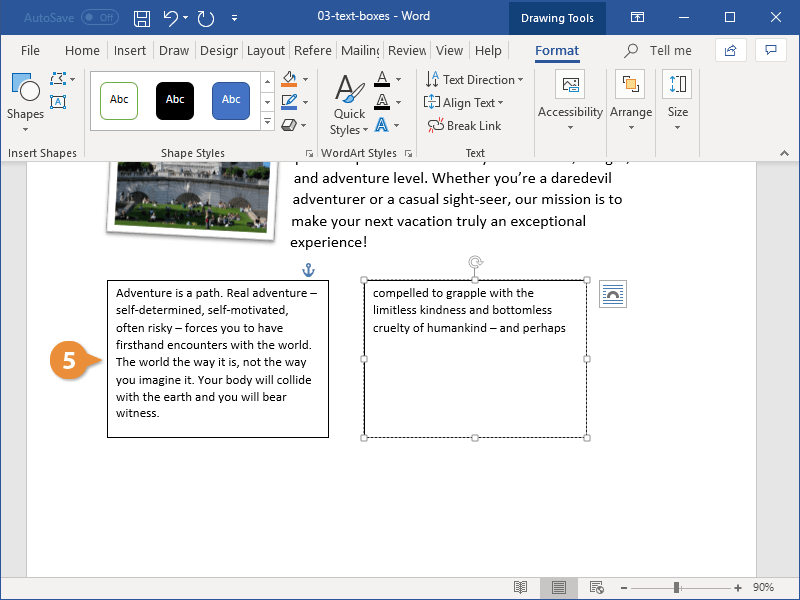
The second text box must be empty, so make sure to remove any text in it before proceeding.
The cursor changes into a tiny pitcher full of letters. Moving the cursor over the second text box reveals that you can “pour” additional text into it.
The two text boxes are linked. Now, once enough text is entered into the first text box, it will automatically overflow into the second.
You can format the text in a text box just as you would any other text by using the Font and Paragraph groups on the Home tab.