
Interactive Tutorial
Insert Date in Word
Add Automatic or Manual Dates in Word to Keep Documents Updated and Professionally Formatted
-
Learn by Doing
-
LMS Ready
-
Earn Certificates

Try this Course with a Free Trial
Fields are placeholders that use codes to display bits of text that can be changed automatically. They can display all sorts of information, and you'll often use them in your documents without realizing it.
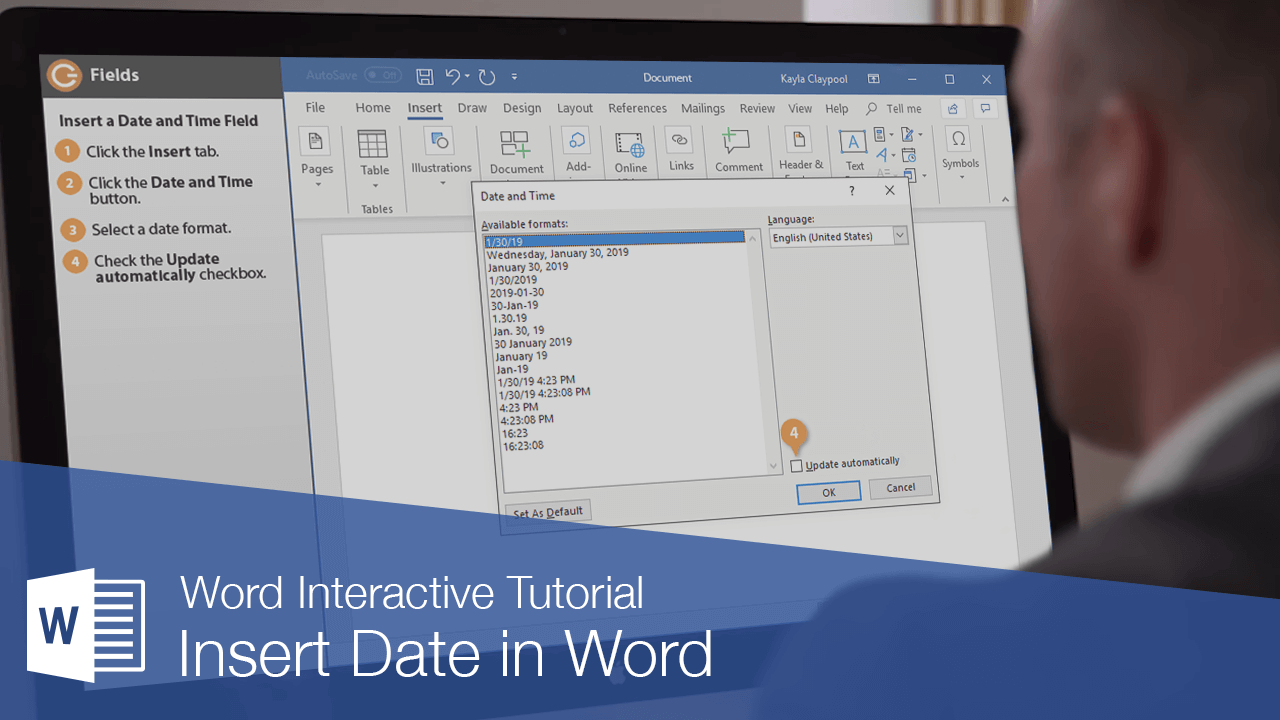
Insert a Date and Time Field
A Date and Time field is one of the most common field types used in Word and is a good example of how fields work.
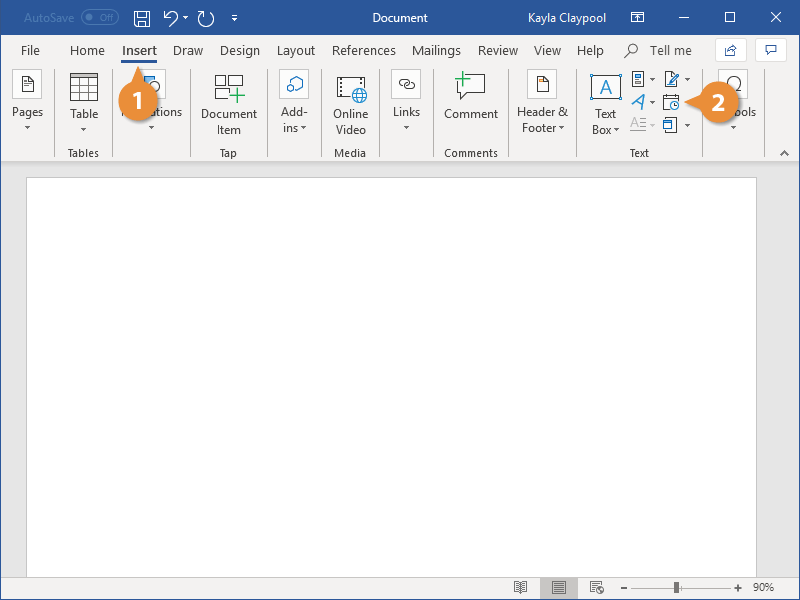
- Click the Insert tab.
- Click the Date and Time button.
- Select a date format.
- Check the Update automatically check box.
If the Update automatically check box isn't checked, the date will be inserted as static text.
If it is checked, the date will be inserted as a field that can be updated automatically to reflect the current date.
- Click OK.

The date and time field is inserted. By default, the field displays the current date and/or time in the selected format.
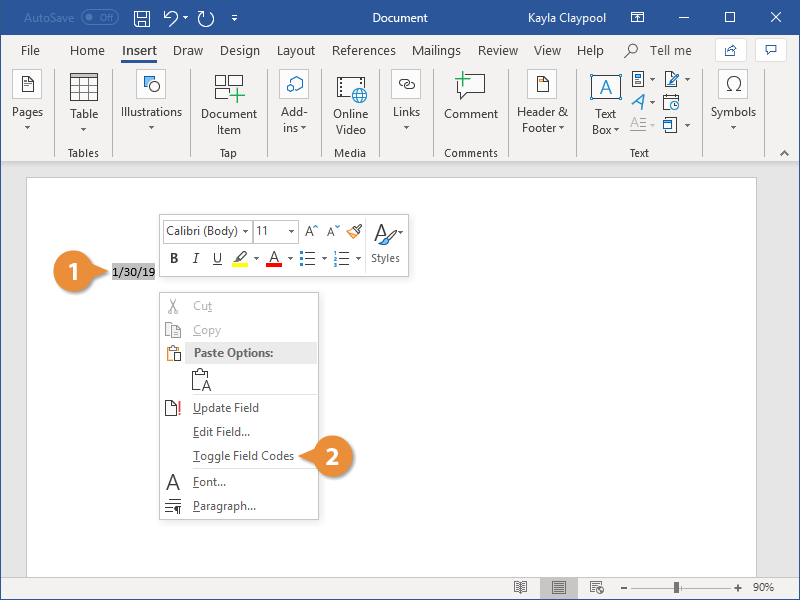
View and Edit Field Codes
At first glance, a field will display what it’s configured to, such as a date, page number, or author name. Behind the scenes there's a hidden code that controls what information is displayed.
- Right-click a field.
- Select Toggle Field Codes.
Now, you can see the hidden code that tells Word to display the content of the field.
Most fields will include a code for the type of field, as well as an additional code that controls the formatting of the data in that field; for example, how the date in a field is formatted.
- Edit the field code.
By editing the field code manually, you can change the formatting of the data in a field, or even change the type of field (provided that you know the exact code to use).
- Click Update.
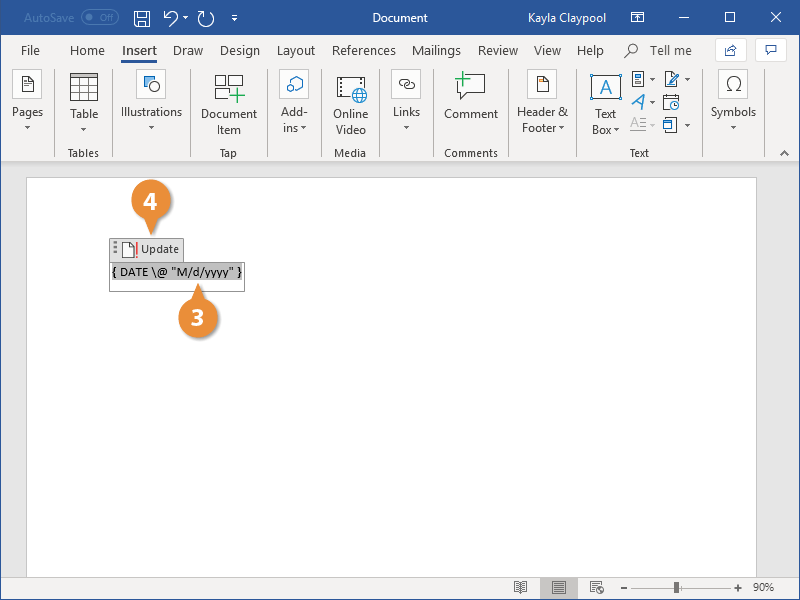
The field code is updated, and the field codes in the document are toggled again to show the results.
Add Other Types of Field
There are plenty of field types that you can add to a document. While some have their own buttons on the ribbon to add them directly (such as date and time or page numbers), you can also browse field types in the Field dialog box.
- Click the Quick Parts button on the Insert tab.
- Select Field.
The Field dialog box opens. Different fields are listed in the left column, with the ability to narrow them down by category.

- Select a field category by clicking the Categories list arrow and selecting one.
- Select a field from the list.
When a field is selected, field properties will appear in the next column, with some fields also displaying a field options column.
- Customize the field properties and options (optional).
- Click the Field Codes button (optional).
The field properties and options are replaced with a text box displaying the field code. You can switch back and forth to see how changing the field properties and options will affect the field code.
- Click OK.
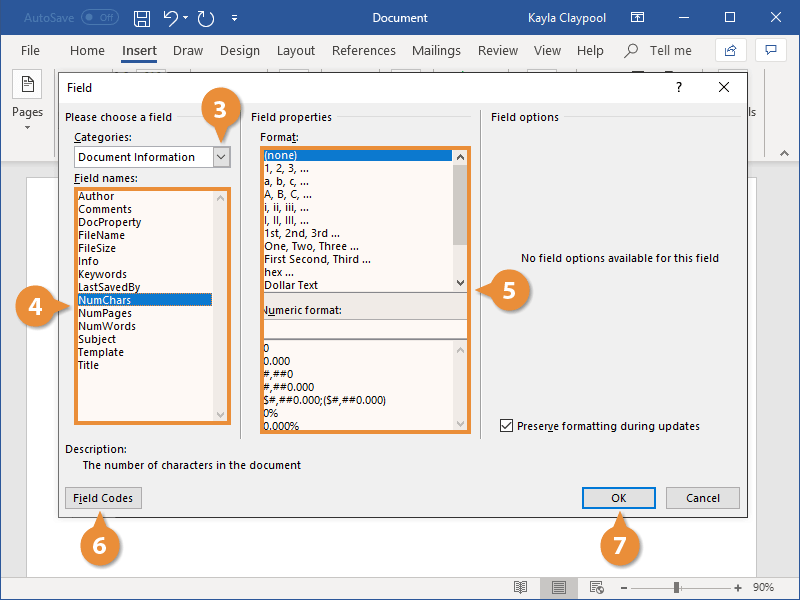
The field is inserted in the document.