
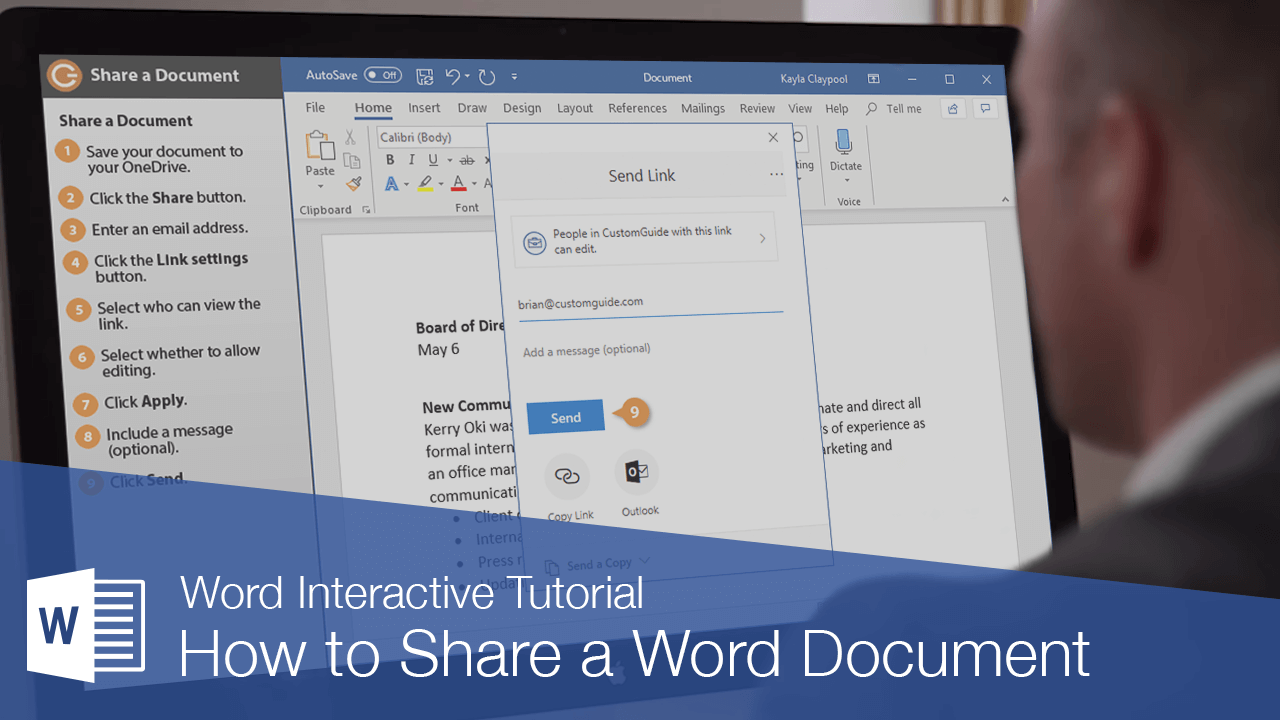
Interactive Tutorial
How to Share a Word Document
Share Word Documents via Email, OneDrive, or Link to Collaborate in Real Time
-
Learn by Doing
-
LMS Ready
-
Earn Certificates

Try this Course with a Free Trial
It’s easy to share a document with other people from within Word. For example, you can send a sharing invitation to co-workers that gives them access to view or edit the file. To easily share your document, make sure it’s saved to an online location, such as your OneDrive or your organization’s SharePoint server.
Share a Document
- Save your document in an online location, such as OneDrive or SharePoint.
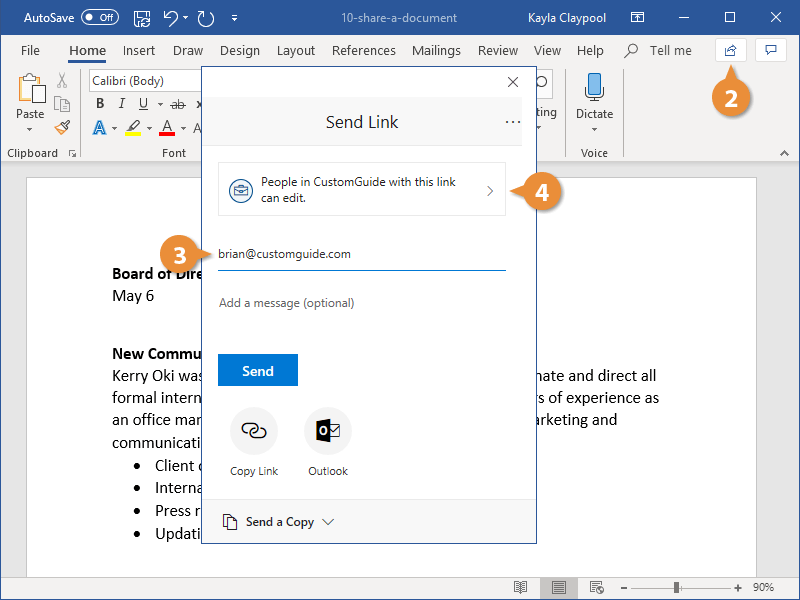
- Click the Share button.
- Enter an email address or select one from the address book.
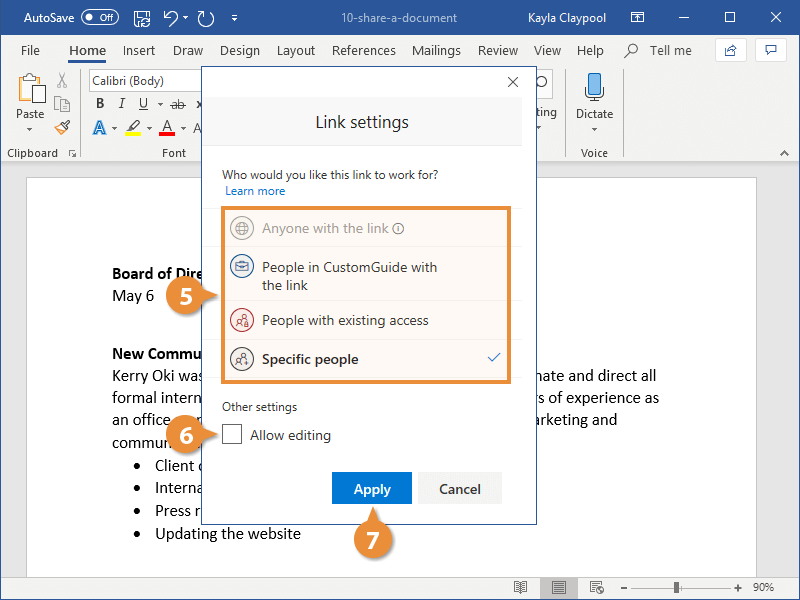
- Click the Link Settings arrow.
Here you can control who this link you send out will work for.
- Select who can view the link.
- Select whether to allow editing.
- Click Apply.
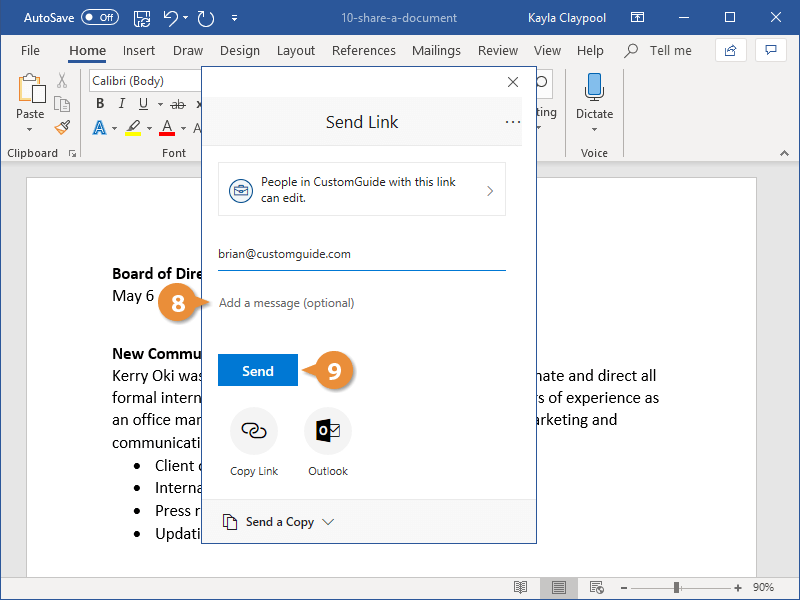
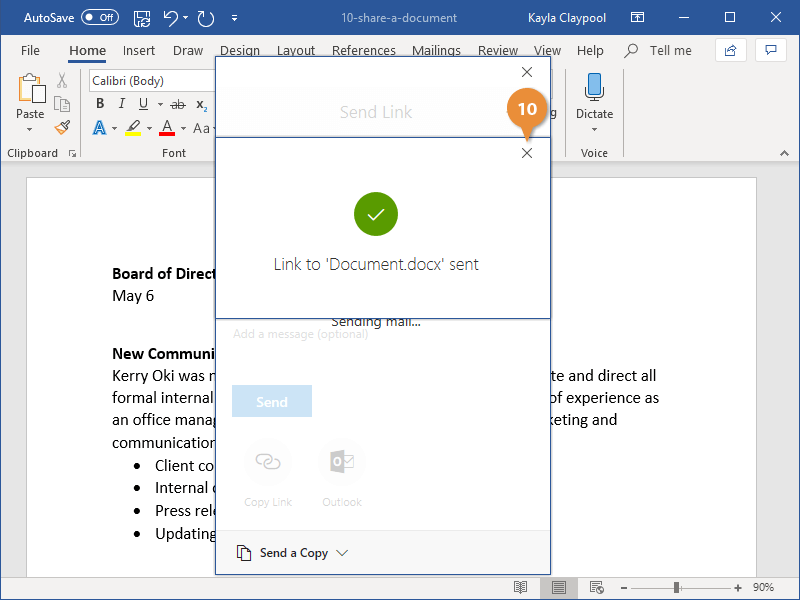
- (Optional) Include a message.
This message will be included in the email that’s sent, informing the recipients that you’re sharing a document with them.
- Click Send.
- Click Close.
Anyone who has been granted access to the document shows up in the Share pane, along with their permission level.
You can always revoke or modify a person’s sharing permissions by right-clicking their name in the Share pane.
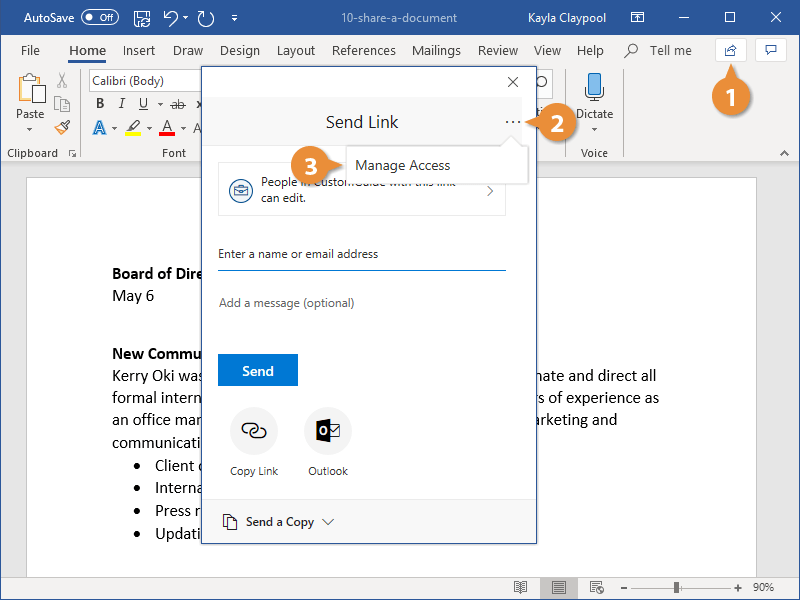
Manage Access to a Document
After you've started sharing things with others, it may be tricky to remember who has access to what.
- Click the Share button.
- Click the More Options (…) button.
- Select Manage Access.
Now, you can see who has access to this document, and whether they have editing or view-only permissions.
- Click a permissions list arrow.
- Select a permissions level.
- Can edit: Anyone who has been invited to the document can make edits.
- Can view: Anyone who has been invited is only able to view the document, not make changes.
- Click Close.
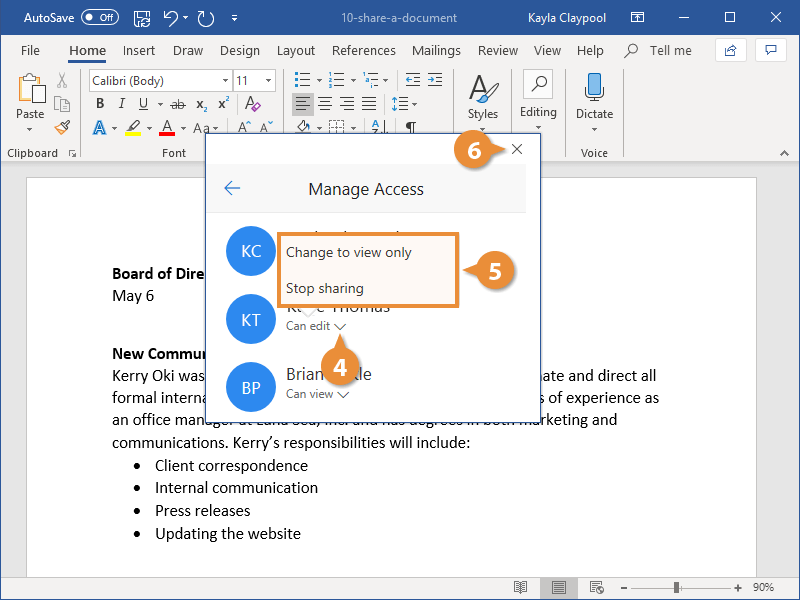
The permissions are updated.