
Interactive Tutorial
How to Set Tabs in Word
Set, Adjust, and Use Tab Stops in Word to Align Text and Improve Document Layout
-
Learn by Doing
-
LMS Ready
-
Earn Certificates

Try this Course with a Free Trial
By using tab stops in your document, you can create uniformly spaced text. And, unlike if you were to just enter a bunch of spaces to separate text, tabs ensure your text remains properly aligned. Each time you press the Tab key, the cursor moves to the next tab stop. By default, Word has left tab stops set at every half-inch, but you can create your own tab stops in a specific position or change the location of the existing tab stops.
Enable Formatting Marks and the Ruler
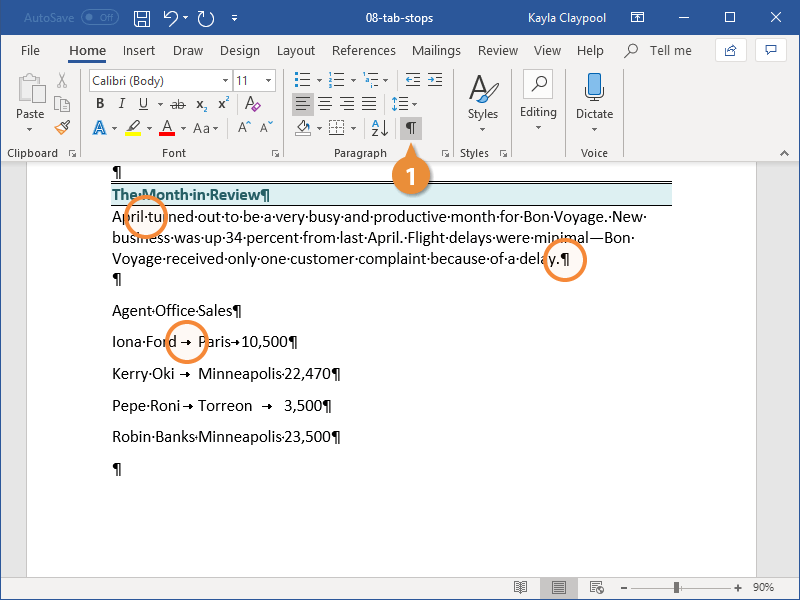
Before you start adjusting tab stops, make sure to turn on both formatting marks and the ruler. The formatting marks make it easy to see what's going on in your document, especially when it comes to tabs. The ruler is necessary to easily add, move, and remove tab stops.
- Click the Show/Hide ¶ button on the Home tab.
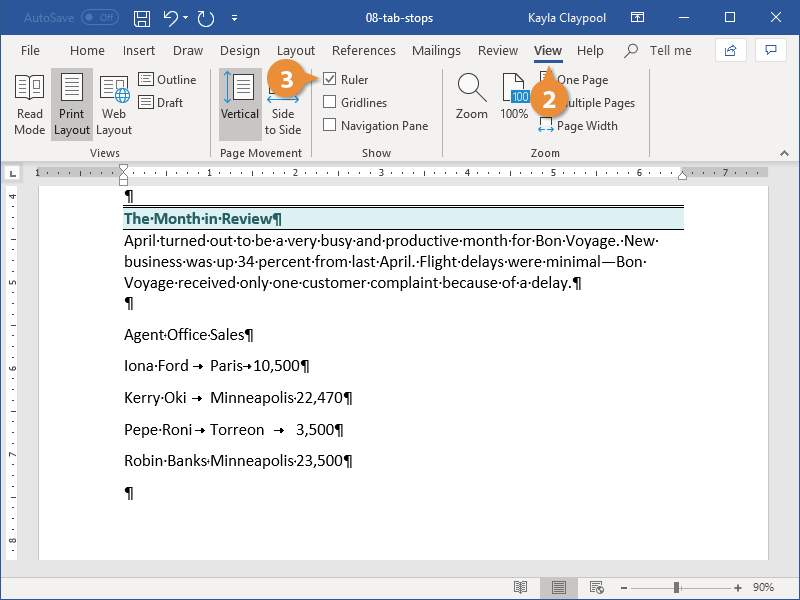
- Click the View tab.
- Click the Ruler checkbox in the Show group.
Each space is represented by a dot (·) each pilcrow (¶) is a new paragraph, and each arrow (→) is a tab.
Set a Tab Stop Using the Ruler
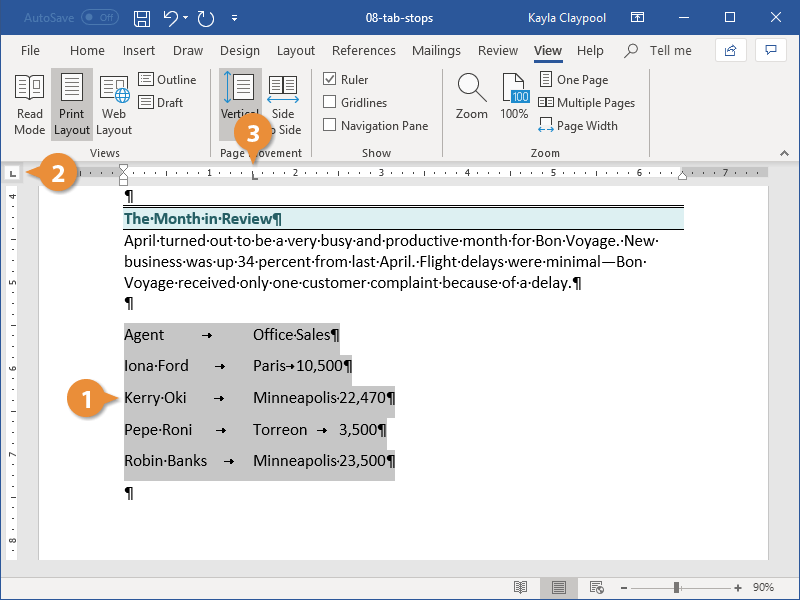
- Select the text you want to align.
- Select the type of tab stop you want to use.
- Click on the ruler where you want to place the tab stop.
The tab icon at the upper-left shows the type of tab that's active. If you want something else, click the icon to cycle through the available options.
The tab stop is added and everything after the tab is aligned to it.
| Types of Tab Stops | ||||
|---|---|---|---|---|
| Left | Center | Right | Decimal | Bar |
 |
 |
 |
 |
 |
| Aligns the left side of text with the tab stop. | Aligns the text so that it’s centered under the tab stop. | Aligns the right side of text with the tab stop. | Aligns text and numbers by decimal point. | A vertical line character is inserted at the bar tab. |
Set a Custom Tab Stop
If you want to create an additional tab at an exact location, you can use a custom tab stop.
- Click the Home tab.
- Click the Paragraph dialog box launcher.
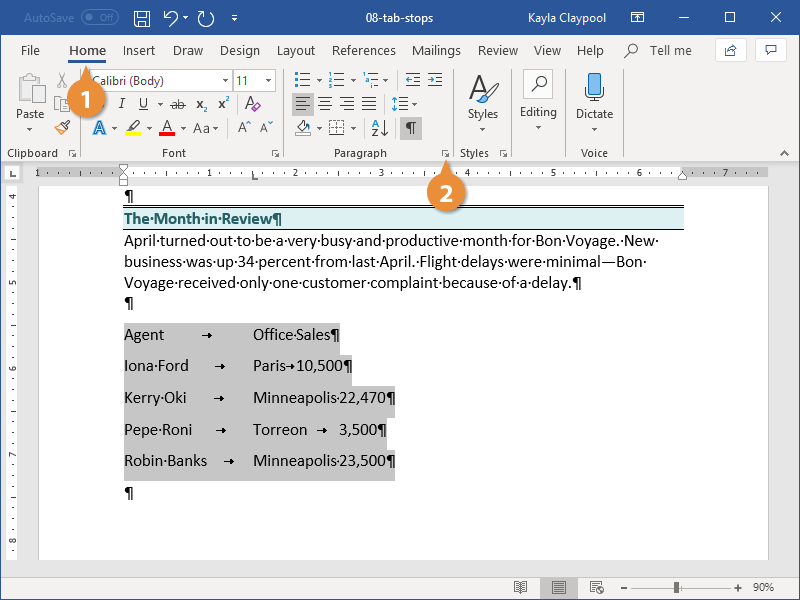
- Click Tabs.
- Type a tab stop position.
- Select the type of tab stop you want to use in the Alignment section.
- Click Set.
- Click OK.
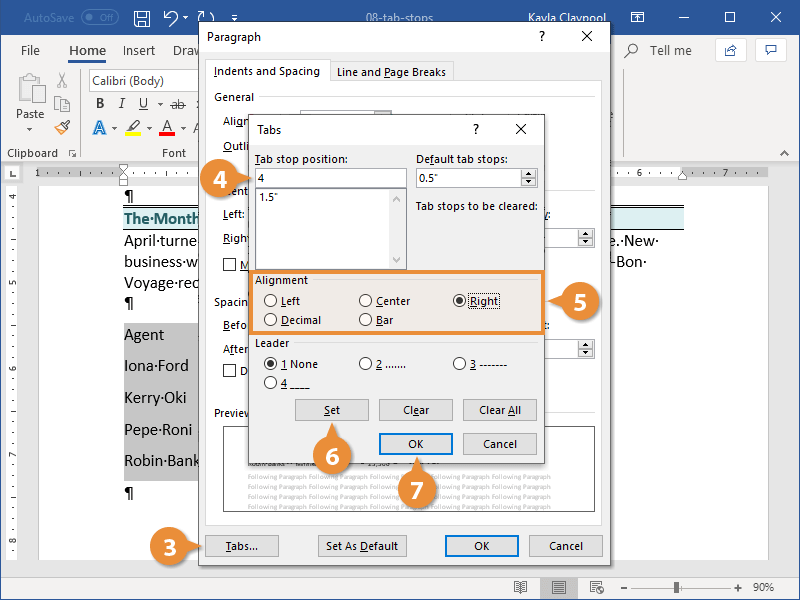
You can set a tab leader here, which is a series of dots, dashes, or line that extends across the empty space added by a tab. These are very helpful when you need to line up information across multiple lines, like in a directory or table of contents.
The tab stop is added. You can repeat the process to add more tab stops.
The tab stops you set are added to the selected paragraph.
Click the Clear button in the Tabs dialog box to remove a single tab stop or click the Clear All button to remove all tab stops.
Move or Remove a Tab Stop
You can adjust a tab stop directly from the ruler, moving it to a new position or removing it entirely.
- Click and drag a tab stop along the ruler to reposition it.
- Click and drag a tab stop off the ruler to remove it.
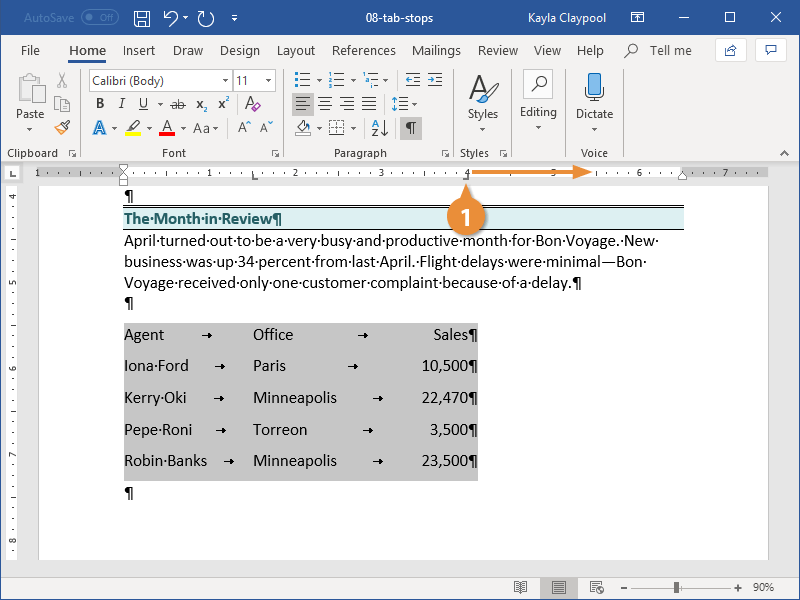
As you drag a tab stop to a new position on the ruler, the text affected by that tab stop will move with it.
Removing a tab stop will shift the text over to the next tab stop. If another tab stop isn’t set, the text will instead use the default half-inch tab spacing.