
Interactive Tutorial
How to Save a Word Document as a PDF
Convert Your Word File to a PDF Format for Easy Sharing and Professional Printing
-
Learn by Doing
-
LMS Ready
-
Earn Certificates

Try this Course with a Free Trial
After you’ve created a new document or made changes to an existing document, you’ll need to save it for those changes to be preserved. You can also save a copy of an existing document, using a new name, a new location, or a different file type.
Save a New Document
When you save a new document for the first time, you’ll need to give it a name and tell Word where to save it.
- Click the Save button on the Quick Access toolbar.
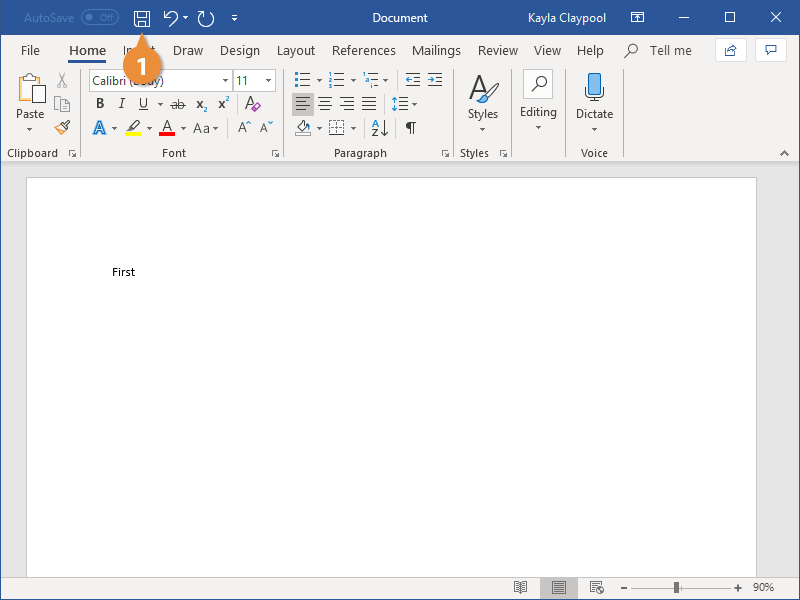
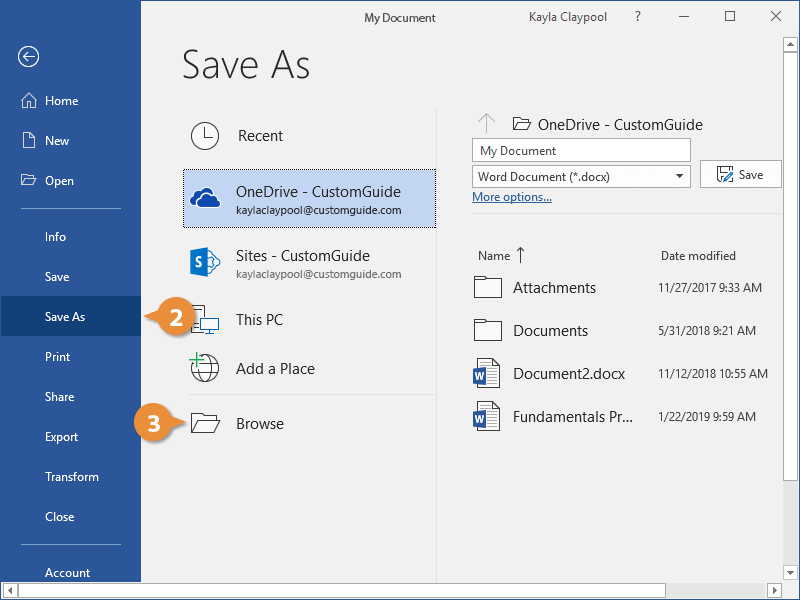
Since the document doesn’t have a name or location yet, the Save As screen will appear.
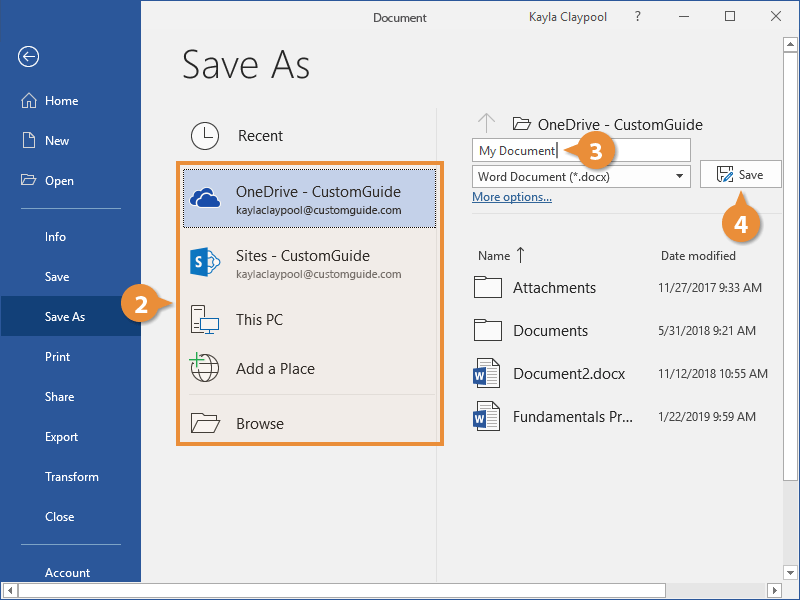
- Choose a location to save the file to:
- OneDrive, a cloud storage folder accessible to all computers and mobile devices that you’ve connected to your Office 365 account.
- A SharePoint site, if you’re part of an organization that uses one.
- Select This PC to save the file locally in your Documents folder.
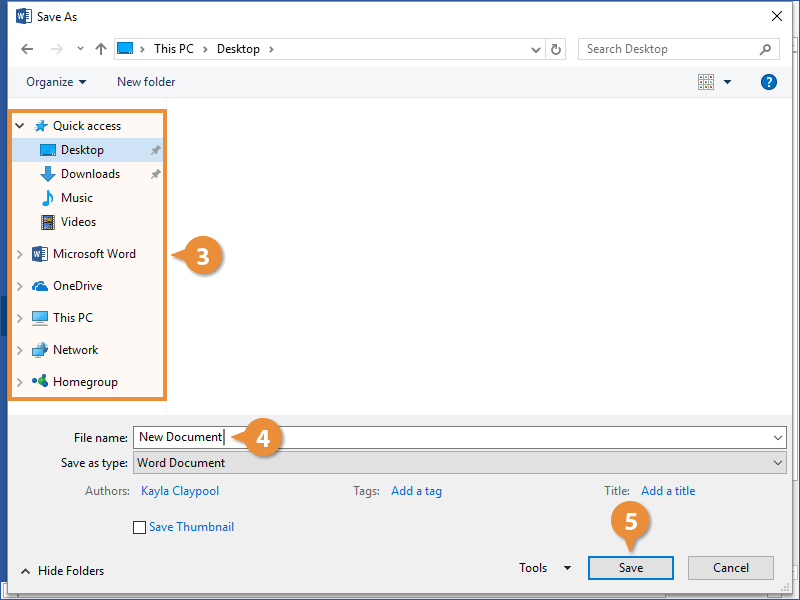
- Click Browse to open a dialog box, where you can browse through your computer’s folders, drives, and network shares.
- Enter a file name.
- Click Save.
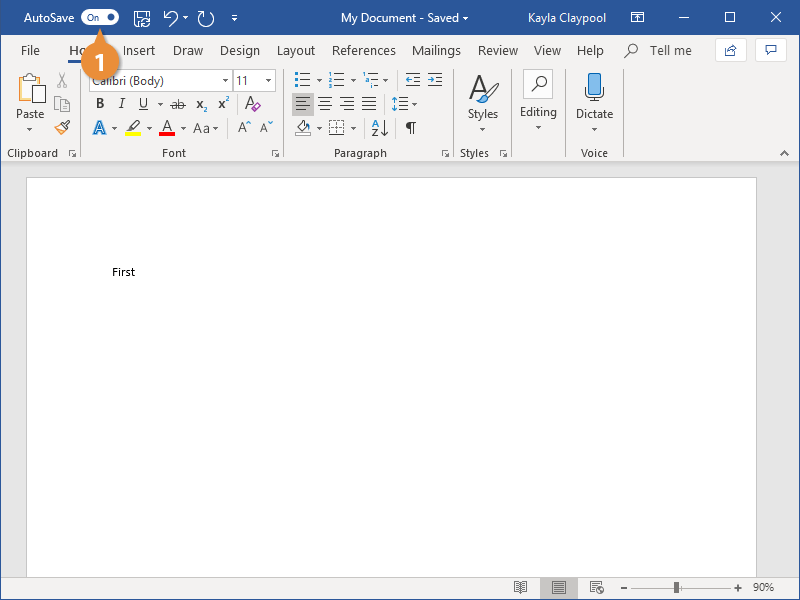
The file is saved and can be safely closed for you to reopen later.
Press Ctrl + S to save.
AutoSave Documents
If you've saved a document to an online location, you'll have the option to automatically save changes.
- Click the AutoSave toggle button to turn the feature on or off.
Save Progress
As you continue to work in Word, you’ll want to save any changes you make periodically. This way, you won’t lose all of your work if there’s an unexpected crash.
- Click the Save button on the Quick Access Toolbar.
Press Ctrl + S or click the File tab and select Save.
Save As a New File and/or Location
Sometimes you may want to make a copy of an existing document by saving it in a new location and/or with a new name.
- Click the File tab.
- Click the Save As.
- Select a location, by selecting either OneDrive, SharePoint, or This PC. Or, you can click Browse and navigate to the folder where you want to save your file.
- Enter a new file name.
- Click Save.
The document is saved to the new location with the new name. The original file is automatically closed so you can start working in the new one right away.
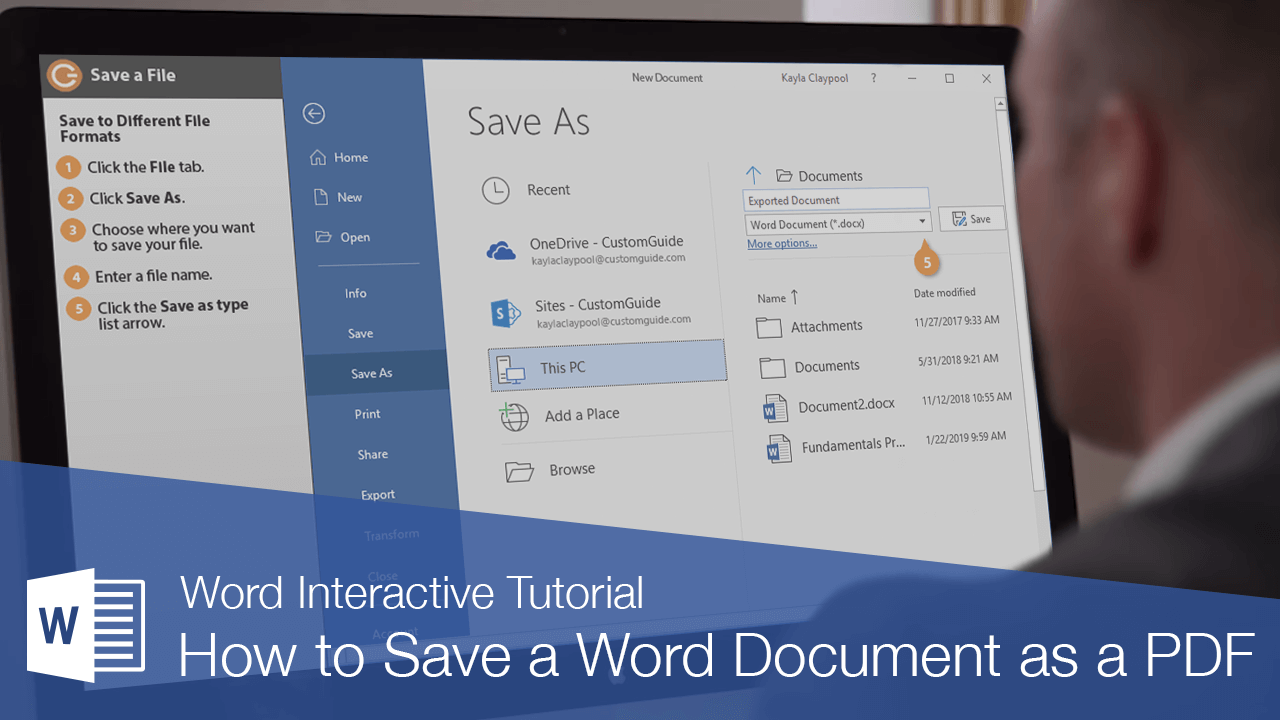
Save to Different File Formats
Word normally saves its files as Word documents, but you can save your Word projects as other file formats too.
- Click the File tab.
- Click the Save As.
- Choose where you want to save your file.
- (Optional) Enter a new file name.
- Click the Save as type list arrow.
The drop-down list displays the different types of files you can save the document as.
- Select a file format.
- Click Save.
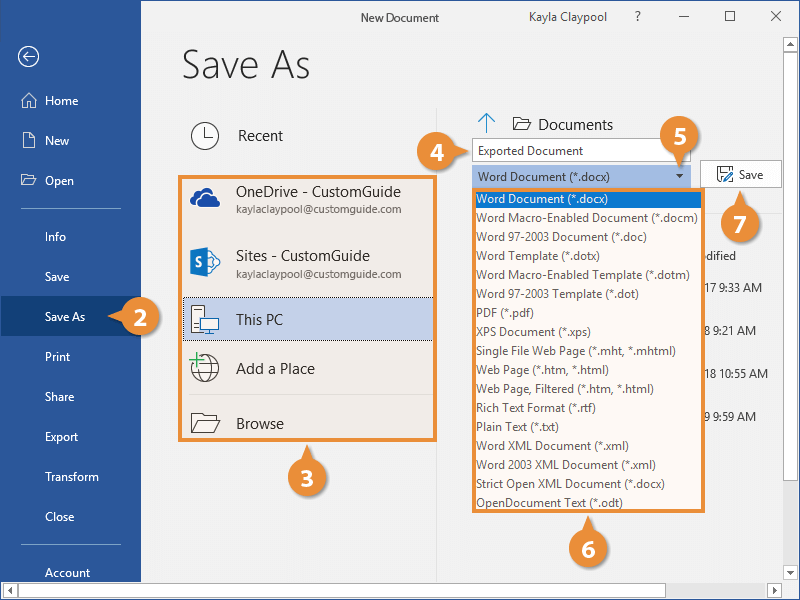
A copy of the file is saved in the new format.
| Common Word File Formats | |||
|---|---|---|---|
| Word Document (.docx) | This is the default format for Word documents. | ||
| Word Macro-Enabled Document (.docm) | This is a version of the default Word file type that supports macros, which allow for small tasks to be automated. | ||
| Word 97-2003 Document (.doc) | Documents in this format can be read by all previous versions of Word, but lack some advanced features. They are also larger than .docx files and are more prone to corruption. | ||
| PDF (.pdf) | A PDF preserves a document as how it would appear when printed and can be shared electronically to be viewed on many kinds of devices. | ||
| Web Page (.htm, .html) | This format creates pages that can be uploaded to the web and viewed in a browser. | ||
| Rich Text (.rtf) | This basic format can be opened by nearly any text editor and preserves basic font formatting. | ||
| Plain Text (.txt) | This simple file type saves only text with no formatting or page layout. | ||