
Interactive Tutorial
How to Password Protect a Word Document
Encrypt and Secure Your Word Documents with a Password to Protect Sensitive Information
-
Learn by Doing
-
LMS Ready
-
Earn Certificates

Try this Course with a Free Trial
When a document is finished, you have a few ways to let others know that further edits aren’t needed, and to prevent them from making any edits at all.
Mark as Final
Marking a document as final lets others know that it’s finished and no further edits are necessary. It also removes proofing and editing markup.
- Click the File tab.

- Click the Protect Document button.
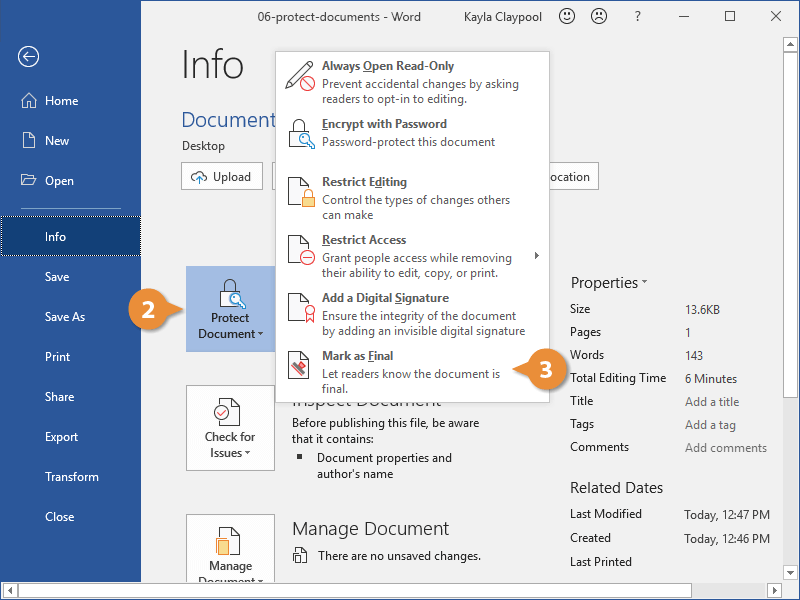
Several options for protecting a document appear here.
- Select Mark as Final.
The first confirmation dialog box lets you know that marking a document as final will also save it.
- Click OK.
A second confirmation dialog box appears. This one explains a bit about what marking a document as final will do.

- Click OK.
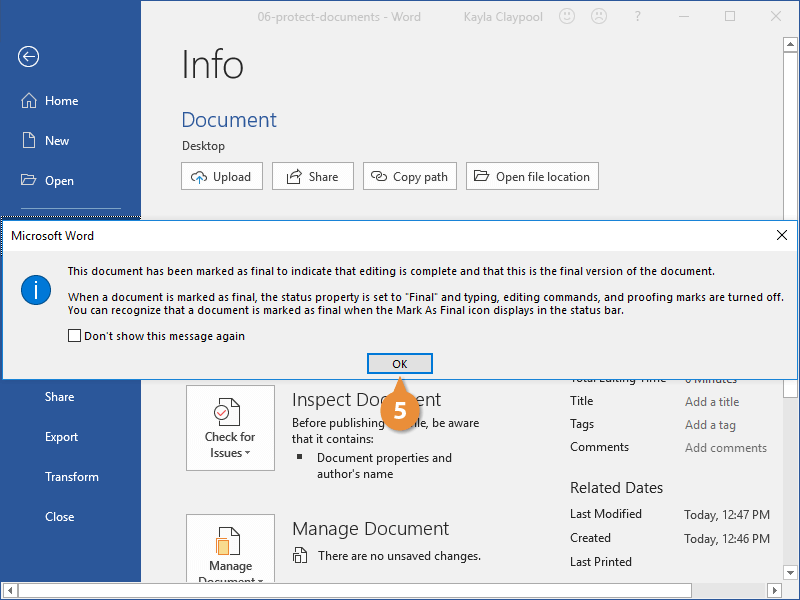
All typing, editing commands, and proofing marks are cleaned up. The ribbon is hidden to discourage editing and a Marked as Final icon appears in the status bar.
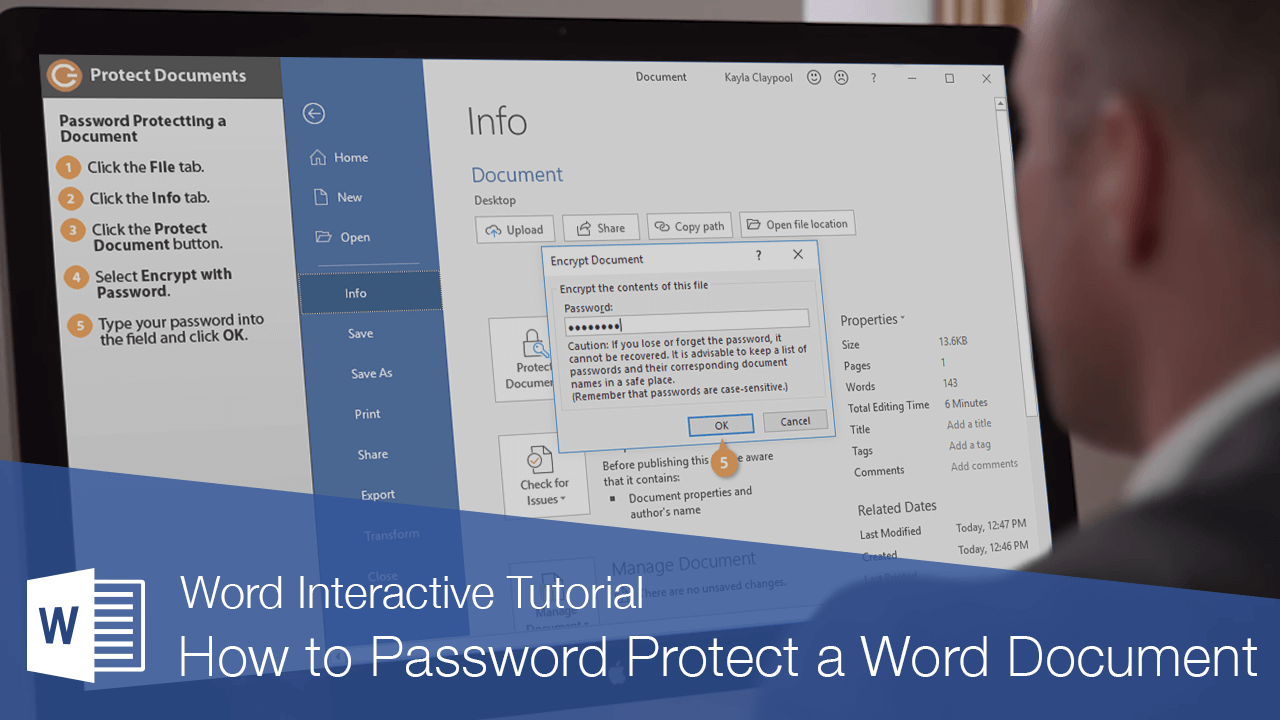
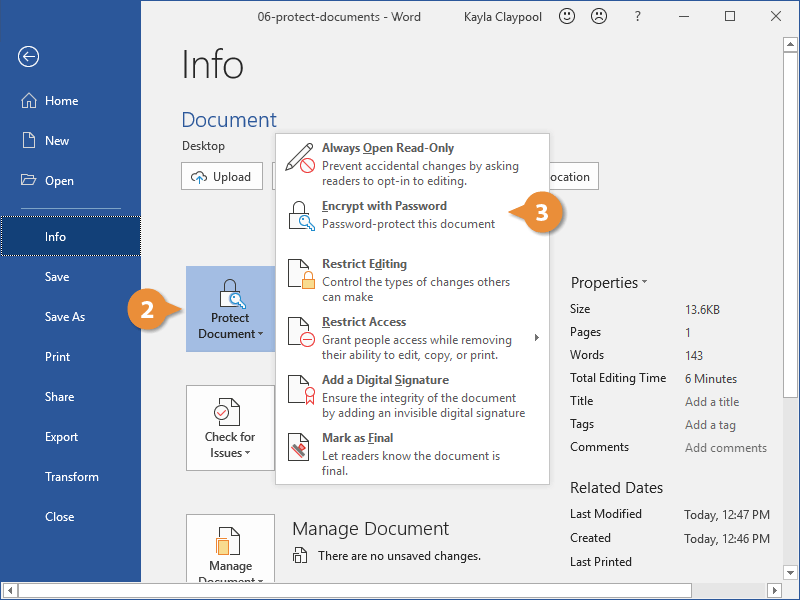
Password Protect a Document
If a document will still need a few changes, but only from specified individuals, you can also password-protect a document to limit who can open and edit it.
- Click the File tab.
- Click the Protect Document button.
- Select Encrypt with Password.
The Encrypt Document dialog box appears with a password field, where you can enter a password.
- Type your password into the field and click OK.
- Reenter the password in the field and click OK.
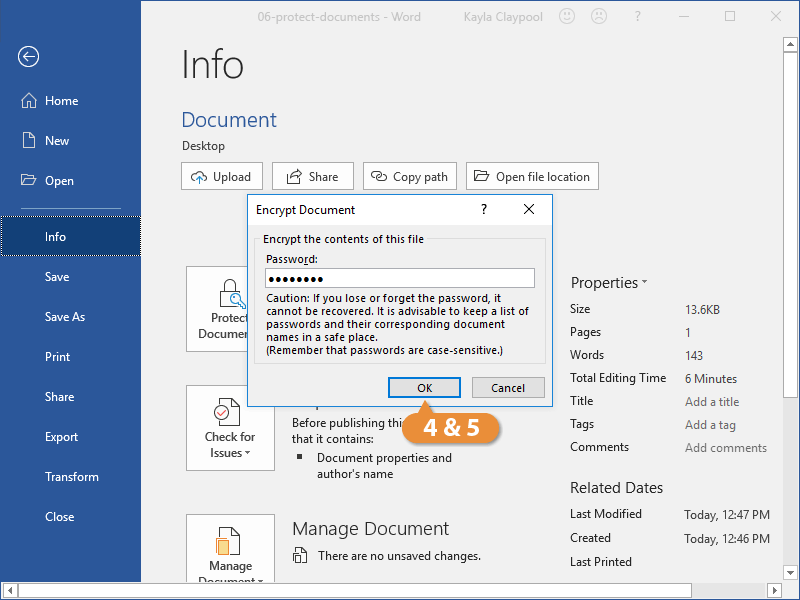
Now anyone who wants to open the document will need to enter the password first.
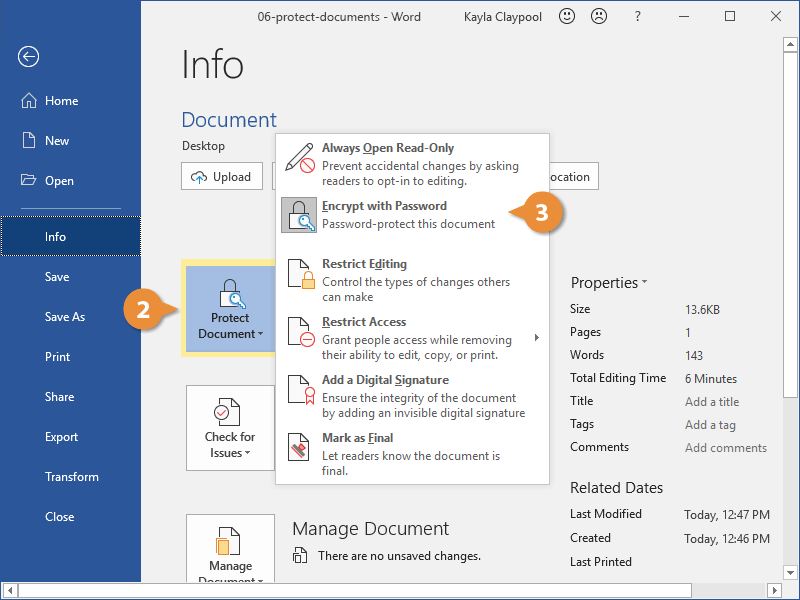
Remove a Password
Setting a password on a document isn’t permanent. If you need to remove it, you can. Once the password is correctly entered to open the protected file, you can follow the steps to remove it.
- Click the File tab.

- Click the Protect Document button.
- Select Encrypt with Password.
The Encrypt Document dialog box opens again, with the password filled in already.
- Delete the password in the field.
- Click OK.
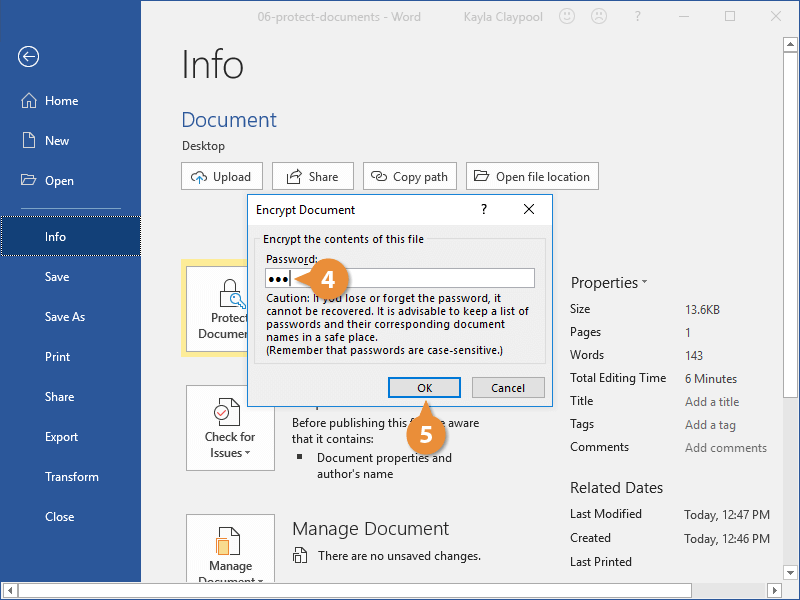
The password is removed and no longer required to open the document.