
Interactive Tutorial
How to Move a Picture in Word
Adjust Picture Position and Text Wrapping in Word for Better Layout Control
-
Learn by Doing
-
LMS Ready
-
Earn Certificates

Try this Course with a Free Trial
Whenever you insert a graphic into a document, it is inserted in line with text by default. This treats the object as if it were text, moving it around the page as text is inserted. You can enable text wrapping on an object to move it around freely, forcing the text to move around to accommodate it.
Wrap Text Around an Object
Text wrapping is how an object in your document interacts with the text around it. You have several options controlling how closely text will wrap around an object.
- Select the object.
- Click the Layout Options button.
- Select an option.
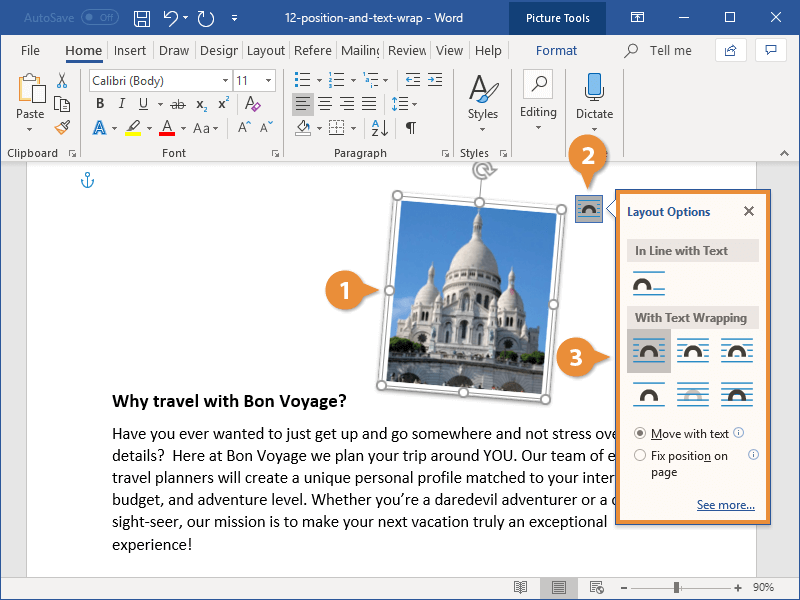
When an object is selected, a Layout Options button appears by its top-right corner.
Here, you can choose to keep the object in line with text or select a text wrapping option. Each option’s icon represents how closely the text will wrap around the object.
You can also place the object behind or in front of the text.
The text wrapping is applied, and the text moves to accommodate the object.
You can also click the Wrap Text button on the Layout tab to access text wrapping options.
Position an Object
You can use the Position menu to automatically place an object in a certain spot on the page.
- Select the object.
- Click the Format tab in the new ribbon group.
- Click the Position button in the Arrange group.
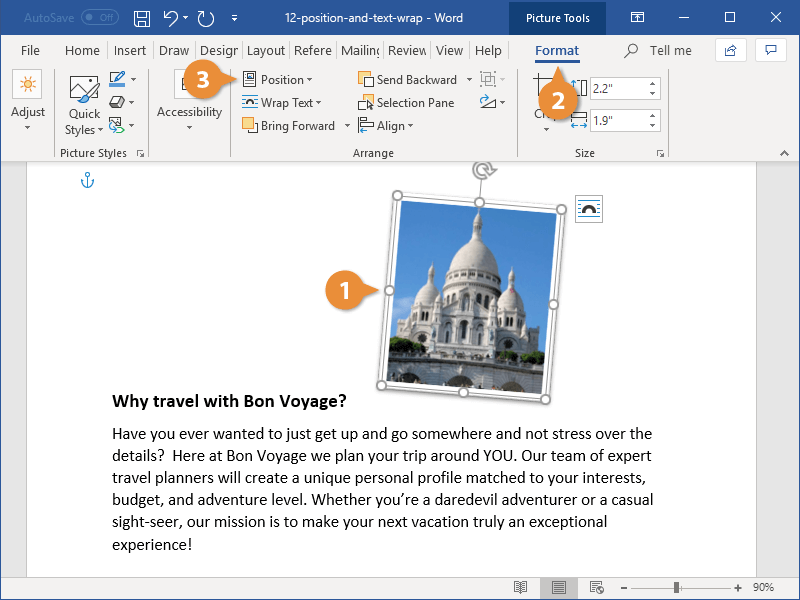
- Select from the options.
Depending on the type of object selected, different ribbon groups will appear at the end of the ribbon. Selecting a picture will open the Picture Tools ribbon group, selecting a shape will open the Shape Tools ribbon group, and so on.
Each of these ribbon groups will include a Format tab.
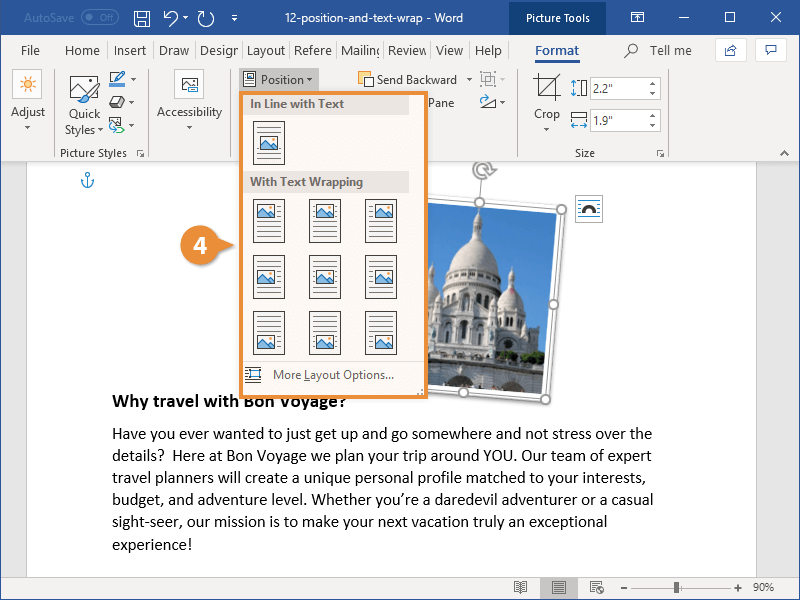
This menu gives you the option to keep the object in line with text or position in one of nine automatic positions on the page.
Selecting one of these positions will force the text to wrap around the object automatically, instead of moving the object with it.
The object is moved to the selected position.
You can also select More Layout Options to access the Layout dialog box, where you have more precise control over where the object appears on the page.
Align an Object to Text
You can move objects on your own with a click and drag, but you can also make sure that they’re aligned with text and other objects using Word's alignment guides.
- With the object selected, click the Align Objects button on the Format tab.
- If the Use Alignment Guides option is unchecked, select it.
- Click and drag the object until green alignment guides appear.
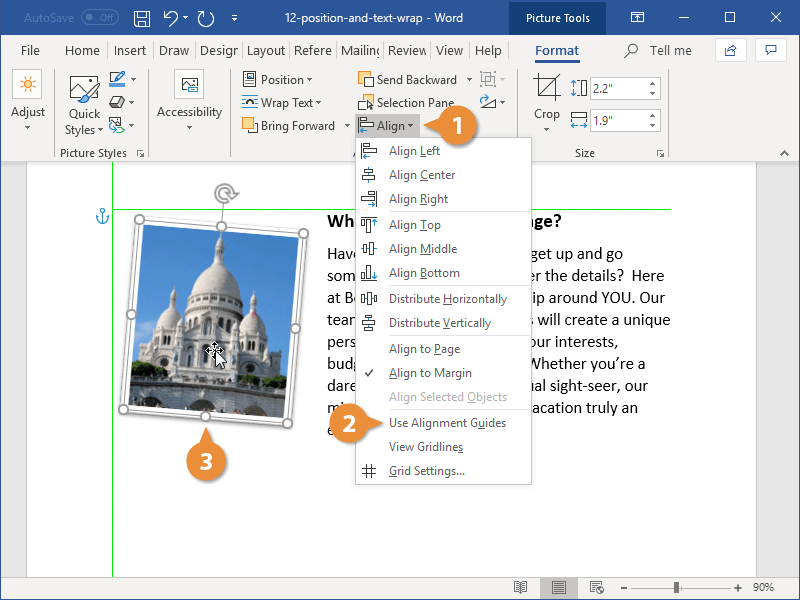
The Align Objects menu includes a Use Alignment Guides setting. If it’s already checked, the alignment guides are enabled.
These alignment guides will appear and disappear when the object is dragged near something that it can be aligned to.
To further help you with your alignment, you can also turn on gridlines that appear in the background like graph paper. Select View Gridlines from the Align Objects menu or check the Gridlines check box on the View tab.