
Interactive Tutorial
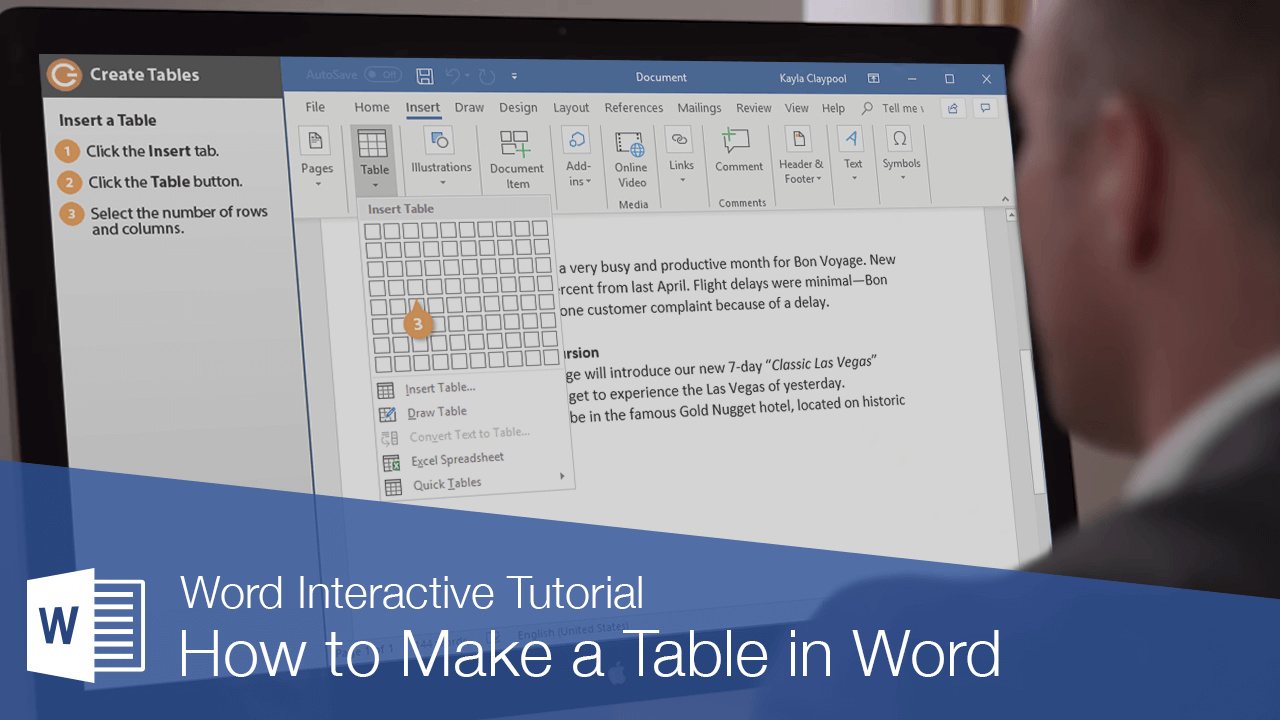
How to Make a Table in Word
Insert, Format, and Customize Tables in Word to Organize Data Clearly and Professionally
-
Learn by Doing
-
LMS Ready
-
Earn Certificates

Try this Course with a Free Trial
Tables are very useful tools when creating and formatting documents. For example, with a table you can:
- Align Text, Numbers, and Graphics: Many people prefer to use tables for alignment instead of tab stops because text can wrap to multiple lines in a table.
- Create a Form: You can use tables to store lists of telephone numbers, clients, and employee rosters.
- Share Information: You can use tables to share information between programs. For example, you can copy and paste a table’s information into a Microsoft Excel worksheet or Access database.
- Create a Publication: Tables make it easier to create calendars, brochures, business cards, and many other publications.
Insert a Table
To create a table, you must first determine how many columns (which run up and down) and rows (which run left to right) you want to appear in your table. Cells are small, rectangular boxes where the rows and columns intersect. The number of columns and rows determines the number of cells in a table.
- Click the Insert tab.
- Click the Table button.
- Use the grid to select how many columns and rows you’d like.
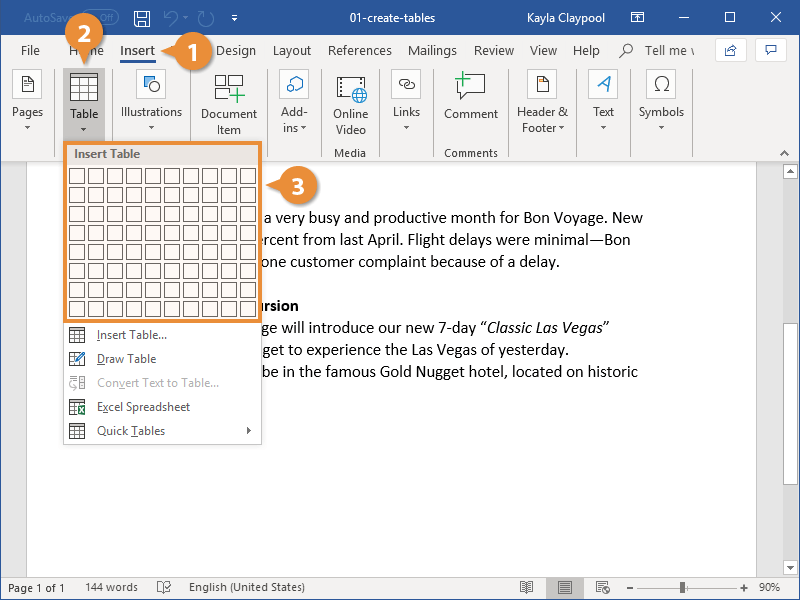
- Enter your content into your newly created table.
The table with the specified number of rows and columns is inserted.
You can use the arrow keys to navigate from cell to cell as you type. You can also press the Tab key to move to the next cell.
Select Cells
You can select a single cell in a table, or you can select multiple cells, entire rows or columns, or the entire table.
- Select a single cell: Click in the lower-left corner of a cell, when the cursor changes to an arrow
 . Click and drag to select multiple cells. You can also triple-click a cell, or place your text cursor within a cell, click the Select button on the Table Tools Layout tab and choose Select Cell from the menu.
 - Select a row: Click to the left of the table row, just outside of the table itself. You can also place your text cursor within a cell, click the Select button on the Table Tools Layout tab and choose Select Row from the menu.
- Select a column: Click above a column, when the cursor changes to an arrow
 . You can also place your text cursor within a cell, click the Select button on the Table Tools Layout tab and choose Select Column from the menu.
 - Select an entire table: Click the table selector
 button in the upper-left corner of a table. You can also place your text cursor within a cell, click the Select button on the Table Tools Layout tab and choose Select Table from the menu.
Add a Row or Column
You can add more columns and rows to a table after you’ve inserted it. This way, you’re not trapped using a fixed structure if you need to add more data later.
- Select a cell in a row or column adjacent to where you want the new row or column inserted.
- Click the Layout tab in the Table Tools ribbon group.
- Click one of the Insert buttons in the Rows & Columns group.
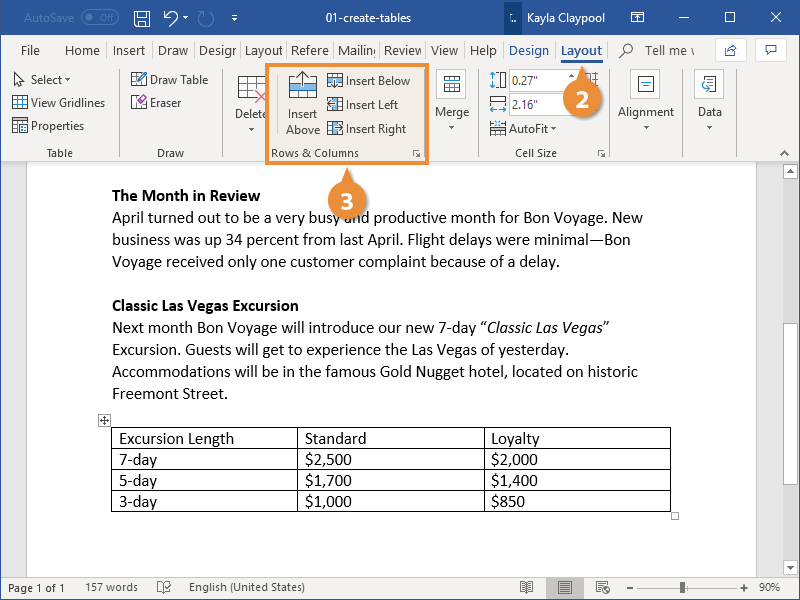
You can insert a row above or below the selected cell’s row, or a column to the left or right of the selected cell’s column.
Hover your mouse above the line between columns, or to the left of the line between rows, and click the + button that appears to quickly add a new column or row.
Delete a Row or Column
You can delete rows and columns that you don’t want, in case you made a table that was bigger than you needed.
- Select a cell in a row or column you want to delete.
- Click the Delete button on the Layout tab (in the Table Tools ribbon group).
- Select one of the options.
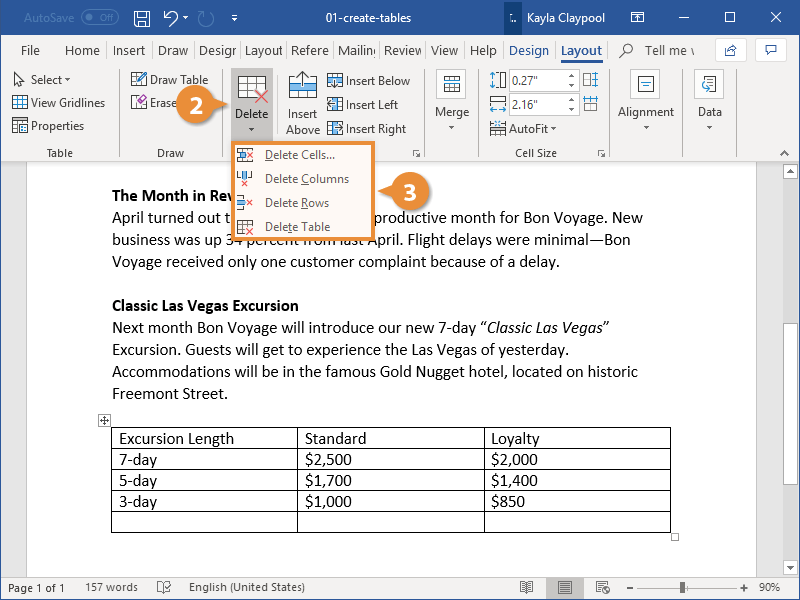
Here, you have the option to delete the specific cell, the column or row the selected cell is in, or the entire table.
If you decide to delete only the selected cell, you can choose how to move the rest of the cells around to fill the gap. You can shift the rest of the row’s cells to the left or shift the rest of the column’s cells up.