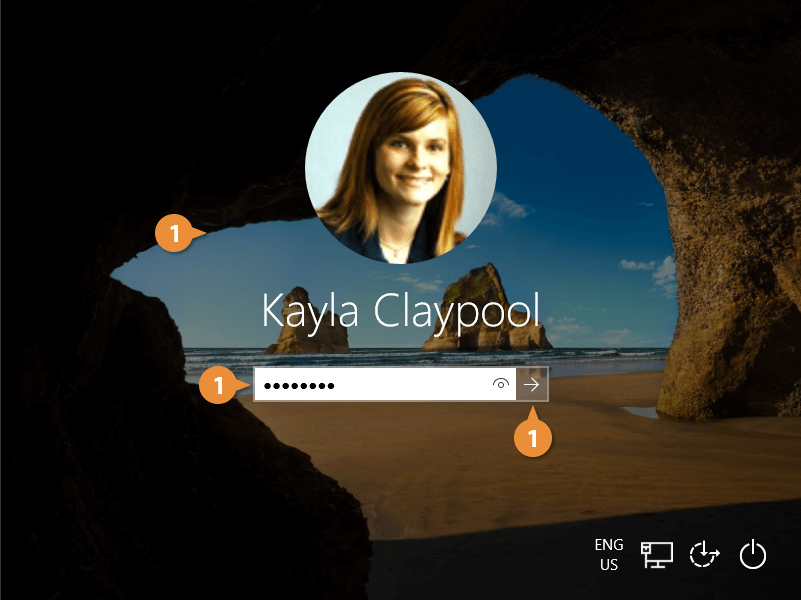
The Lock Screen appears before you sign in to your computer. It can be customized, allowing you to change the background image and what information appears.
Here's how to customize the Lock Screen.
- With the Lock Screen displayed, click anywhere on your screen, type your password, and then click the Sign In button.
You will be logged in to Windows.
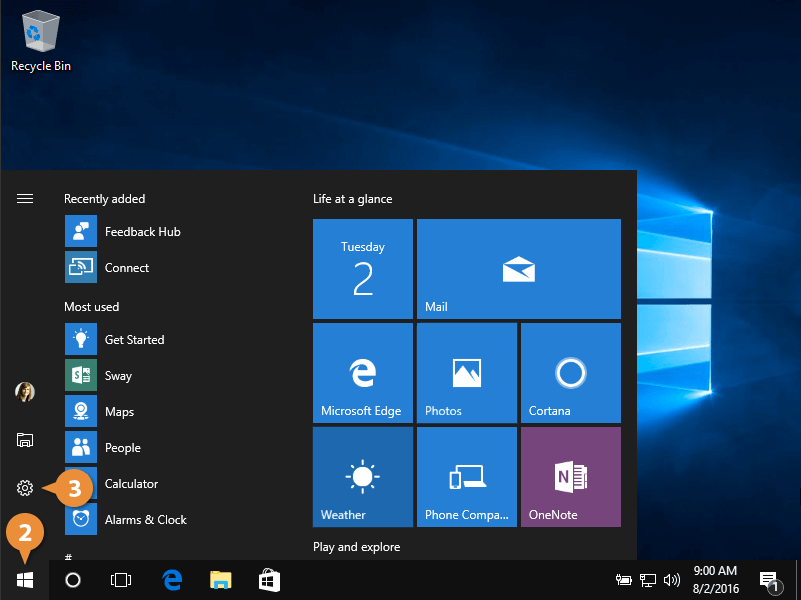
- Click the Start button.
- Click the Settings button.
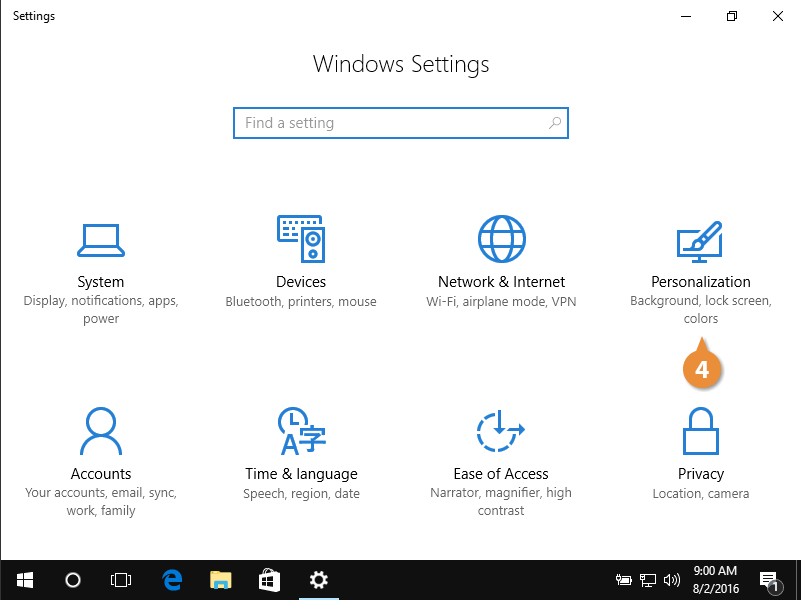
Settings categories appear.
- Click Personalization.
Personalization settings appear.
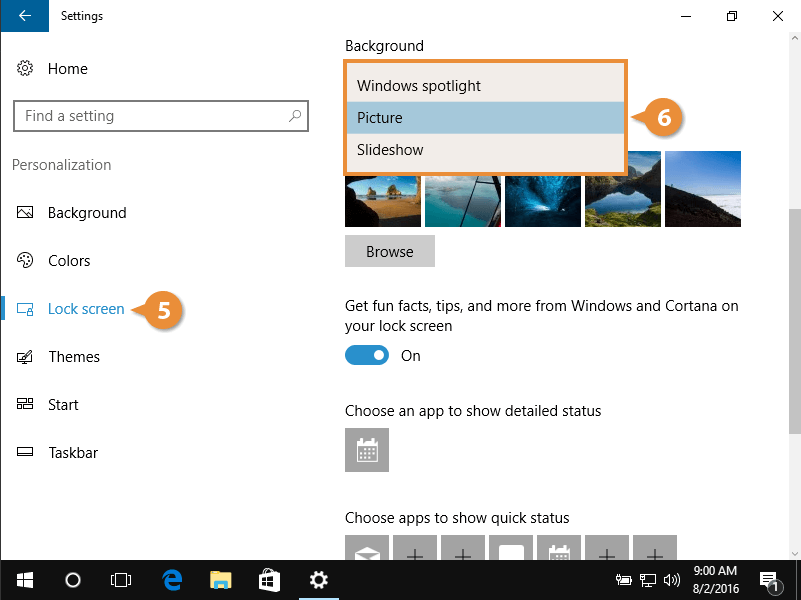
- Choose Lock screen.
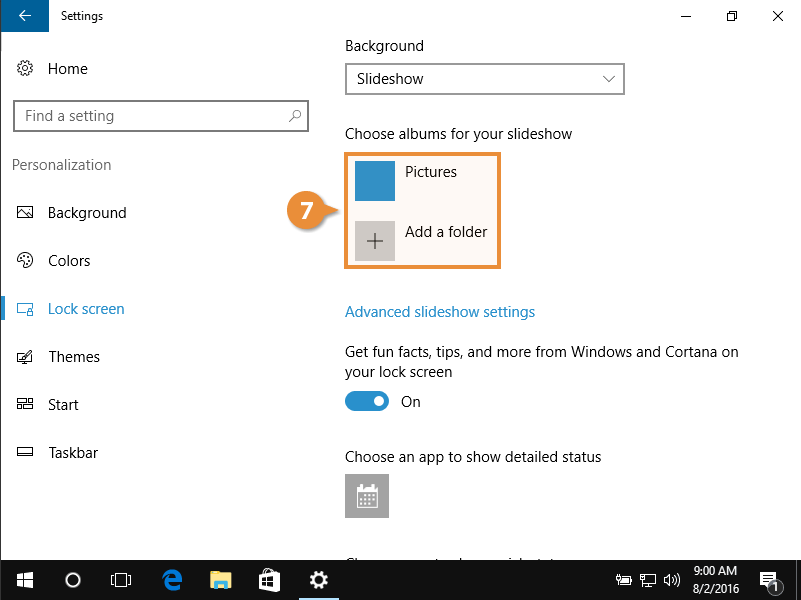
- Select a type from the Background list.
- Select a background image or slideshow. Browse a folder for pictures, or choose an existing photo from the library.
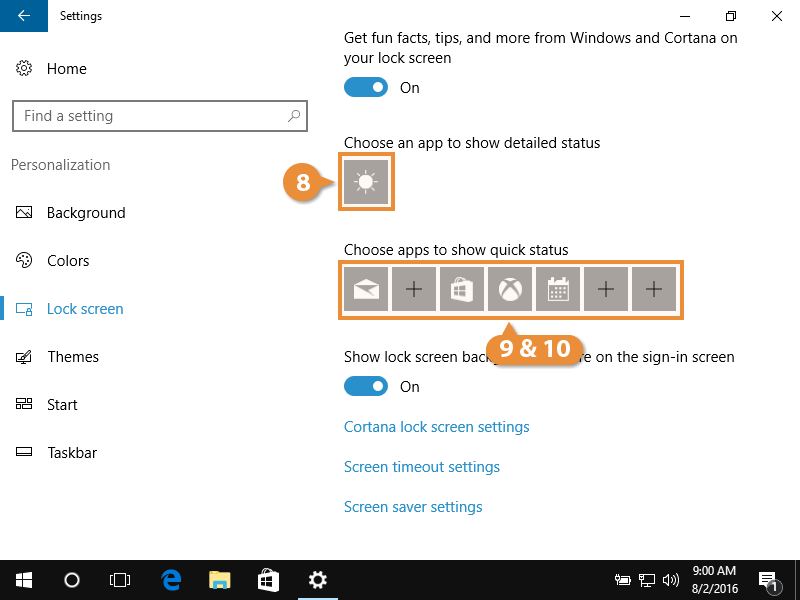
- Click the existing button under Choose an app to show detailed status, and then choose an app to see detailed information appear on the Lock Screen.
- Click the existing buttons under Choose apps to show quick status, and then choose apps to see a quick status appear on the Lock Screen.
- Click the + button to add apps.?
Follow these steps to view the Lock Screen to preview any changes.
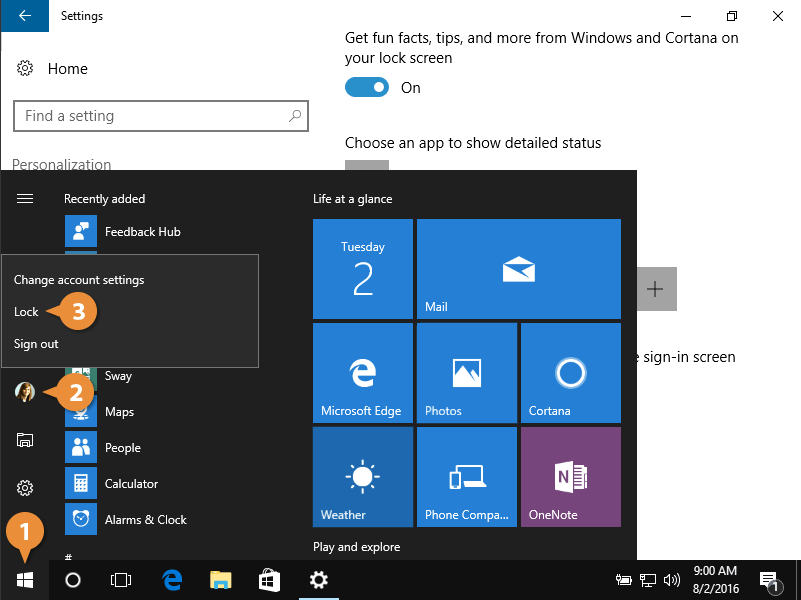
- Click the Start button.
- Click your user profile photo button.
- Choose Lock.
Your updated Lock Screen appears.

