
Interactive Tutorial
Salesforce Tasks
Create and Manage Salesforce Tasks to Track Activities, Set Reminders, and Improve Productivity
-
Learn by Doing
-
LMS Ready
-
Earn Certificates

Try this Course with a Free Trial
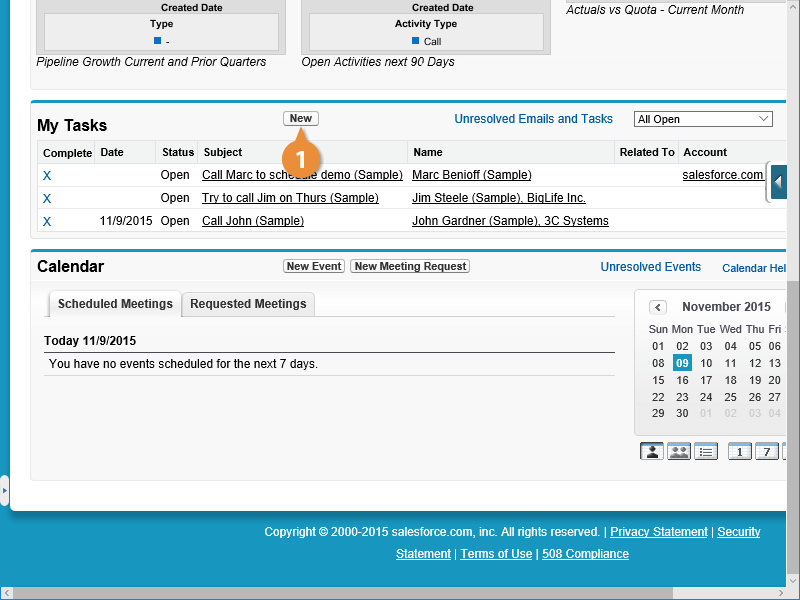
The Salesforce Home page includes a section called My Tasks which displays any tasks you've created or that have been assigned to you. This feature allows you to stay on top of your work by organizing your tasks into one group no matter where the records originated.
Filter Tasks
If you have a lot of tasks on your plate, you can filter to find the one you need to work on.
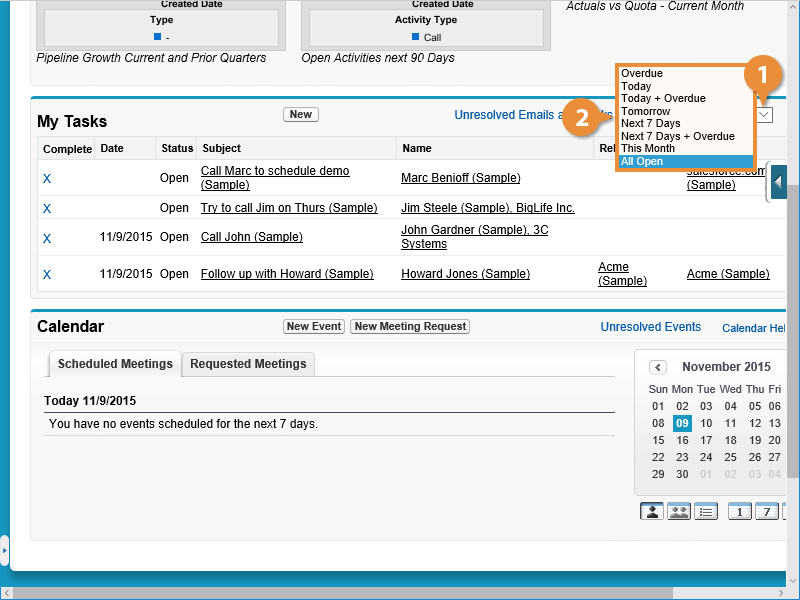
There are a variety of ways to filter your tasks, but filtering by when they are supposed to be completed by is a good way to stay on top of your work.
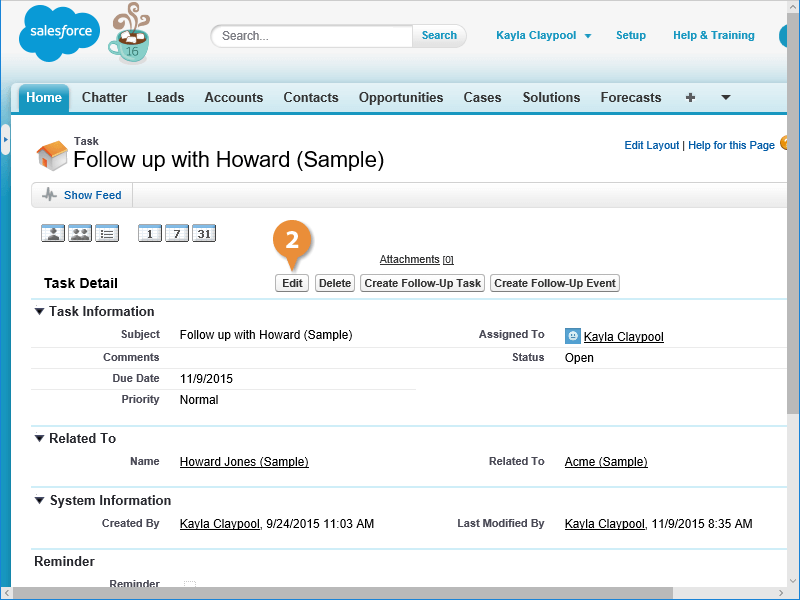
View a Task
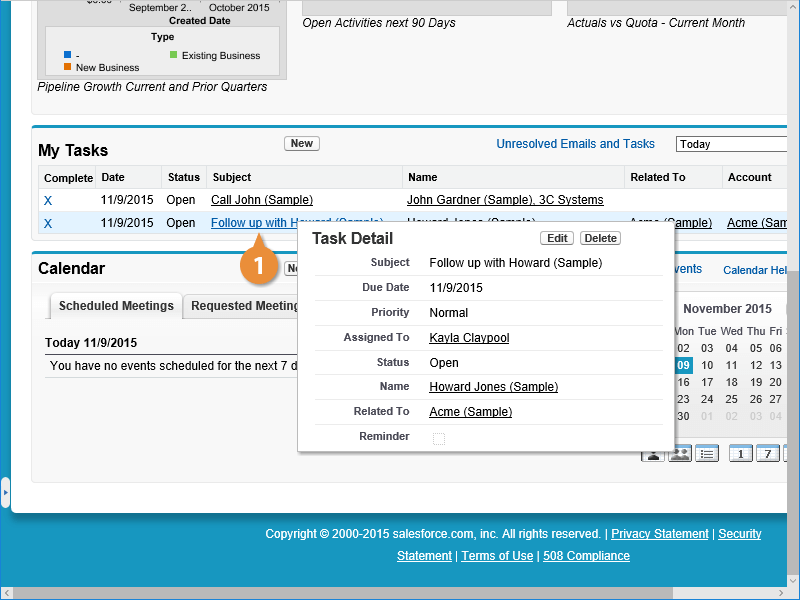
A window will appear with all the details concerning the task you are viewing.
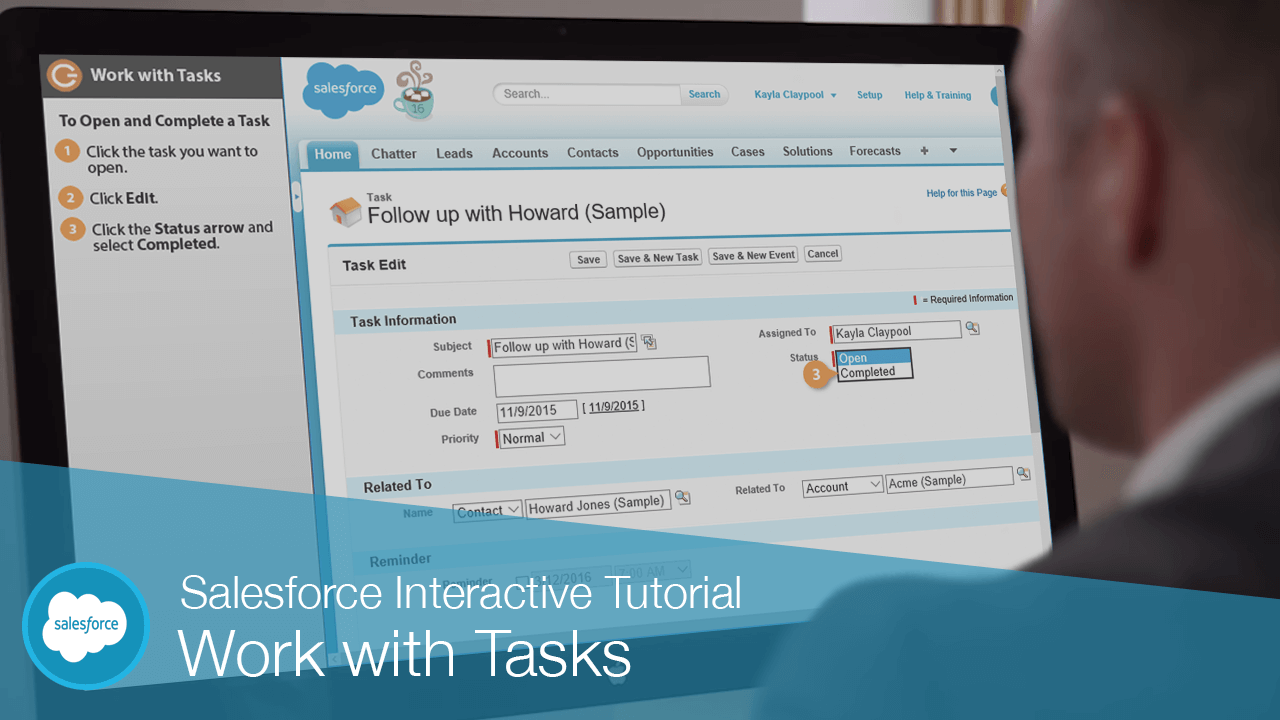
Open and Complete a Task
- Click the task you want to edit.
- Click Edit.
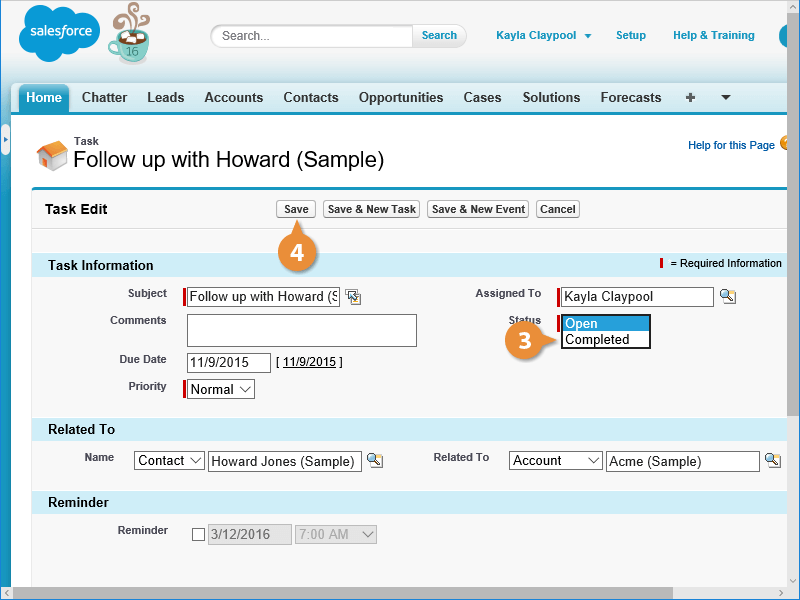
Once you are finished with a task you can change its status to reflect that.
- Click the Status arrow and select Completed.
- Click Save.
You can also quickly mark the task as complete by clicking its X in the Complete column.
Create a Task
You will normally create tasks from Salesforce records, but you can also create tasks directly from the My Tasks section.
- Click New under My Tasks.
- Enter a subject and any optional comments.
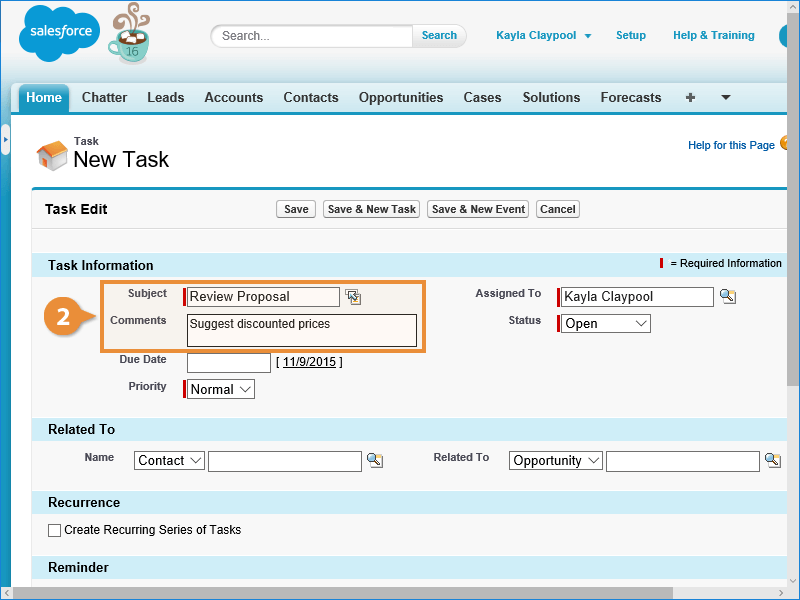
- Enter a Due Date.
- (Optional) Specify a reminder.
- (Optional) Click Attach File to add an attachment.
- (Optional) Assign the task to another user.
Normally tasks are assigned to yourself, but you can also assign tasks to other Salesforce users.
- Click Save.
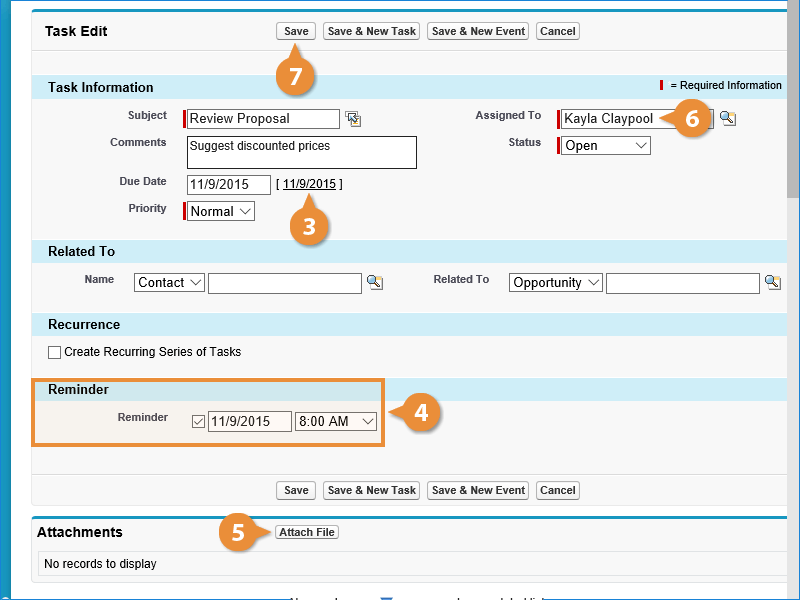
Salesforce creates the new task.