
Interactive Tutorial
Transfer Record Salesforce
Transfer and Share Records in Salesforce to Manage Ownership and Collaborate Across Teams
-
Learn by Doing
-
LMS Ready
-
Earn Certificates

Try this Course with a Free Trial
In Salesforce, most records have an owner who is responsible for them. That person has the highest level of access to those records. They can assign them to someone else or edit them as much as they want.
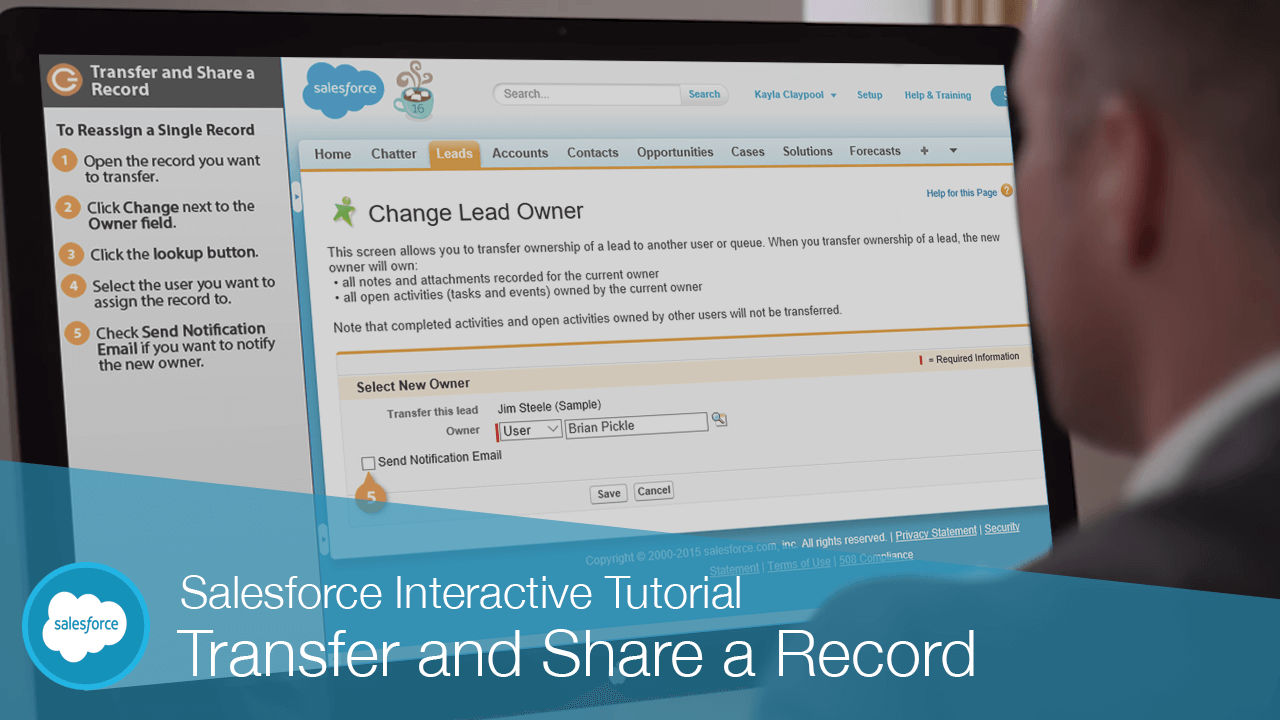
Reassign a Single Record
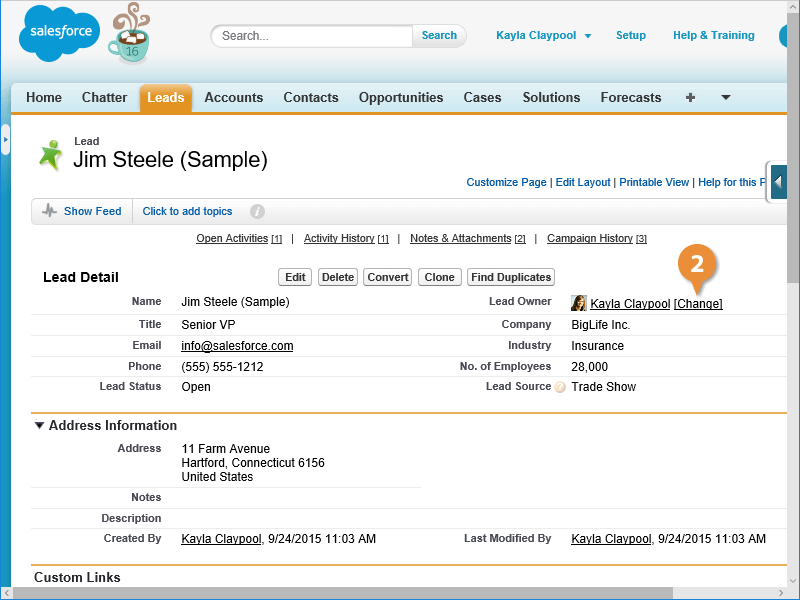
- Open the record you want to transfer.
- Click Change next to the Owner field.
- Click the Lookup icon.
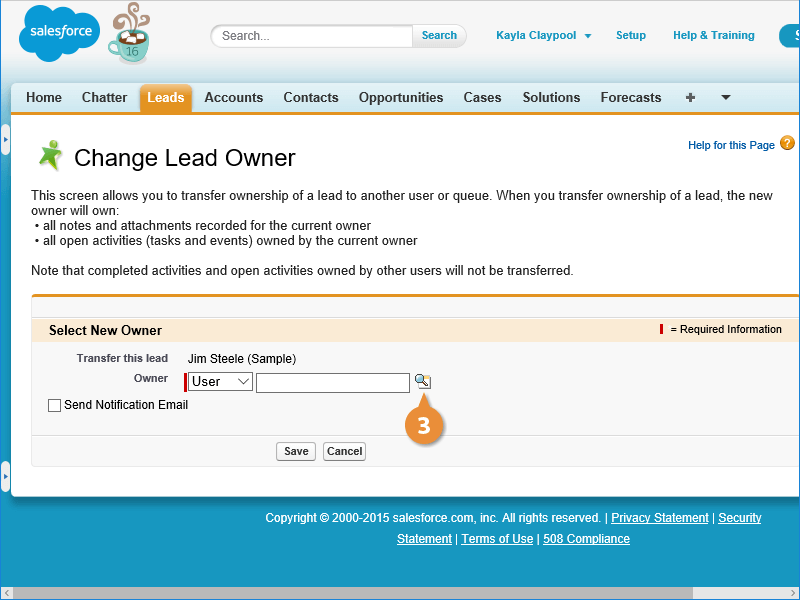
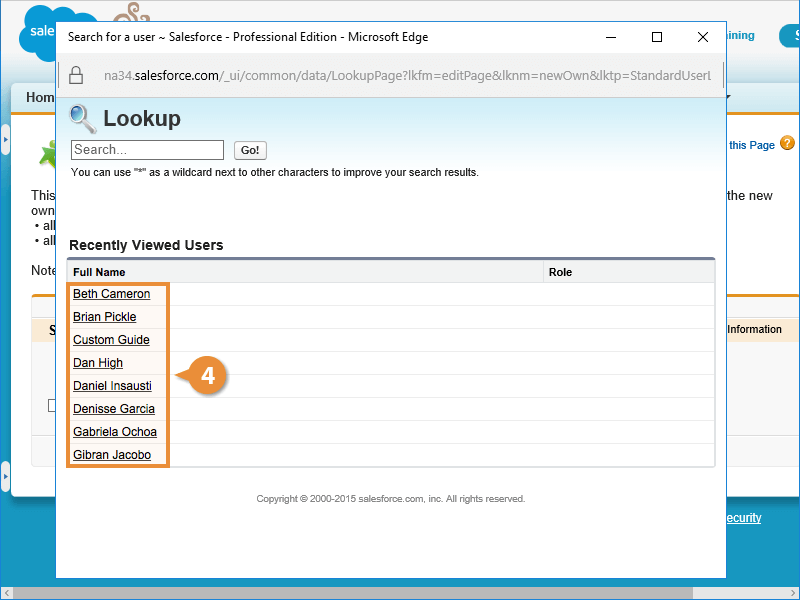
- Select the user you want to assign the record to.
- Check Send Notification Email if you want to notify the new owner.
- Click Save to transfer the lead to the new owner.
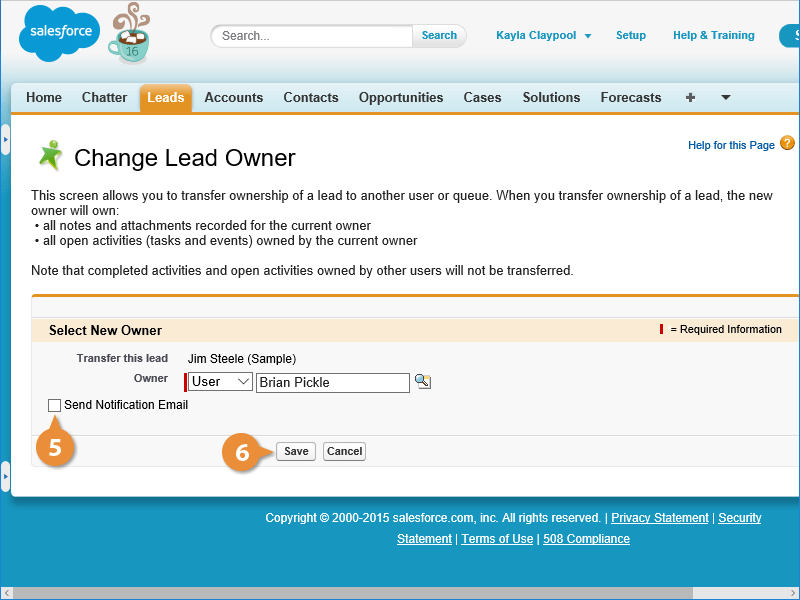
The lead is reassigned.
Share an Account
Depending on how your Salesforce is configured, other users may not be able to see the Accounts that you own. You can give other users permissions to view your Accounts by sharing them.
- Open the account you want to share.
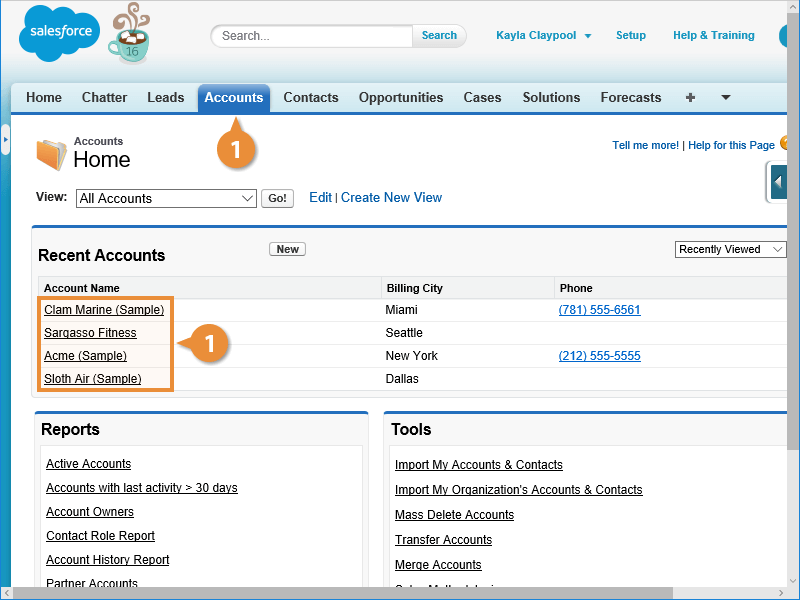
- Click the Sharing button.
The Sharing Detail page appears.
- Click the Add button to specify who you want to share this account with.
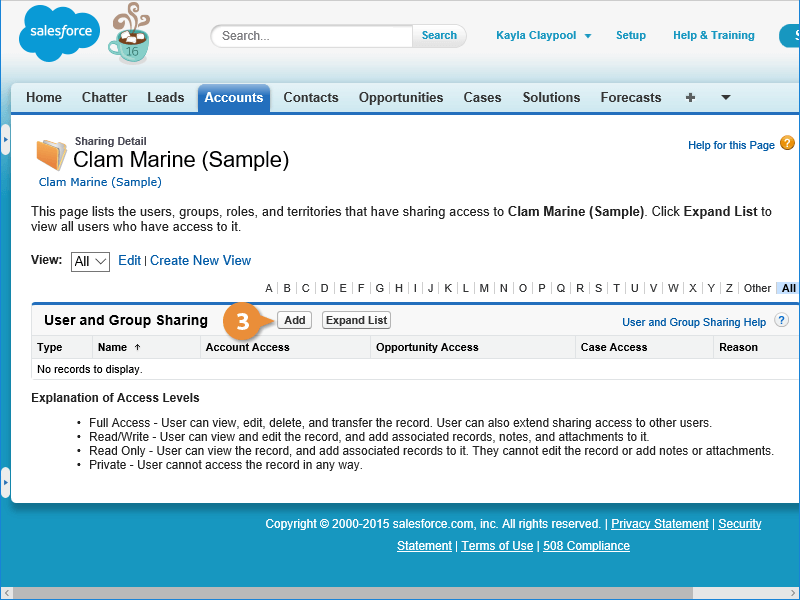
You can share an account with any Public Groups that have been set up in Salesforce, or with a single person.
- Click the Search list arrow and select the group or user you want to share with.
- Click the Add button.
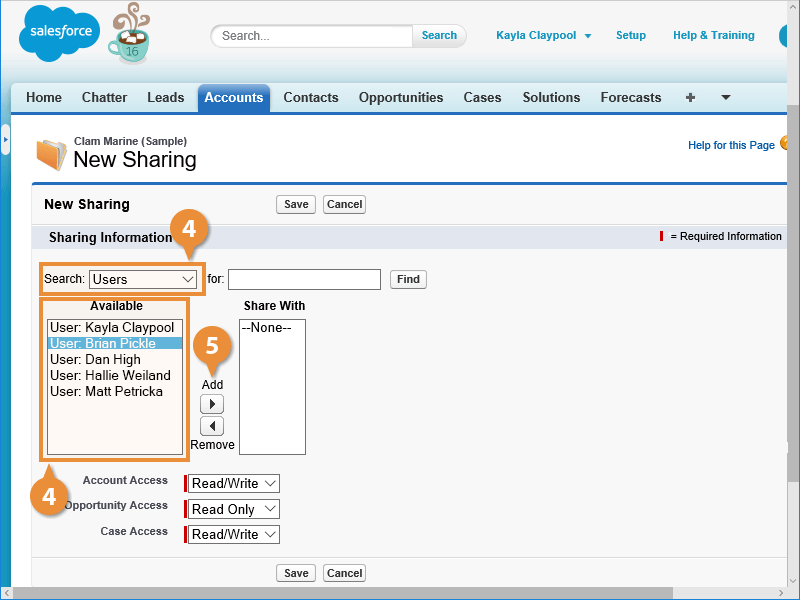
- Specify the access levels you want to grant:
- Read/Write: Gives the person or group access to view and edit the account.
- Read Only: Only gives the person or group access to view the account. They cannot edit the information.
- Click Save.

Salesforce shares the account.