
Interactive Tutorial
How to Create a Dashboard in Salesforce
Build a Salesforce Dashboard to Visualize Key Metrics, Track Performance, and Monitor Business Goals
-
Learn by Doing
-
LMS Ready
-
Earn Certificates

Try this Course with a Free Trial
Create a New Dashboard
Creating a new dashboard allows everyone in your company to keep up with the latest developments.
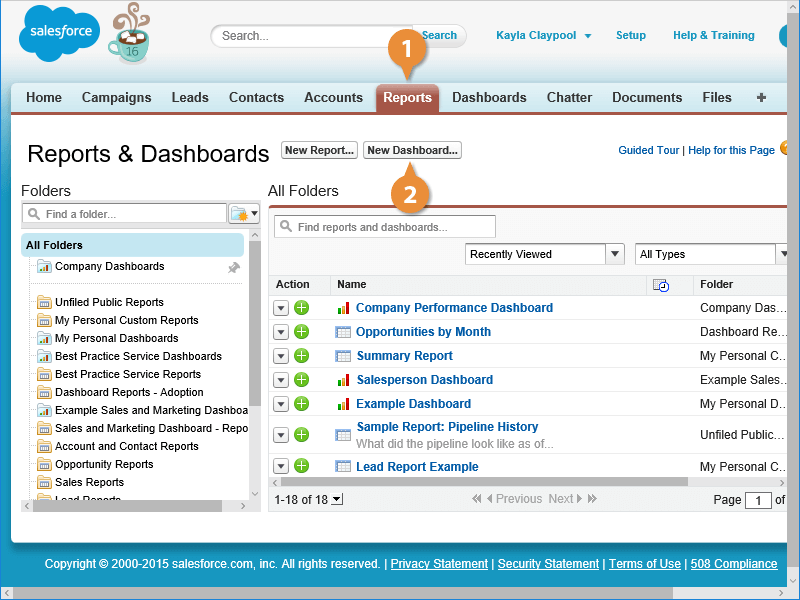
- Click the Reports tab.
- Click New Dashboard
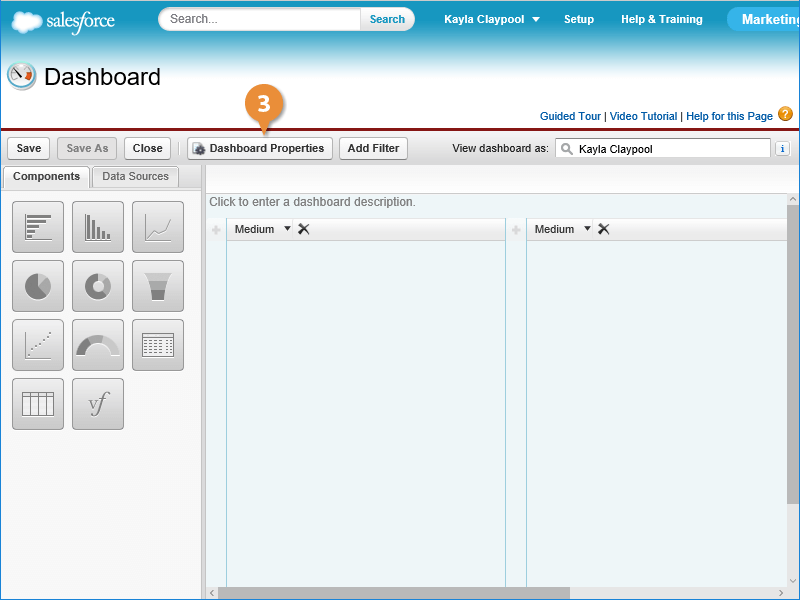
The Dashboard editor appears.
- Click Dashboard Properties.
- Enter a descriptive Title for the dashboard.
- Click OK.
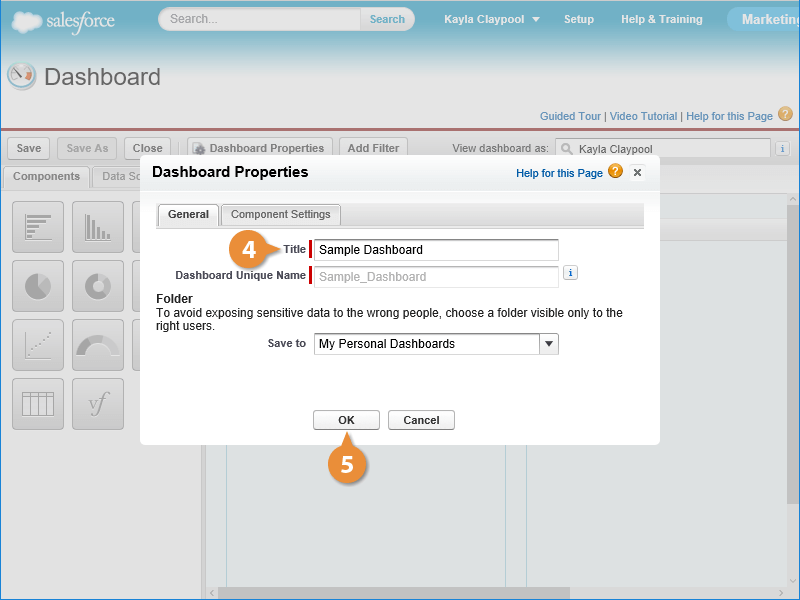
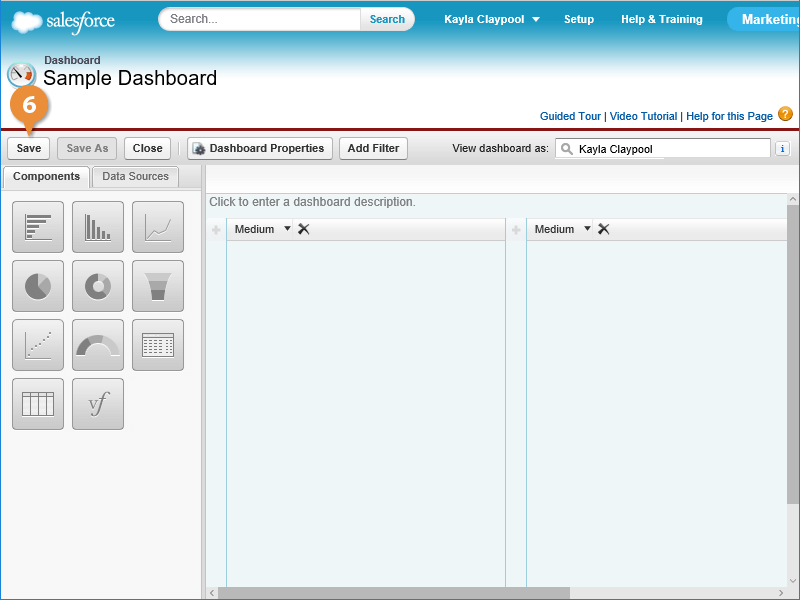
- Click Save.
The dashboard is created.
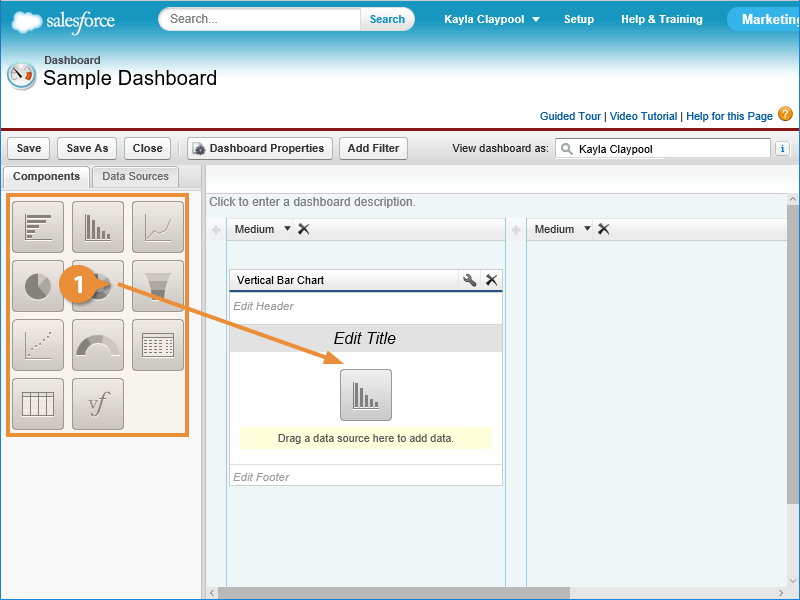
Add a Dashboard Component
Each dashboard can display up to 20 components or charts. You can add components to a dashboard by dragging them from the sidebar.
- Drag the component you want from the sidebar onto the dashboard.
Next you will need to specify the data you want to summarize in this component.
- Click the Data Sources button.
- Click the plus sign (+) next to Reports.
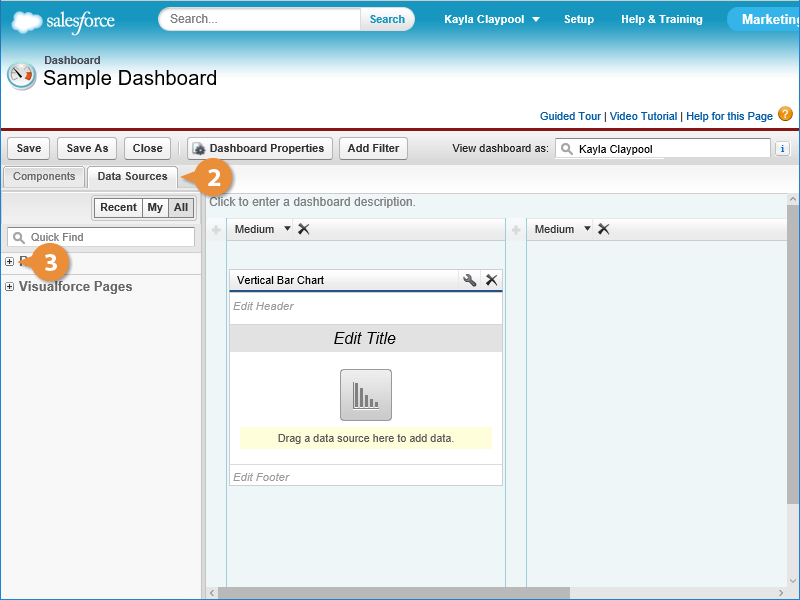
A list of reports grouped by folder appears.
- Click the plus sign (+) next to the folder you want to view.
- Drag a report from the Reports list and drop it onto the component.
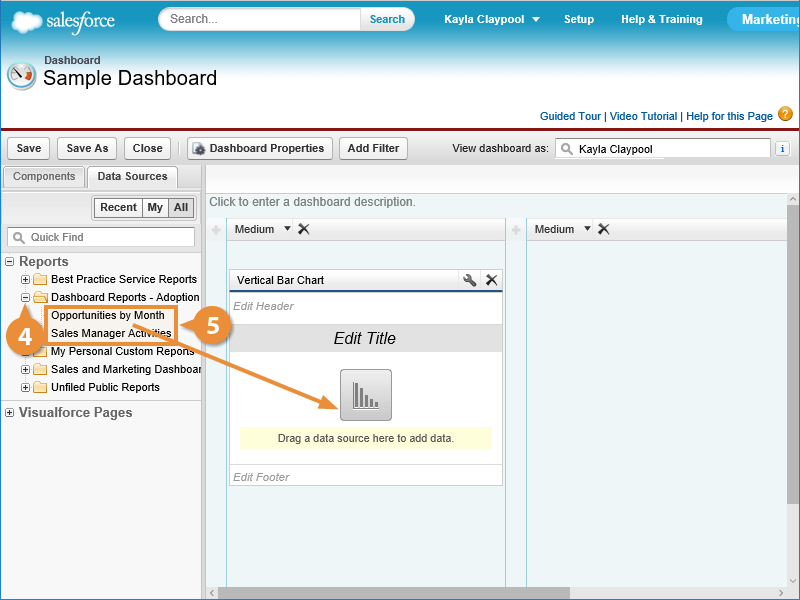
You can make additional changes to a dashboard component by clicking its wrench icon.
Add a Header to a Component
You can also add a header or title to a dashboard component.
- Click the header area or title area for the component.
- Type a descriptive header or title.
- Click outside the component.

The new name is displayed.
Save and Close a Dashboard
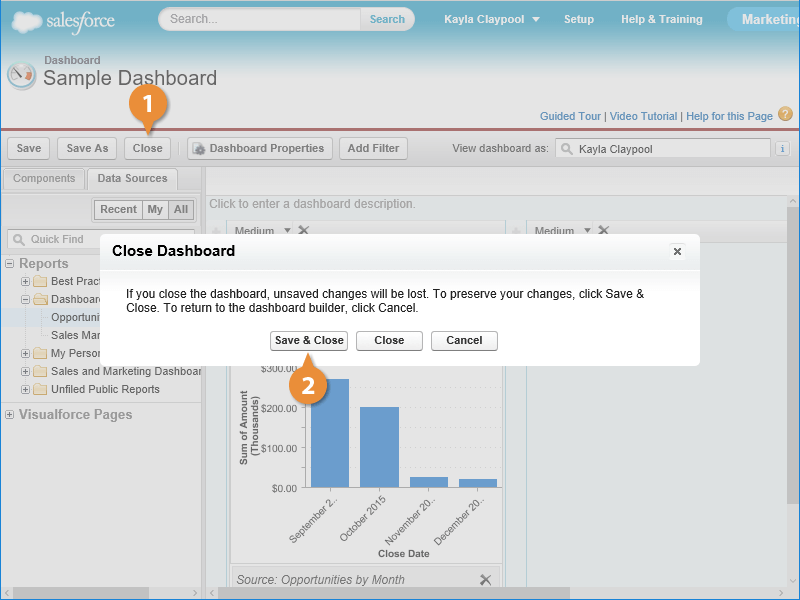
Salesforce displays the new dashboard.