Insert Tables in PowerPoint
How to Insert Tables in PowerPoint

PowerPoint Training Features:
-
Interactive bite-sized lessons
-
Get Certified
-
Accurate skill assessments
-
Customizable, LMS-ready content

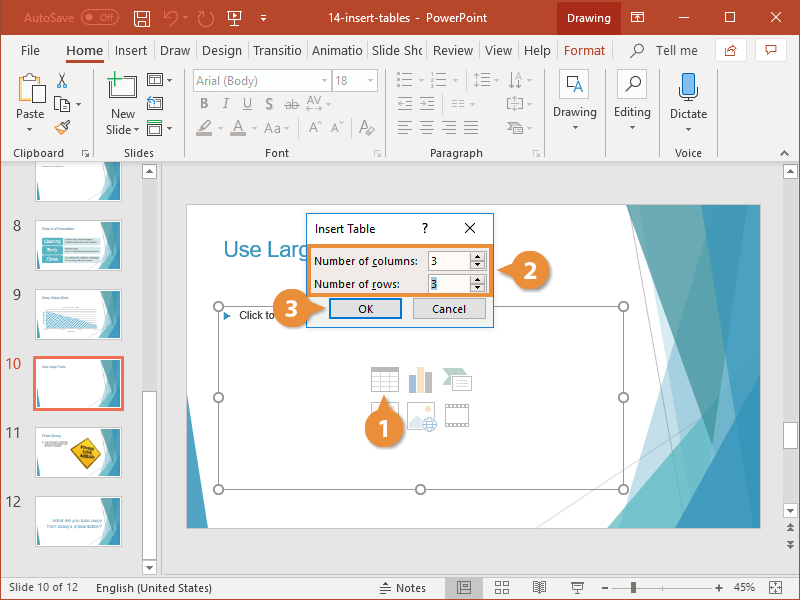
To create a table, you must first determine how many columns (which run up and down) and rows (which run left to right) you want to appear in your table. Cells are small, rectangular shaped boxes where the rows and columns intersect. The number of columns and rows determines the number of cells in a table. If you don’t know how many columns and rows you want in your table, take an educated guess—you can always add or delete columns and rows later.
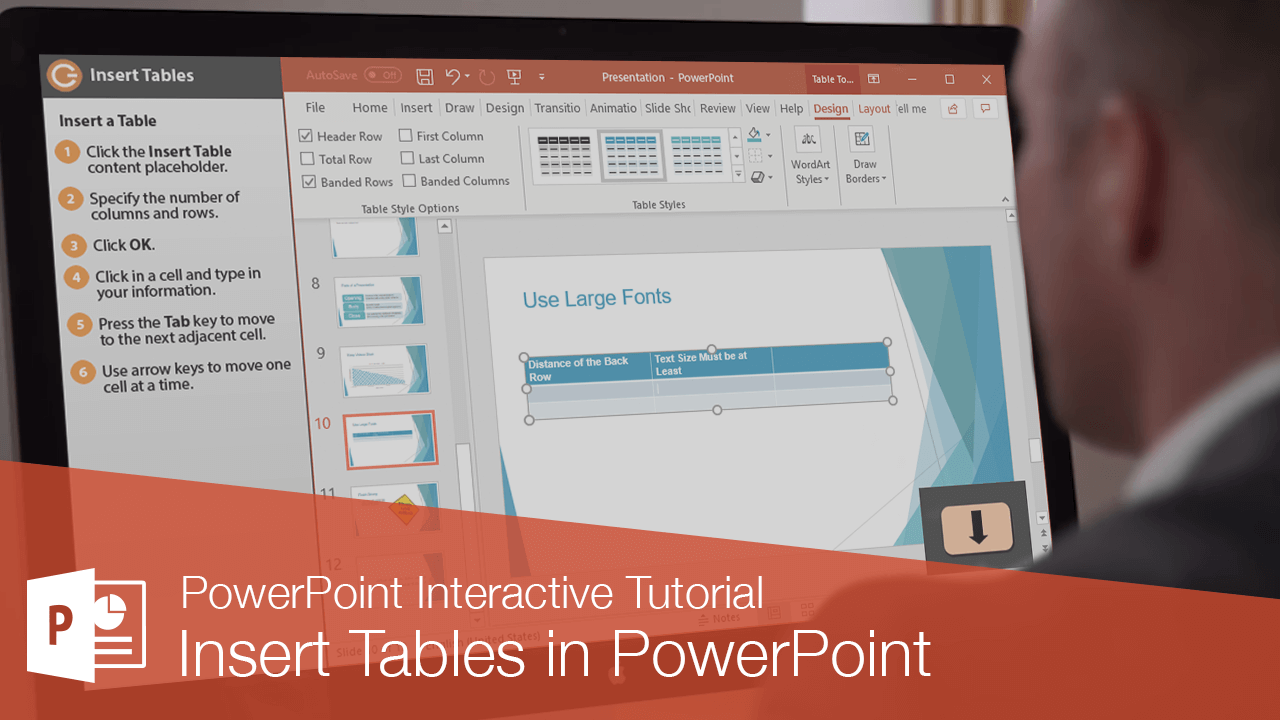
Insert a Table
- Click the Insert Table content placeholder.
You can also insert a table by clicking the Insert tab on the ribbon and then the Table button.
- Specify the number of columns and rows.
- Click OK.
- Click in a cell and type in your information.
Navigation shortcuts:
- Press the Tab key to move to the next adjacent cell.
- Use arrow keys to move one cell at a time.
Add Rows or Columns
You can make a table larger by inserting rows and columns.
- With the table selected, click the Layout tab.
- Use the buttons in the Rows & Columns group to add additional table cells.
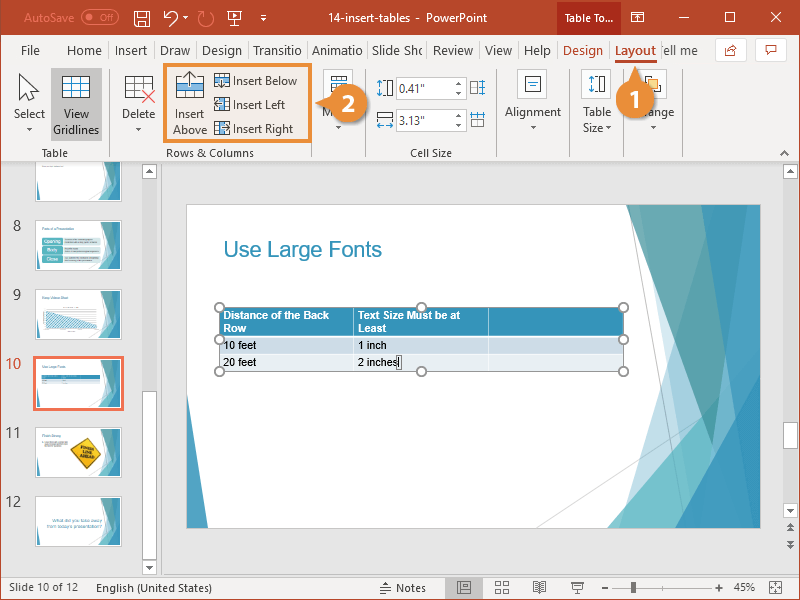
The new rows or columns are added based on the position of the cursor in the table.
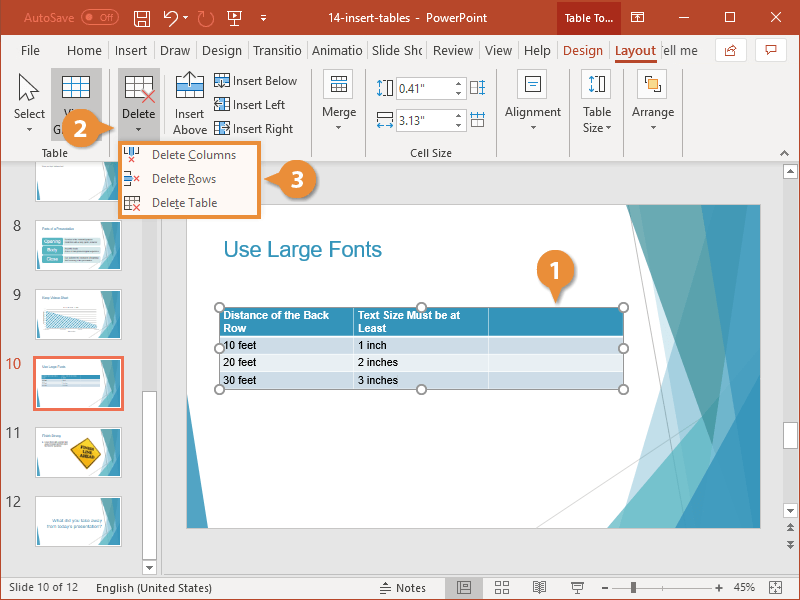
Delete Rows or Columns
You can make a table smaller by deleting rows and columns.
- Click in the row or column you want to delete.
- Click the Delete button on the Layout tab.
- Choose a deletion option.
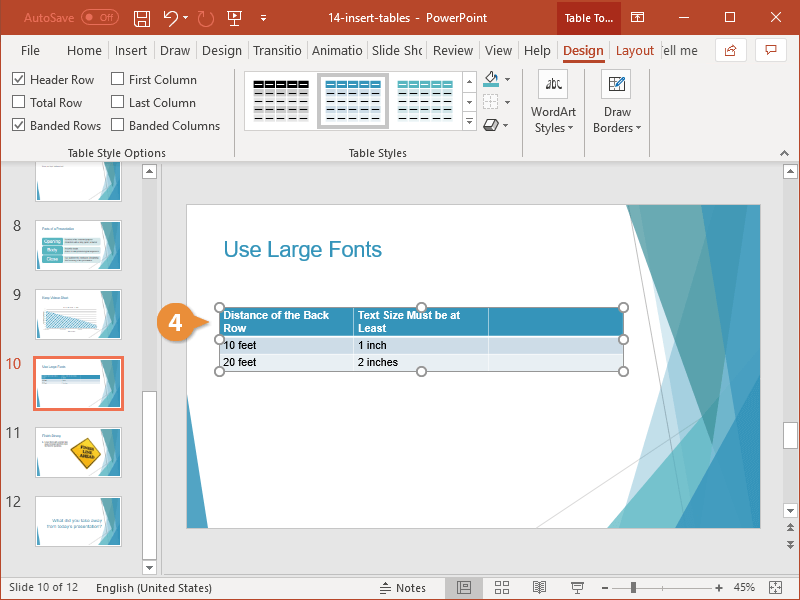
Format Table
Formatting a table is an easy way to spice up its appearance. A table style is a set of different formatting commands that can be applied to a table in a single step.
- With the table selected, click the Design tab under Table Tools.
- Click the Table Styles gallery More button.
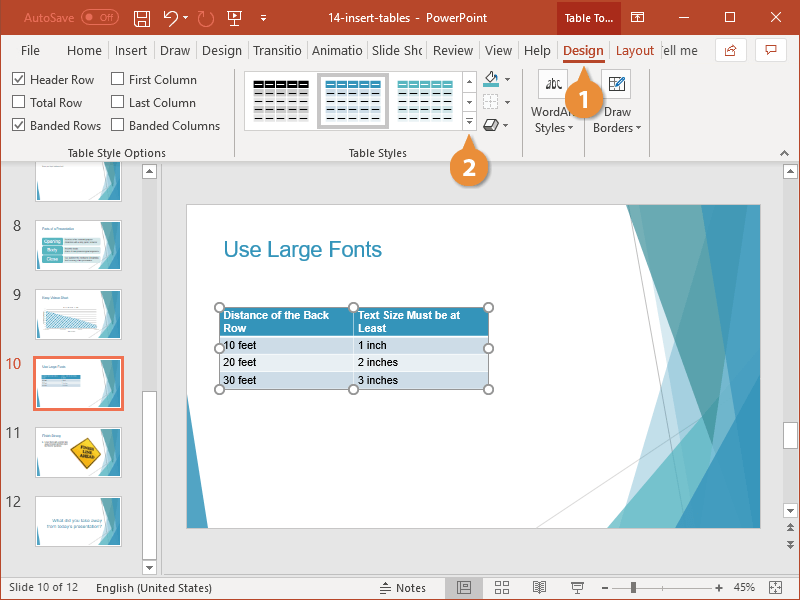
- Select a new table style.
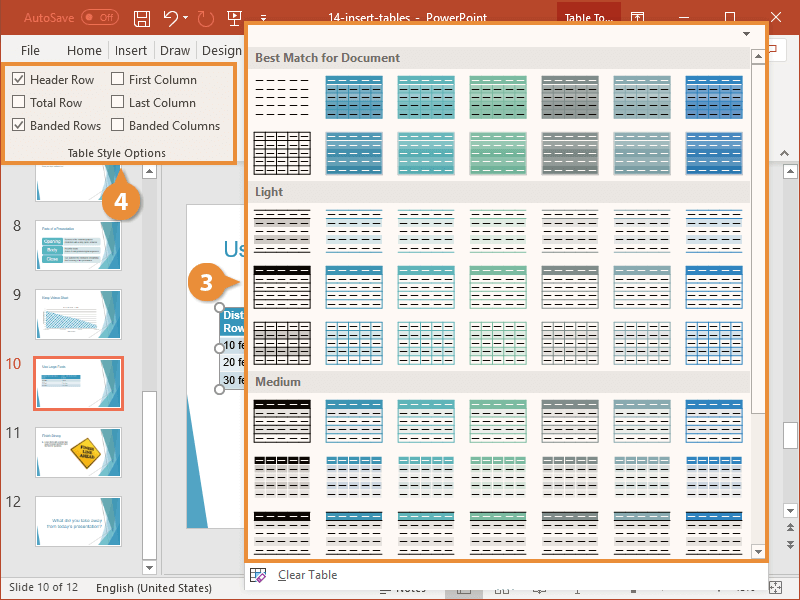
- Click an option in the Table Style Options group:
- Header Row: Specifically formats the top row of the table to stand out from the other table rows.
- Total Row: Displays special formatting for the last row of the table.
- Banded Rows: Formats even rows differently than odd rows to make the table data easier to read.
- First Column: Displays special formatting for the first column of the table.
- Last Column: Displays special formatting for the last column of the table.
- Banded Columns: Formats even columns differently than odd columns to make the table data easier to read.
If you want to further customize the table formatting, select specific cells or cell ranges and use the Shading, Borders, and Effects buttons in the Table Styles group.

FREE Quick Reference
Click to DownloadFree to distribute with our compliments; we hope you will consider our paid training.
- LinkedIn-ready certificate
- Skill assessments
- Bite-sized, interactive lessons
- Saved progress