PowerPoint Remove Picture Background
How to Remove Picture Background in PowerPoint

PowerPoint Training Features:
-
Interactive bite-sized lessons
-
Get Certified
-
Accurate skill assessments
-
Customizable, LMS-ready content

Insert a Screenshot
A screenshot is a snapshot of an area on your screen that you can use as an image in your presentation.
- Click the Insert tab.
- Expand the Images group if necessary.
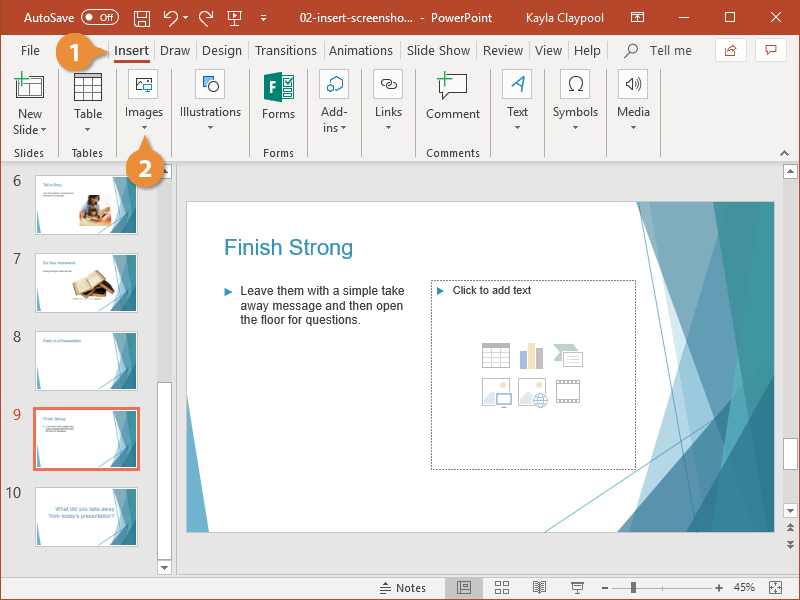
- Click the Screenshot button.
- Select a screenshot method:
- Available Windows: Inserts an image of an open application window. This option will not work if the window is minimized.
- Screen Clipping: Lets you capture a selected area of your computer screen.
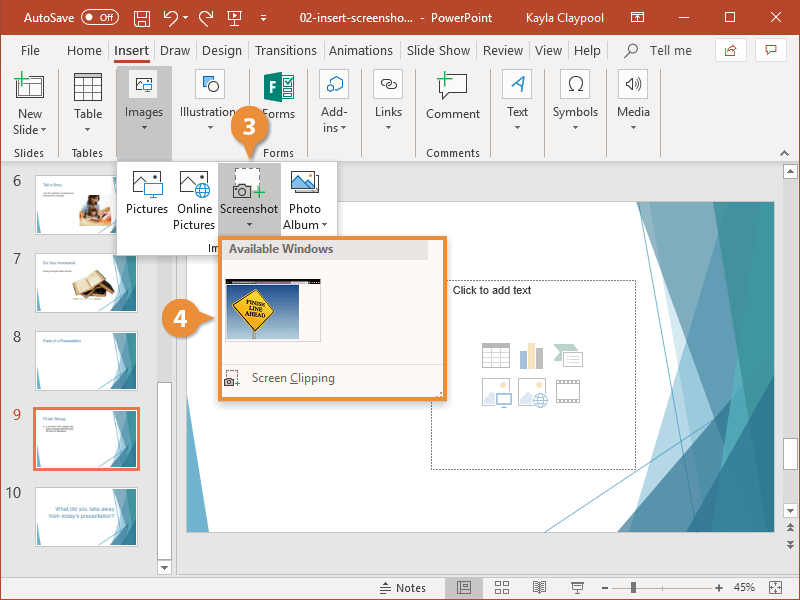
To cancel a screen clipping, press Esc when the screen clipping mode is active.
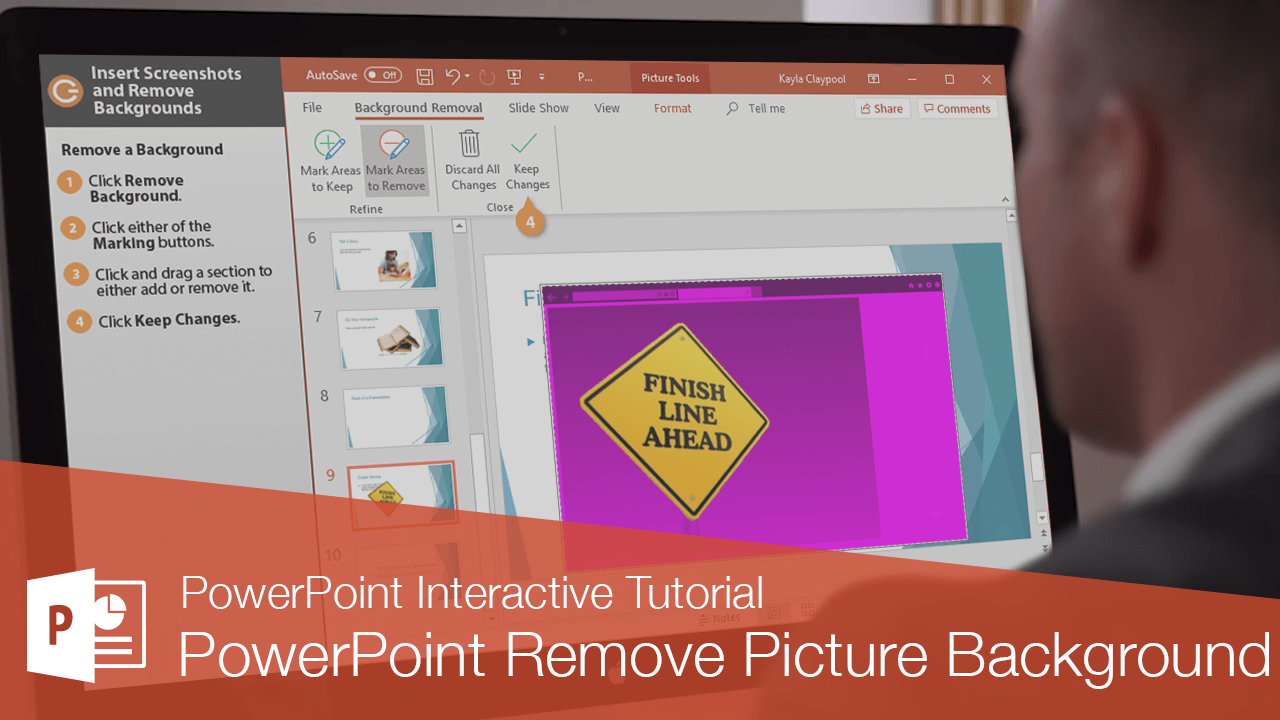
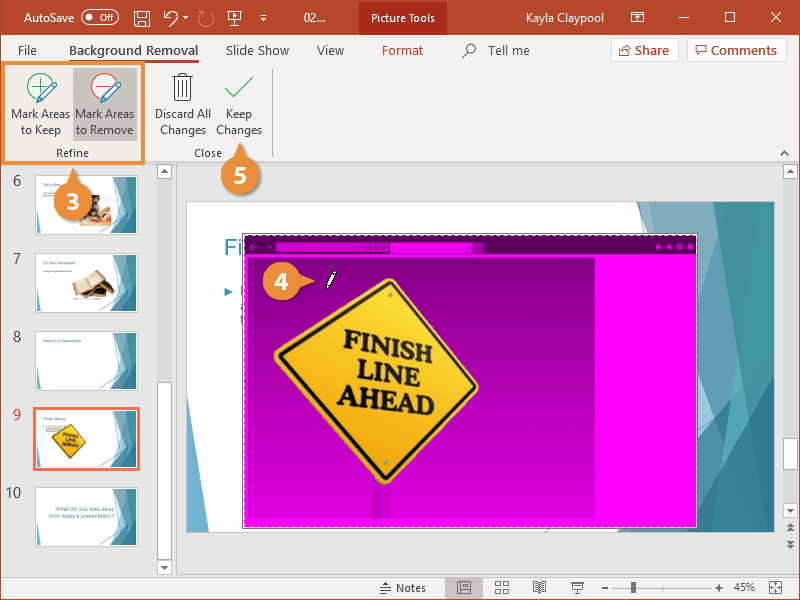
Remove a Background
You can remove the background of any screenshot, picture, or graphic in your presentation.
- Select the picture with a background you want to remove.
- Click Remove Background on the Format tab.
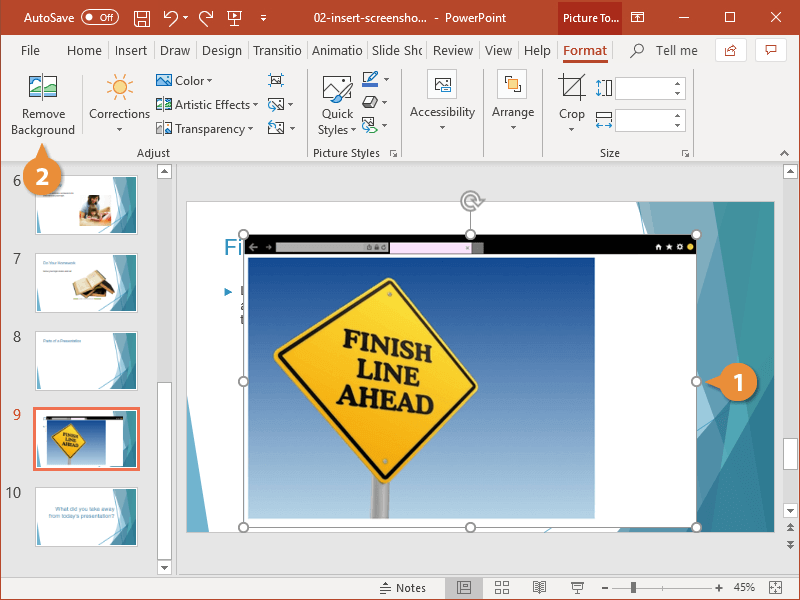
A new tab appears on the ribbon, and the picture is highlighted with a bright magenta color. Any magenta areas will be removed.
Click and drag the box around what you want to keep.
- Click a Mark Areas button in the Refine group:
- Mark Areas to Keep: Draw lines over the areas of a picture you want to keep.
- Mark Areas to Remove: Draw lines over the areas of a picture you want to remove.
- Click and drag over a section of the picture to either add or remove it.
- Click Keep Changes.
To restore the background, select the image, click the Remove Background button, and click Discard All Changes.

FREE Quick Reference
Click to DownloadFree to distribute with our compliments; we hope you will consider our paid training.
- LinkedIn-ready certificate
- Skill assessments
- Bite-sized, interactive lessons
- Saved progress