Outline View in PowerPoint
How to Use Outline View in PowerPoint

PowerPoint Training Features:
-
Interactive bite-sized lessons
-
Get Certified
-
Accurate skill assessments
-
Customizable, LMS-ready content

Outline View shows your presentation arranged as an outline and is ideal for quickly adding text to a slide or previewing the structure of a presentation.
View an Outline
- Click the View tab.
- Click Outline View.
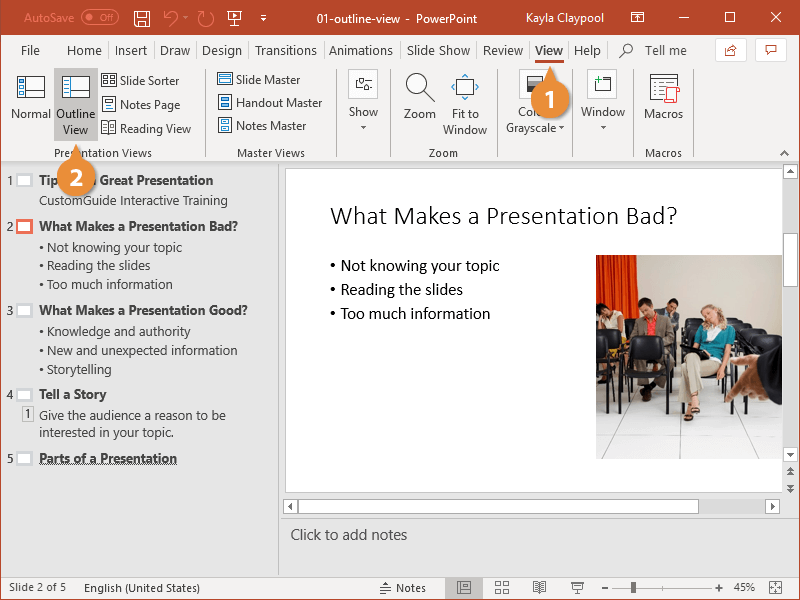
The Outline pane appears at the left, showing only the text in your presentation.
You can quickly create an entire presentation by pasting an outline from Word into the Outline pane.
Collapse and Expand Headings
In Outline View, you can collapse or expand headings, subheadings, and text.
- Right-click any slide title in the Outline pane.
- Click the Collapse list arrow.
- Select a collapse option.
- Collapse: Collapse only the selected slide.
- Collapse All: Collapse all slides in the Outline view.
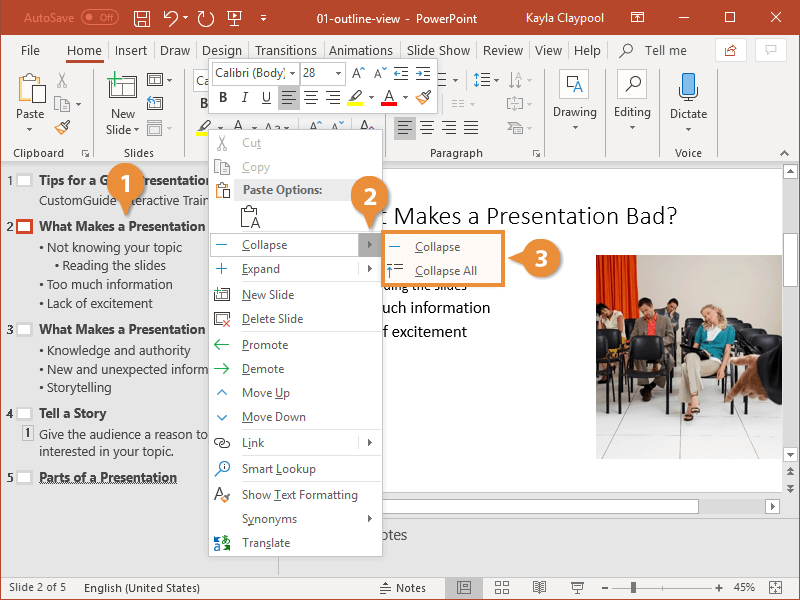
You can expand or collapse a heading by double-clicking a slide icon in the Outline pane.
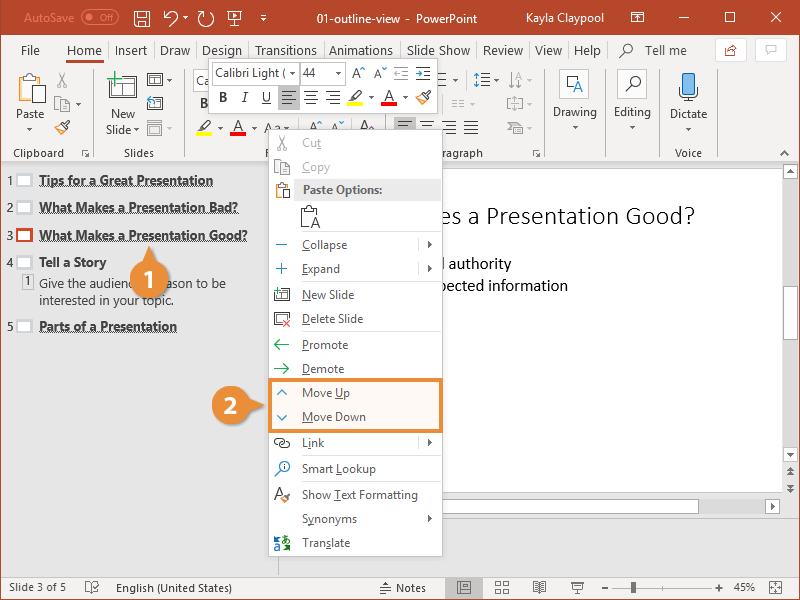
Rearrange Outline Content
- Right-click the slide you want to move.
- Click Move Up or Move Down.
You can also rearrange slides by clicking and dragging them to a new location.
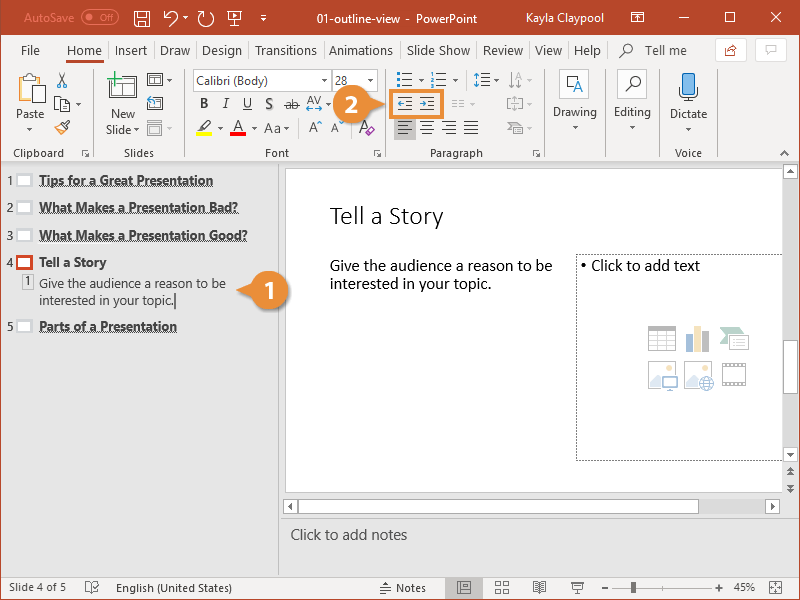
Adjust the List Level
You can also change the level of slide text using the Outline pane.
- Select an Outline item.
- Select a List Level option in the Paragraph group of the Home tab:
- Increase List Level: Demotes a paragraph by moving it down one level in the outline, increasing its indent level.
- Decrease List Level: Promotes a paragraph by moving it up one level in the outline, decreasing its indent level.

FREE Quick Reference
Click to DownloadFree to distribute with our compliments; we hope you will consider our paid training.
- LinkedIn-ready certificate
- Skill assessments
- Bite-sized, interactive lessons
- Saved progress