
Interactive Tutorial
How to Print PowerPoint Slides
Print PowerPoint Slides with Notes, Handouts, or Full Pages for Meetings and Presentations
-
Learn by Doing
-
LMS Ready
-
Earn Certificates

Try this Course with a Free Trial

Once you have created a presentation, and your computer is connected to a printer, you can print a copy. Before you do this, it’s a good idea to preview how it’s going to look.
- Click the File tab.
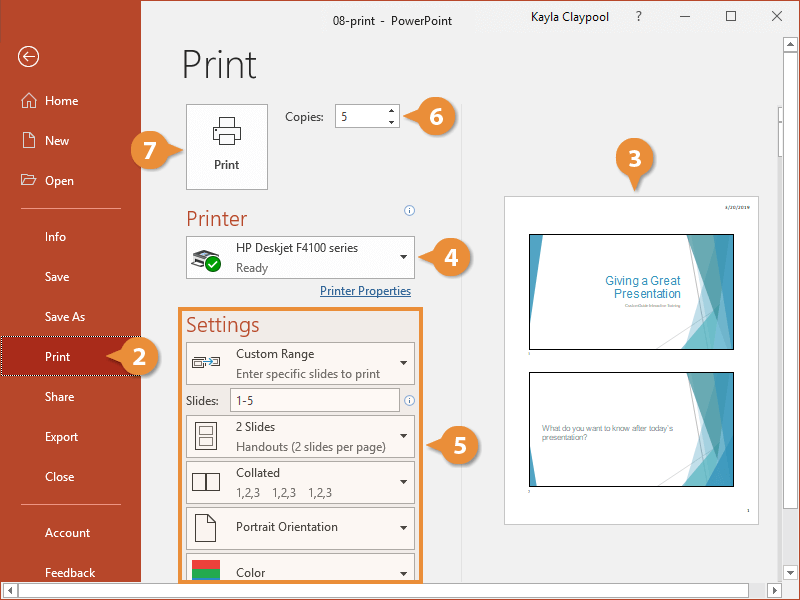
- Select Print.
Press Ctrl + P.
- Examine the print preview on the right side of the screen, making sure that the preview looks the way you want it.
- Select the correct printer by clicking the Printer list arrow and selecting it from the list.
- Adjust the printer settings using the options below the printer, described in the table below.
- Choose the number of copies in the Copies text field.
- Click Print.
| Print Settings | |||
|---|---|---|---|
| Print Range | Print the whole presentation, a selection, a certain slide range, a single slide, or a custom range. | ||
| Print Layout | Determine what you want to print on each page. You can print a single slide, multiple sides, slide notes, handouts, and more. | ||
| Collate | Collating prints multiple copies of the presentation all the way through (1, 2, 3; 1, 2, 3), while printing uncollated prints multiple copies of each slide together (1, 1; 2, 2; 3, 3). | ||
| Orientation | Changes the page orientation of the printed page, portrait or landscape. | ||
| Color | Select whether to print the presentation in full color, grayscale, or pure black and white. | ||