
Interactive Tutorial
Outlook Poll
Create and track polls in Outlook to collect votes and feedback from your recipients easily
-
Learn by Doing
-
LMS Ready
-
Earn Certificates

Try this Course with a Free Trial

If you need to pose a question to your colleagues, Outlook’s voting feature is a great tool to use.
Send a Poll
You can add voting buttons to an email message while you’re composing it.
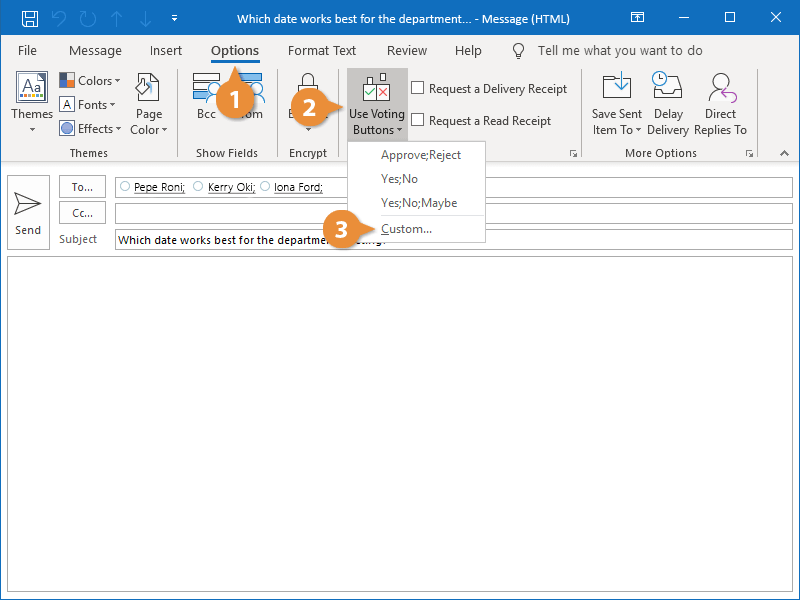
- In a new message window, click the Options tab.
- Click the Use Voting Buttons button.
This menu contains a few default voting options. If “Approve / Reject”, “Yes / No”, or “Yes / No / Maybe” work for you, select one of those. Otherwise, you can fill in your own responses.
- Select from the default responses, or select Custom.
The Properties window opens. In the Voting and Tracking options group, Use voting buttons is already selected, so we just need to fill in our options.
- Enter the responses you want to use in the text field next to the Use voting buttons heading.
Make sure that each choice is separated by a semicolon.
- Click Close.
- Complete the message and click Send.

The message is sent. When the recipients open the message, the choices you specified will be available to vote on.
Track Votes
Once the votes start coming in, you can check to see who has voted for which option.
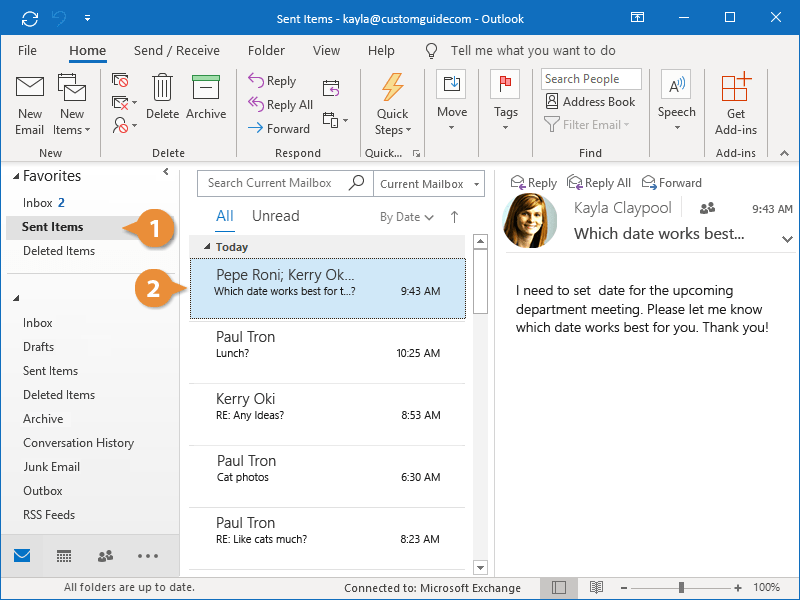
- Click the Sent Items folder.
Your Sent Items folder is displayed, showing every message you’ve sent.
- Open the message that contains the poll.
The messages with the poll opens in its own window.
- Click the Tracking button on the Message tab.
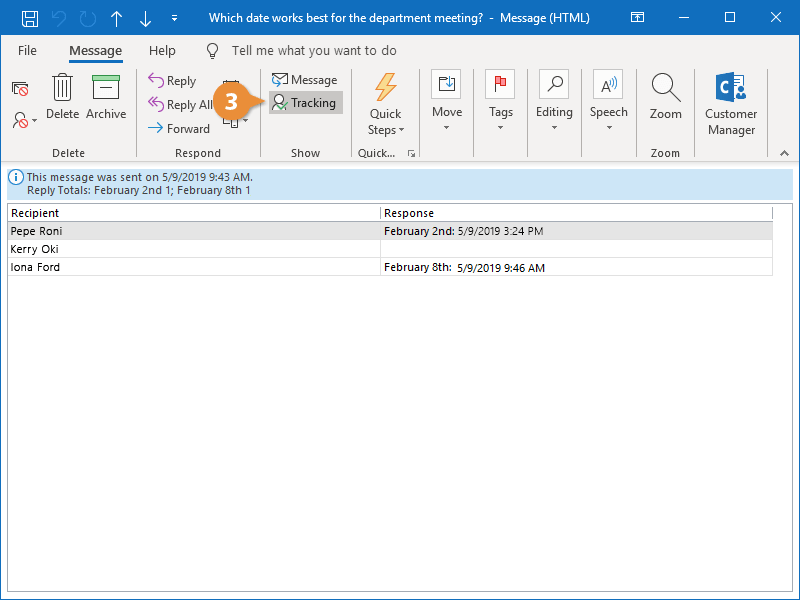
The tracking window displays, where you can see who has responded so far and the response they’ve given.