
Interactive Tutorial
How to Share Your Calendar in Outlook
Collaborate with coworkers by sharing your Outlook calendar for better visibility and planning
-
Learn by Doing
-
LMS Ready
-
Earn Certificates

Try this Course with a Free Trial
Working around other people's schedules can be tricky. Luckily, Outlook allows you to share calendars so that you can view and, depending on your company’s settings, even edit shared calendars.
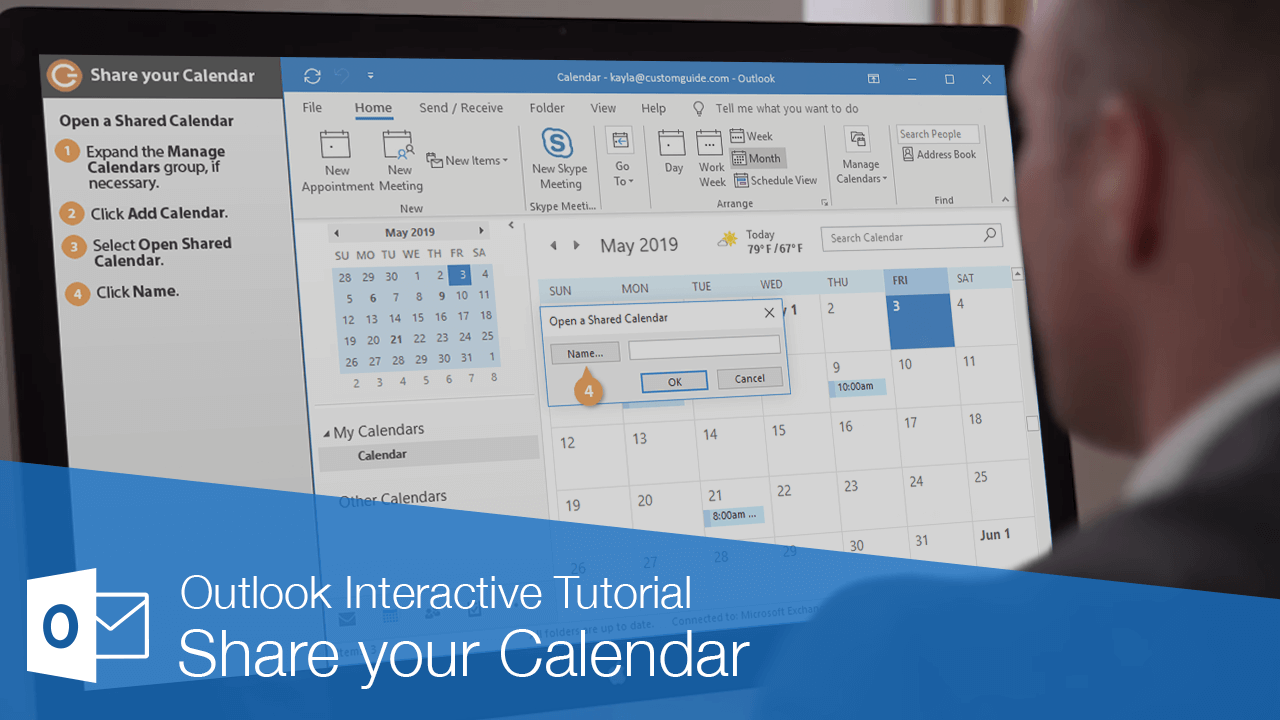
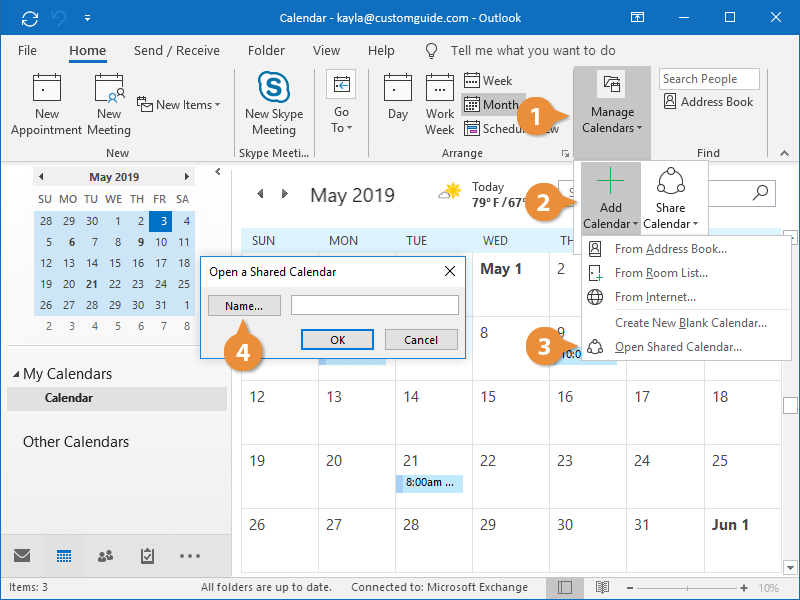
Open a Shared Calendar
- Expand the Manage Calendars group, if necessary.
- Click the Add Calendar button.
- Select Open Shared Calendar.
- Click Name.
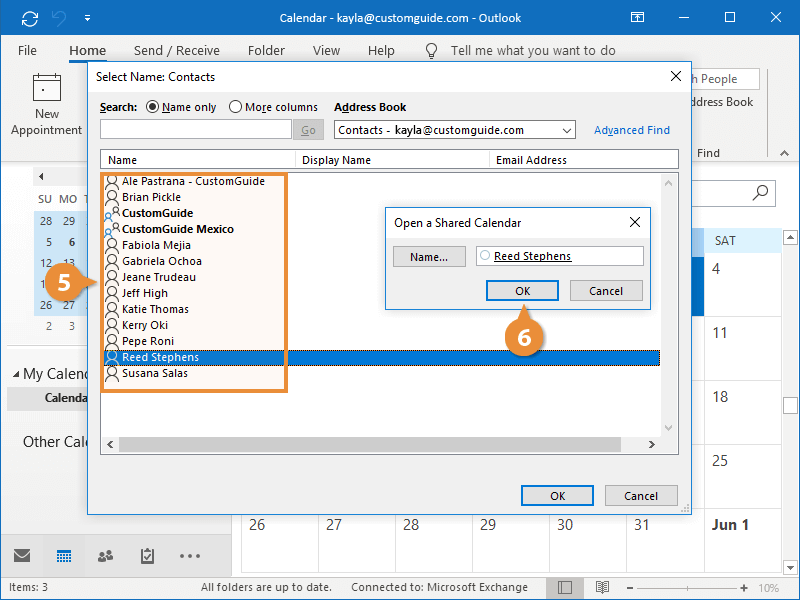
- Double-click a contact.
- Click OK.
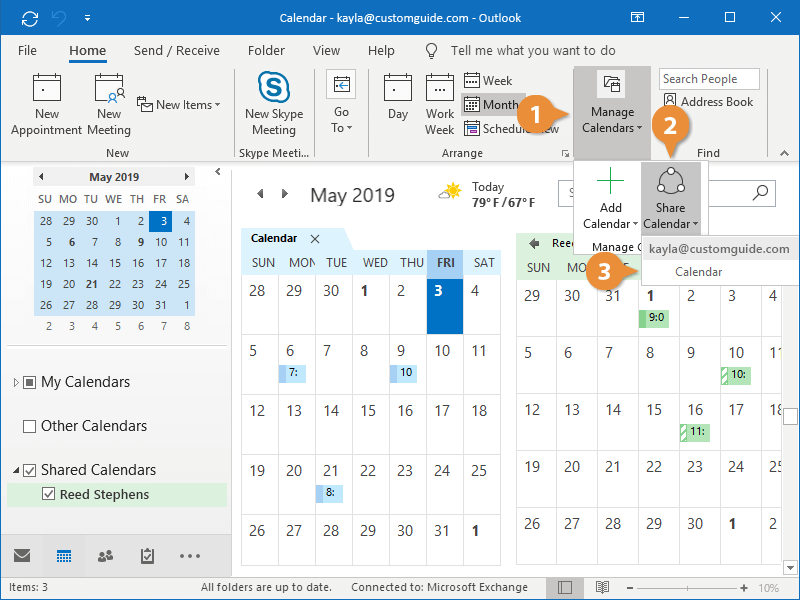
If you have been given permission to view the calendar, it now appears in the Outlook window. Also, the contact’s name appears in the Shared Calendars area of the Navigation Pane.
If you have not received permission to view a calendar, a dialog box asks if you would like to request permission. Click Yes, then complete the email permissions request and click Send. If you are granted permission, you will receive an email.
- Display or hide shared calendars by selecting the check boxes to the left of the calendars.
The shared calendar will appear next to your calendar in the Calendar view.
Send a Sharing Invitation
You can also proactively share your calendar with other people, sending them an invitation so that they know they’ll have access to it.
- Expand the Manage Calendars group, if necessary.
- Click the Share Calendar button.
- Select a calendar from the list.
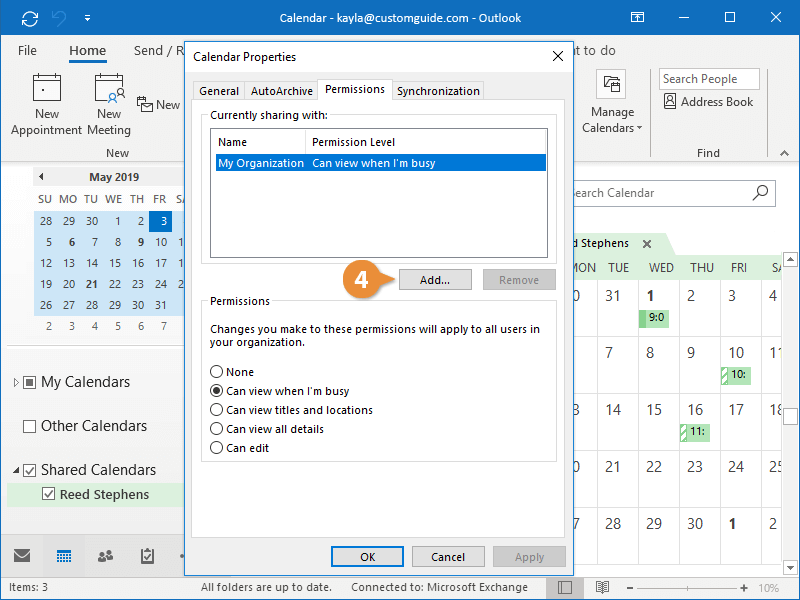
The Calendar Properties dialog box opens to the Permissions tab, where you can control who is able to access your calendar and what they're able to see.
- Click Add.
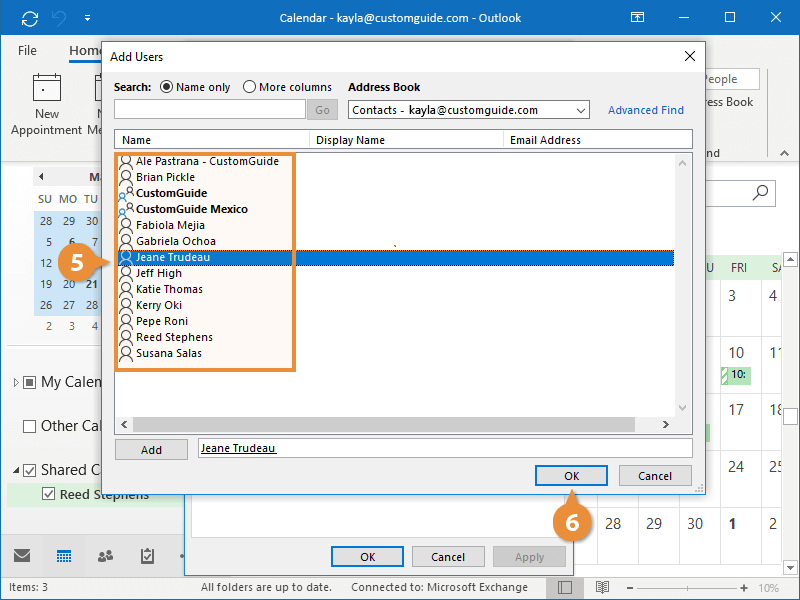
- Double-click a contact.
- Click OK.
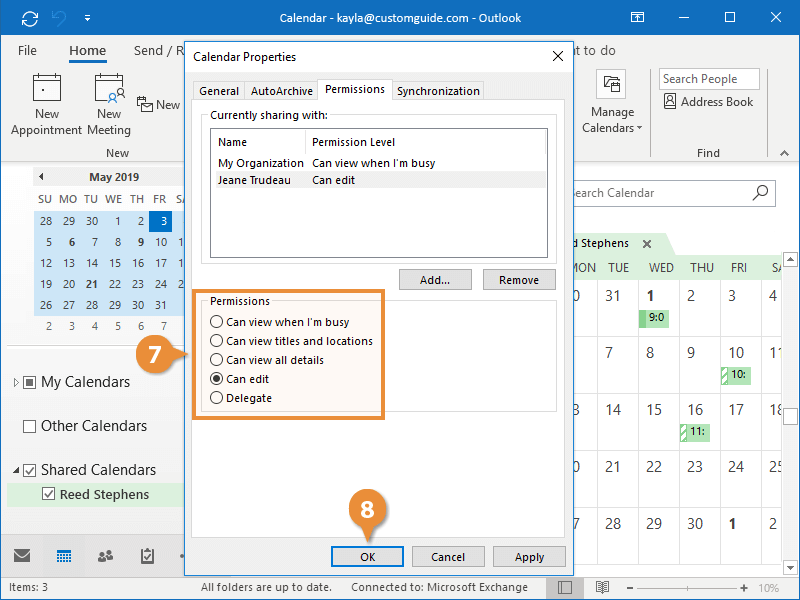
- Select a permissions level.
You can change her permissions level from the options below, ranging from only viewing when you're busy, to viewing event titles, locations, and other details, up to editing events and even creating new ones.
- Click OK.
The invitation is sent, and when accepted, the invitee will have access to your calendar.