
Interactive Tutorial
Outlook Quick Steps
Automate repetitive actions in Outlook with Quick Steps to save time and stay productive
-
Learn by Doing
-
LMS Ready
-
Earn Certificates

Try this Course with a Free Trial
Quick Steps are customizable shortcuts that you can use for simple tasks or groups of tasks, such as easily sending a message to a group, or marking an email as read while also moving it to another folder. Customizable Quick Steps allows you to use Outlook exactly how you need, to make life easier.
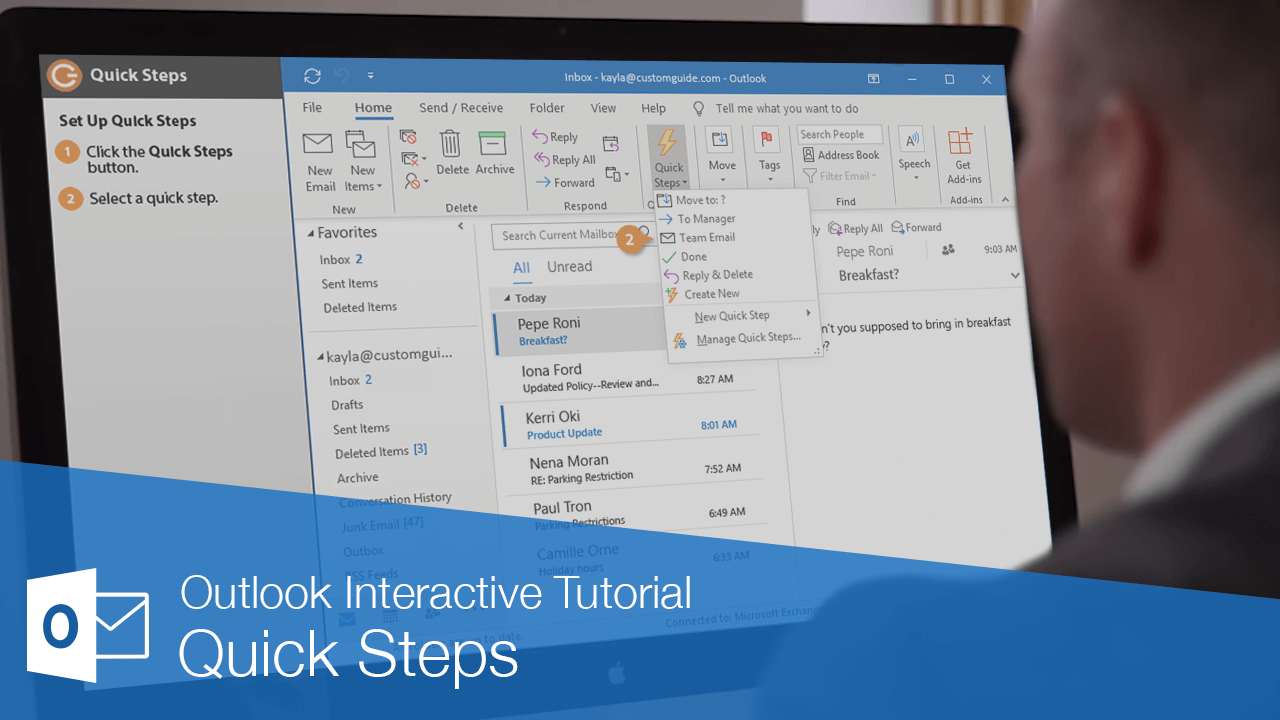
Set Up Quick Steps
Many built-in Quick Steps will require you to set them up the first time you try to use them.
- Expand the Quick Steps group, if necessary.
- Select a Quick Step.
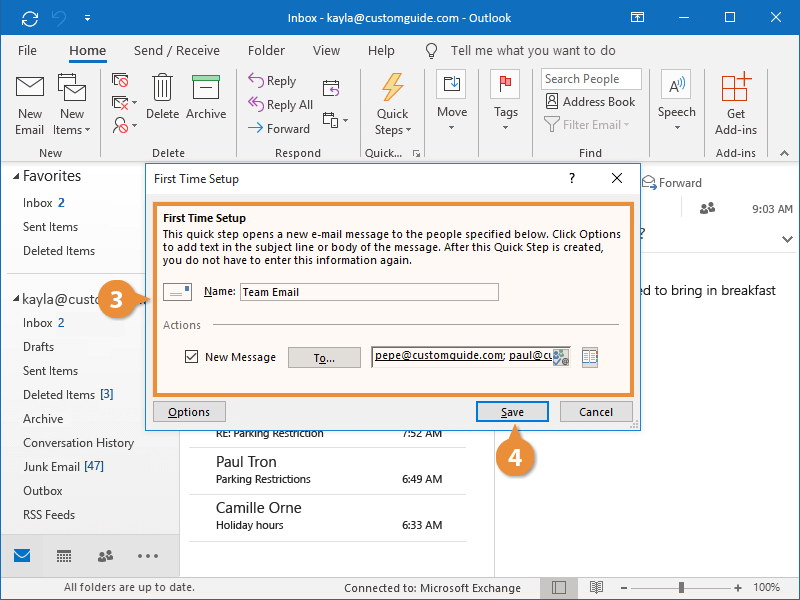
Different Quick Steps will require different information to run the first time. You may need to specify email addresses, inbox folders, or other settings.

- Fill out the First Time Setup dialog box.
- Click Save.
The built-in Quick Step is configured, and now when it is clicked, the corresponding action is performed.
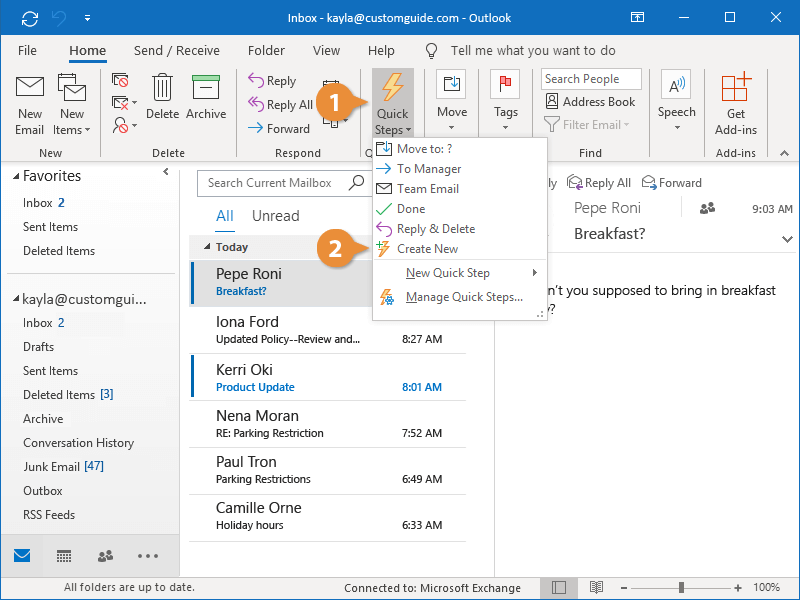
Add a New Quick Step
If none of the built-in Quick Steps do what you want, you can create a new one.
- Expand the Quick Steps group, if necessary.
If the Quick Steps group is expanded, click the More button to see the Quick Steps gallery.
- Select Create New.
A new blank Quick Step is started.
- Choose the settings for your Quick Step.
Give the new Quick Step a name, then click the list arrow under the Actions header and select an action that you want to include in the Quick Step. Some actions may require you to set some additional options.
You can add more actions by clicking the Add Action button.
- Click Finish.
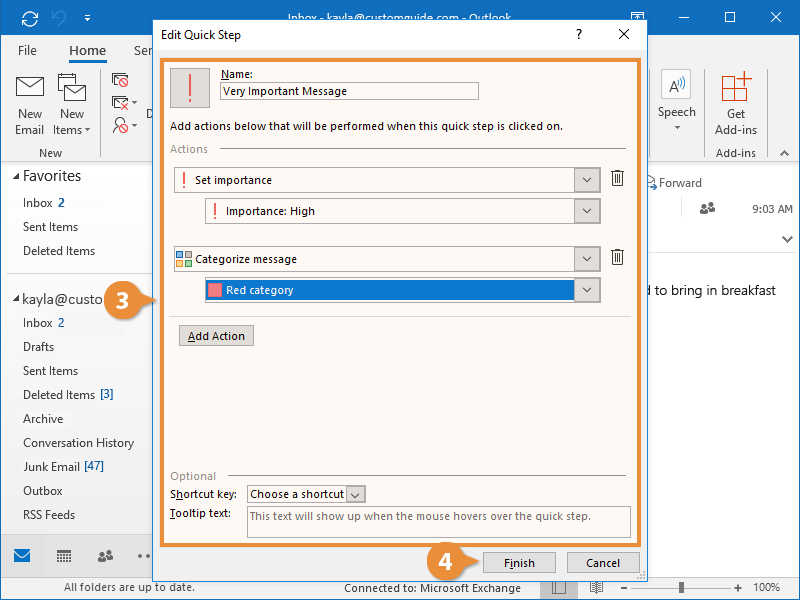
The Quick Step is created and will appear in the Quick Steps gallery.
Edit Quick Steps
You can also change an existing Quick Step’s actions.
- Expand the Quick Steps group, if necessary.
If you see the Quick Steps group expanded, click the More button.
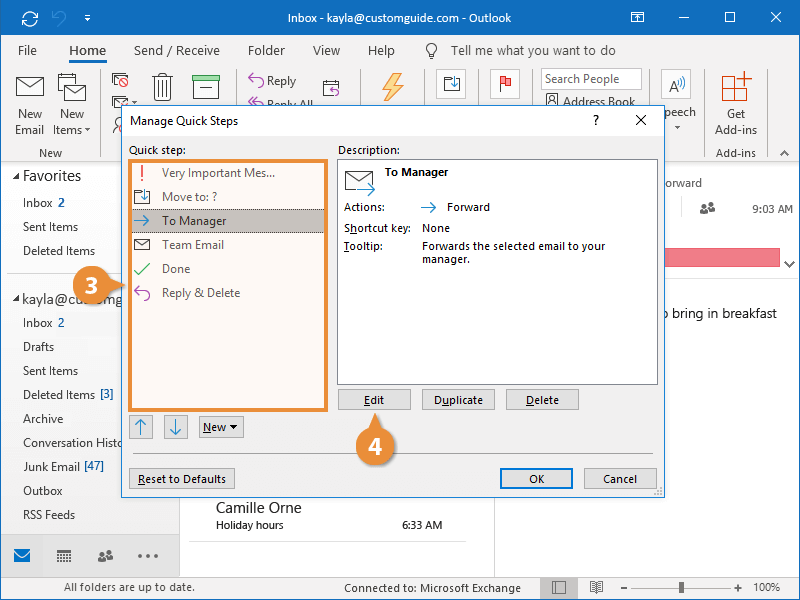
- Select Manage Quick Steps.

The Manage Quick Steps dialog box displays all your Quick Steps.
- Select a Quick Step.
- Click Edit.
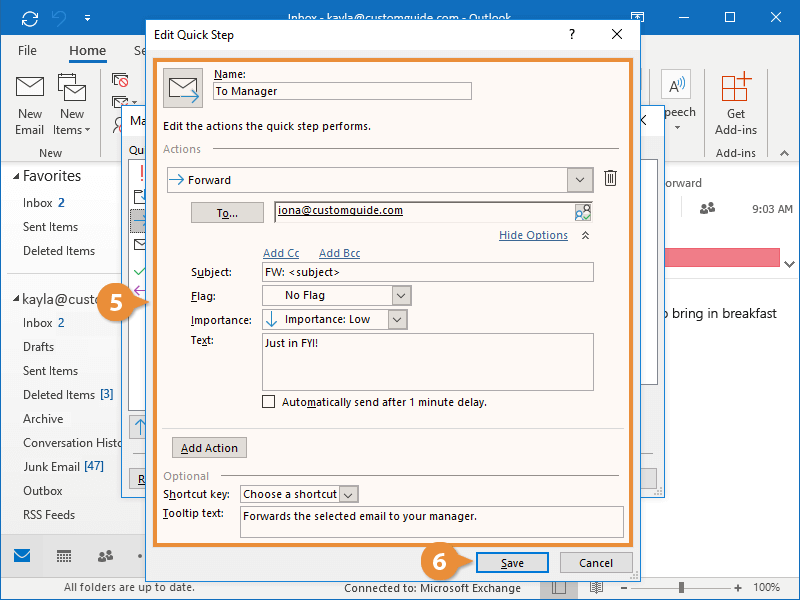
- Edit the Quick Step’s actions.
You can modify existing actions, add extra actions, or delete unwanted actions.
- Click Save.
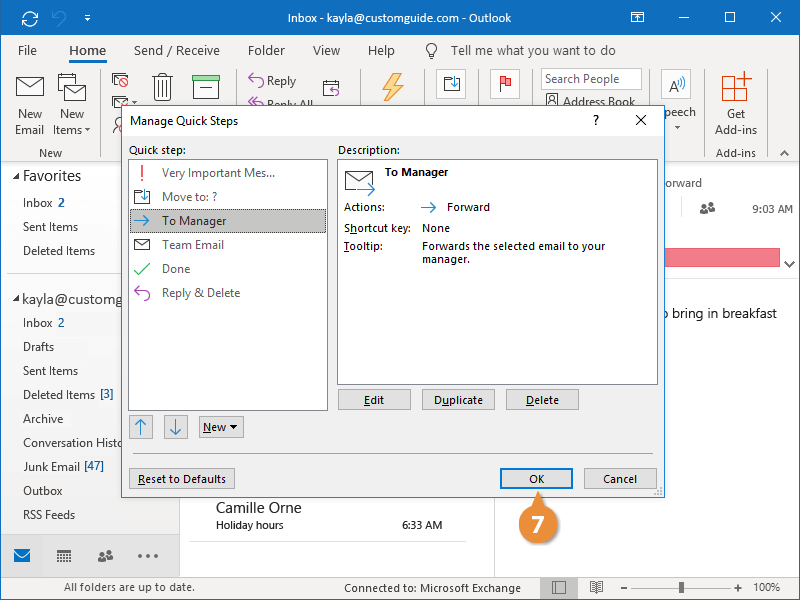
- Click OK.
The Edit Quick Step dialog box opens, showing all the actions used in the selected Quick Step.
The selected Quick Step is updated.
You can restore your default Quick Steps by clicking the Reset to Defaults button in the Manage Quick Steps dialog box.