
Interactive Tutorial
How to Create a Rule in Outlook
Automate your inbox by creating rules in Outlook to organize emails efficiently
-
Learn by Doing
-
LMS Ready
-
Earn Certificates

Try this Course with a Free Trial

Rules are automated actions that are triggered whenever incoming mail meets specific criteria. This can help you keep track of your most important emails during a busy work day.
Create a Rule Based on an Email
You can create a rule based on a single email that will apply to similar emails in the future.
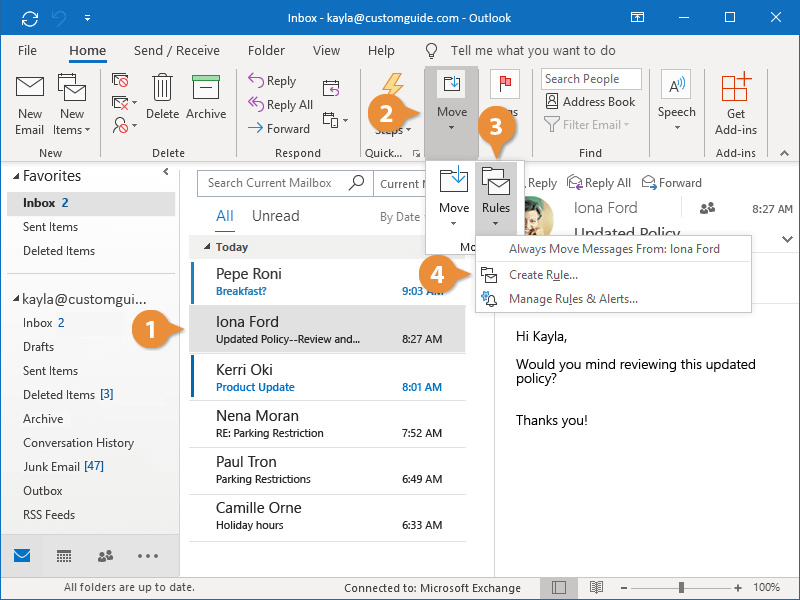
- Select a message.
- Expand the Move group, if necessary.
- Click the Rules button.
- Select Create Rule.
From here, you can select from several conditions based on the selected email.
- Choose the conditions for the rule.
Next, you can choose from a few common actions.
- Choose the action for the rule.
If you want to choose from more conditions or actions, click the Advanced Options button.
- Click OK to close the dialog boxes.
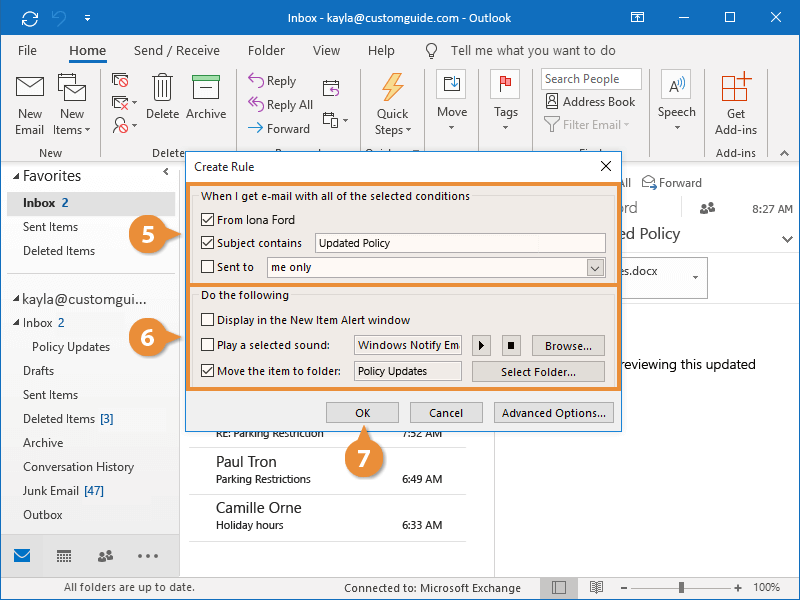
Outlook creates the rule based on your specifications.
Create a Rule from Scratch
You can also create a rule from the ground up with the Rules Wizard.
- Expand the Move group, if necessary.
- Click the Rules button.
- Select Manage Rules & Alerts.
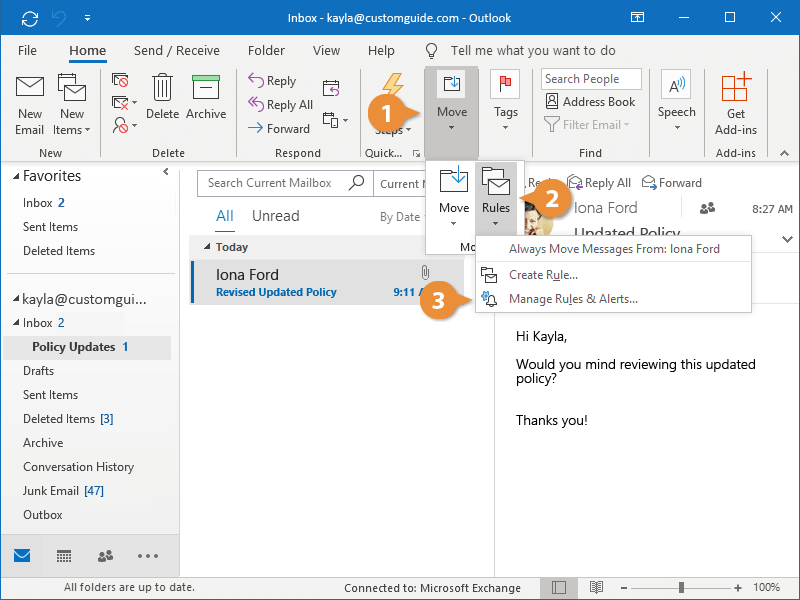
From this dialog box, you can manage your existing rules, or create new rules from scratch.
- Click New Rule.
The Rules Wizard appears, giving you access to many possible conditions and actions.
- Use the Rules Wizard to create a new rule.
- First, select a rule template or choose to start from a blank rule. Click Next.
- Select conditions for the rule by checking their check boxes. Some conditions may have options for you to set in the bottom of the dialog box. Click the hyperlinked text to set those options. Click Next.
- Select the actions for the rule to perform by checking their check boxes and configure those actions in the bottom of the dialog box. Click Next.
- Set any exceptions you want the rule to ignore. Click Next.
- Add a name for your rule and choose how you want the rule to run.
- Click Finish.
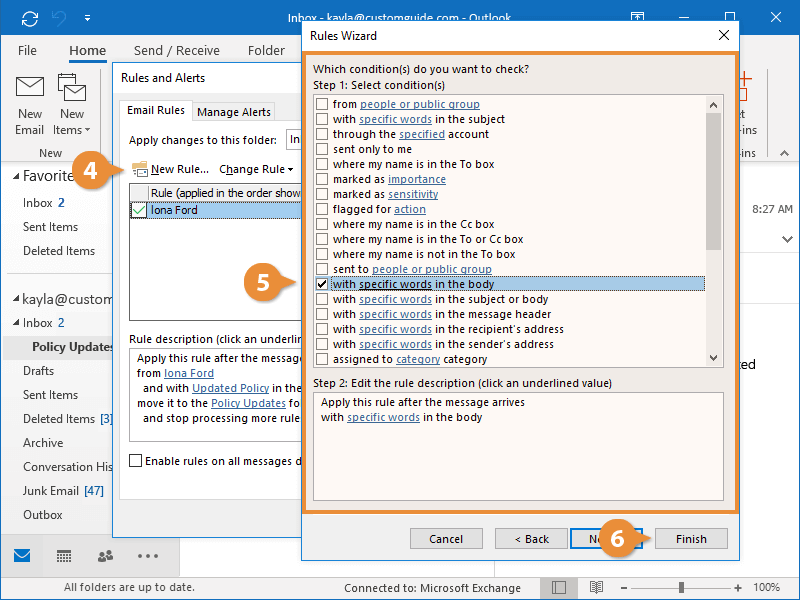
Outlook creates the rule.