
Interactive Tutorial
Appointment Options
Customize appointment settings in Outlook including reminders, time, and privacy options
-
Learn by Doing
-
LMS Ready
-
Earn Certificates

Try this Course with a Free Trial

Once an appointment has been created, there are many ways to edit how your event or appointment appears in the calendar. Adding a reminder or adjusting the priority settings make it easy to be prepared for that big interview, a friend’s birthday, or family dinner.
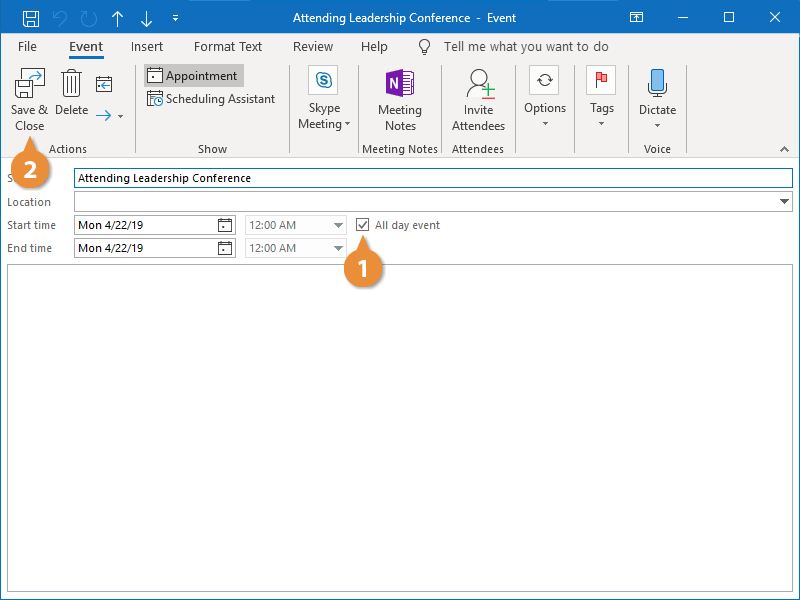
Create an All-Day Event
An all-day event is an appointment that lasts for a day or more, such as a conference, work anniversary, or vacation. It has no specific start or end time.
- From within an appointment window, check the All day event check box.
You can create a new all-day event directly. Click the New Items button on the ribbon and select All Day Event.
- Click Save & Close.
The appointment is saved as an all-day event.
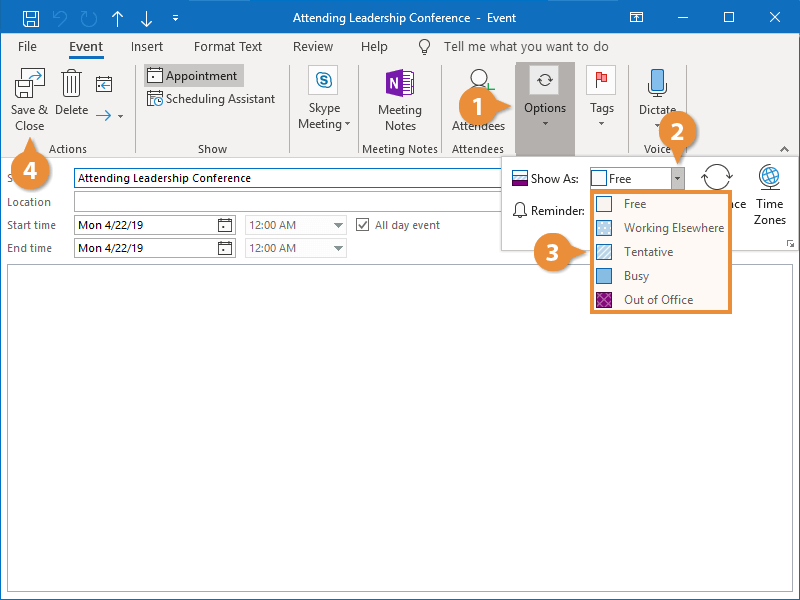
Change Availability
Adding free/busy information to your appointments helps people know when you are available. When you make an appointment, the schedule is automatically set as Busy unless it is an all-day event. You can change your status so that it correctly reflects your availability for those who can view your calendar.
- From within an appointment window, expand the Options group if necessary.
- Click the Show As list arrow.
- Select an option.
- Free: Shows that you are available.
- Working Elsewhere: Indicates that you are working from another location.
- Tentative: Shows that you have tentative plans and may not be available.
- Busy: Indicates that you are busy and not available.
- Out of Office: Shows that you are out of the office and are not available.
- Click Save & Close.
The appointment is updated with your availability.
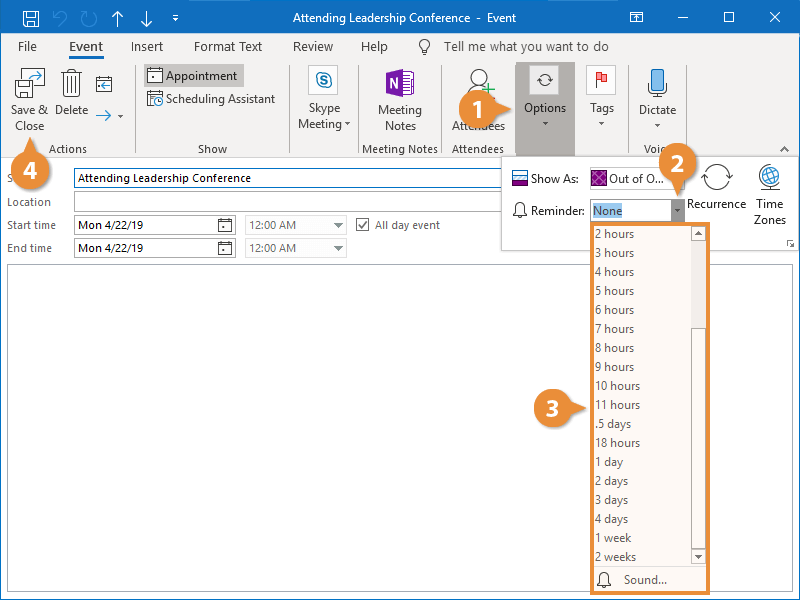
Set a Reminder
By default, a reminder will appear 15 minutes before a scheduled appointment or meeting, and 18 hours before an all-day event. However, you can adjust when a reminder appears.
- From within an appointment window, expand the Options group on the Event tab, if necessary.
- Click the Reminder list arrow.
Various options appear in the list, from a few minutes to several weeks.
- Select an option.
The reminder time is set.
Select Sound from this menu to choose what sound will play with the reminder.
- Click Save & Close.
A reminder will now appear the set time before the appointment.
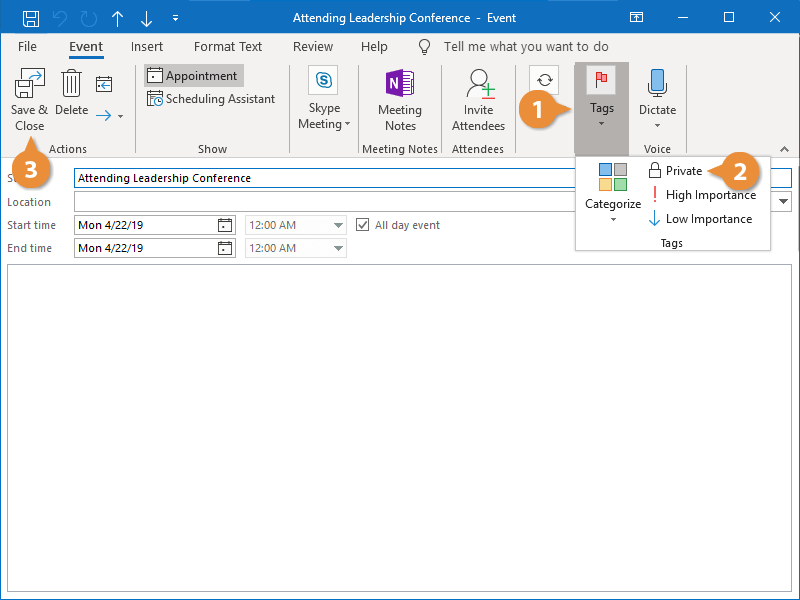
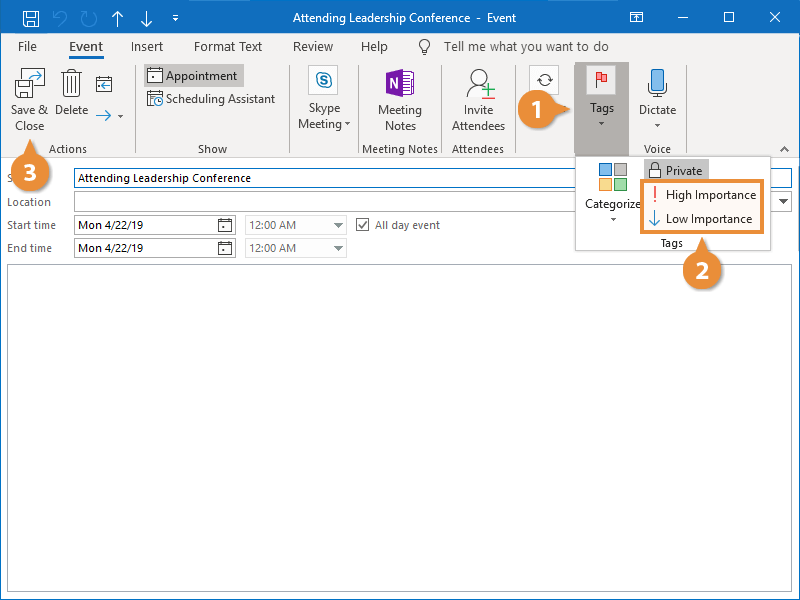
Privacy
You can make appointments private so that you appear busy to your colleagues, but they are unable to see the exact details, such as the subject, location, or meeting organizer.
- From within an appointment window, expand the Tags group on the Event tab, if necessary.
- Click the Private button.
- Click Save & Close.
The appointment is marked private, hiding the details from others. To make an appointment or meeting public again, click the Private button again to toggle it off.
Set Priority
You can also specify if an appointment is of high or low importance.
- From within an appointment window, expand the Tags group on the Event tab, if necessary.
- Click High Importance or Low Importance.
- Click Save & Close.
The appointment’s importance level is set.