
Interactive Tutorial
Onenote Tables
Organize and present data neatly with tables in Microsoft OneNote
-
Learn by Doing
-
LMS Ready
-
Earn Certificates

Try this Course with a Free Trial
Add a Table
- Click the Insert tab.
- Click the Table button.
Now just use the grid to select how many columns and rows you would like.
- Select the number of rows and columns.
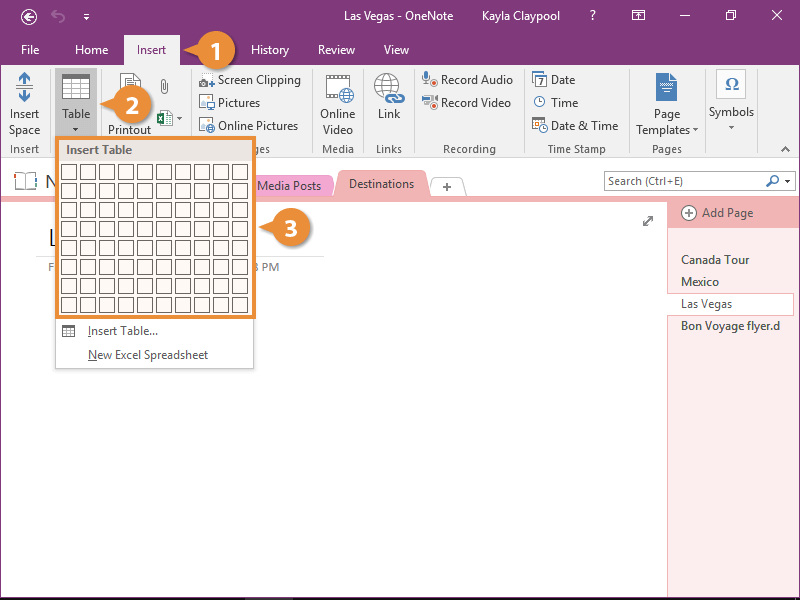
- Click in a table cell and type the table content.
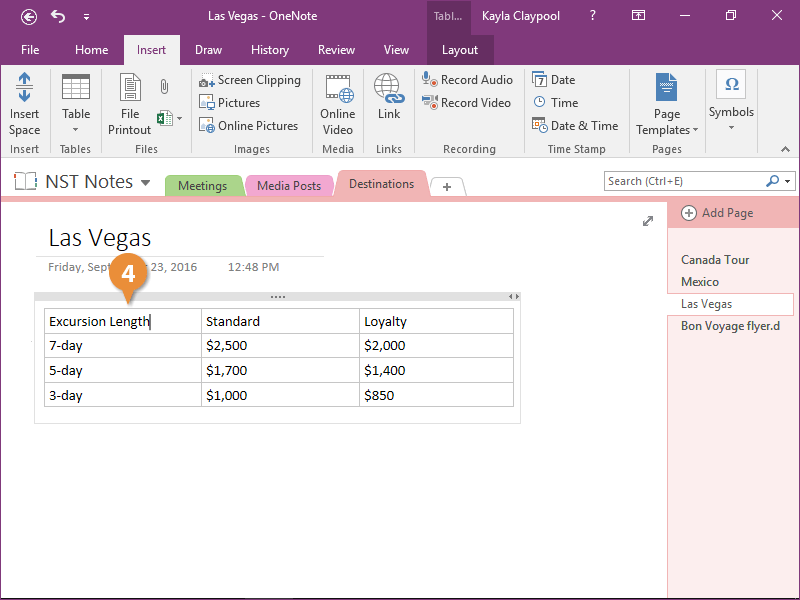
Insert Rows and Columns
Now that the table is populated, let's take a look at some ways to modify it.
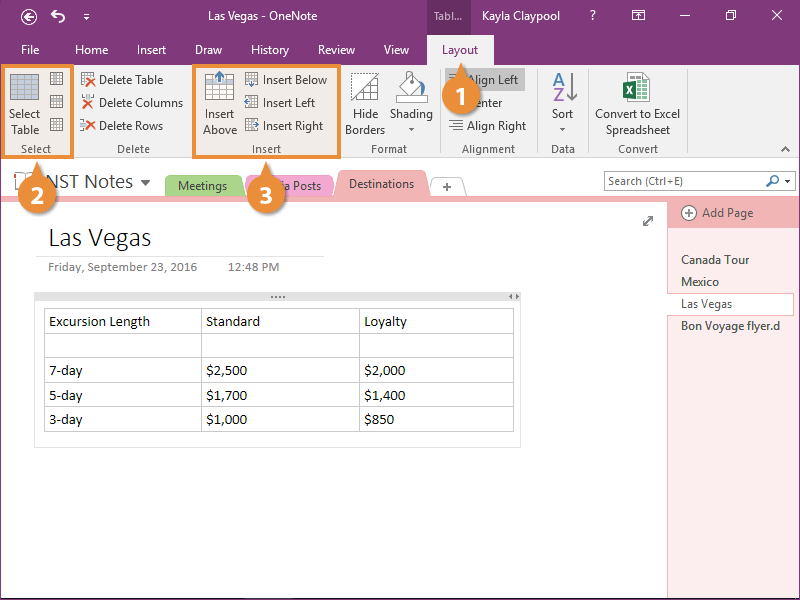
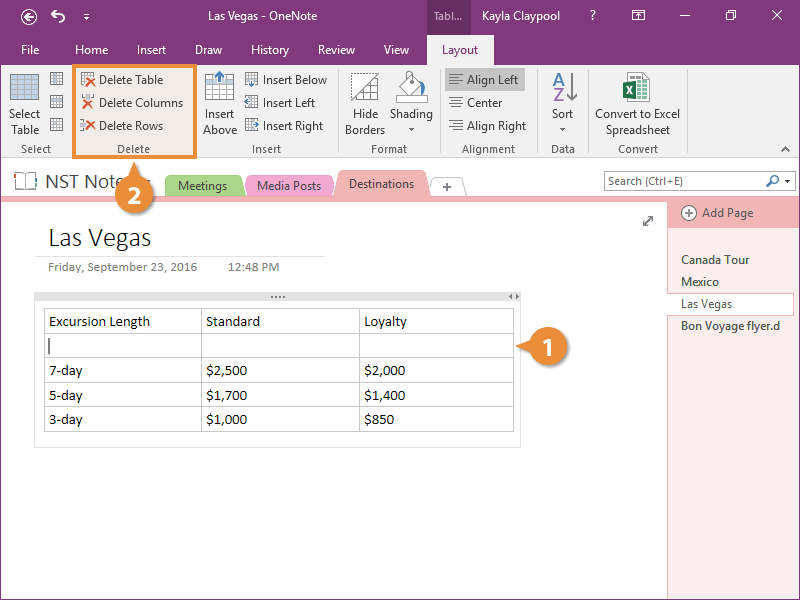
Delete Rows and Columns
If you decide you no longer need some cells, you can delete them.
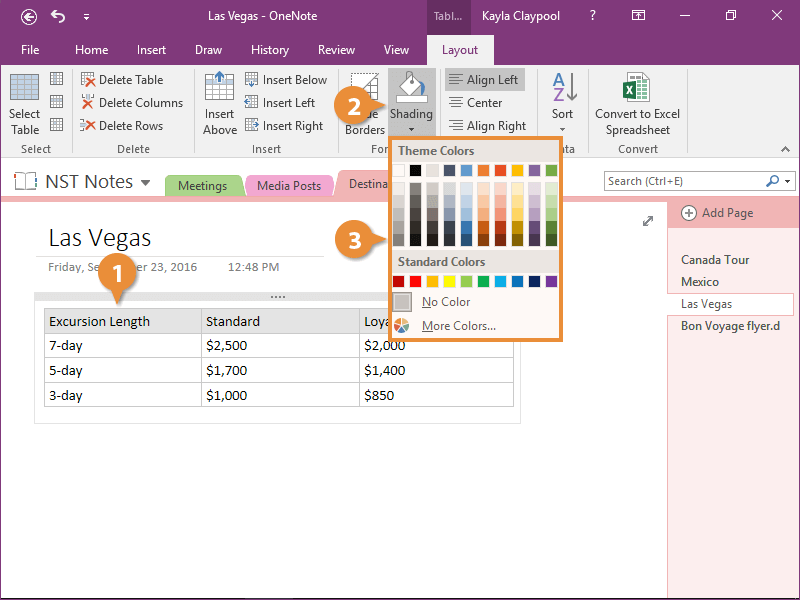
Apply Table Shading
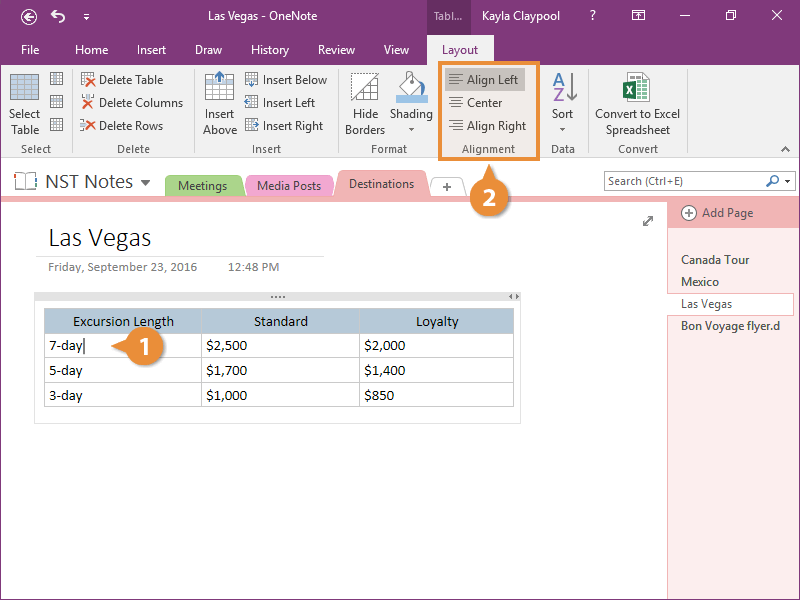
Align Table Content
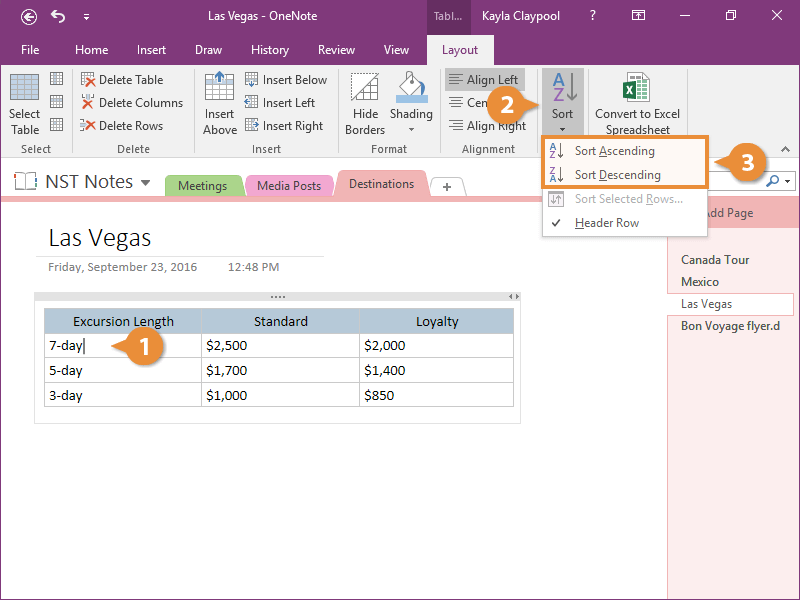
Sort a Table
In just a few simple steps, your notes are organized into a great-looking table.