
Interactive Tutorial
Onenote Section Groups
Group related sections together to keep large OneNote notebooks organized and easy to navigate
-
Learn by Doing
-
LMS Ready
-
Earn Certificates

Try this Course with a Free Trial

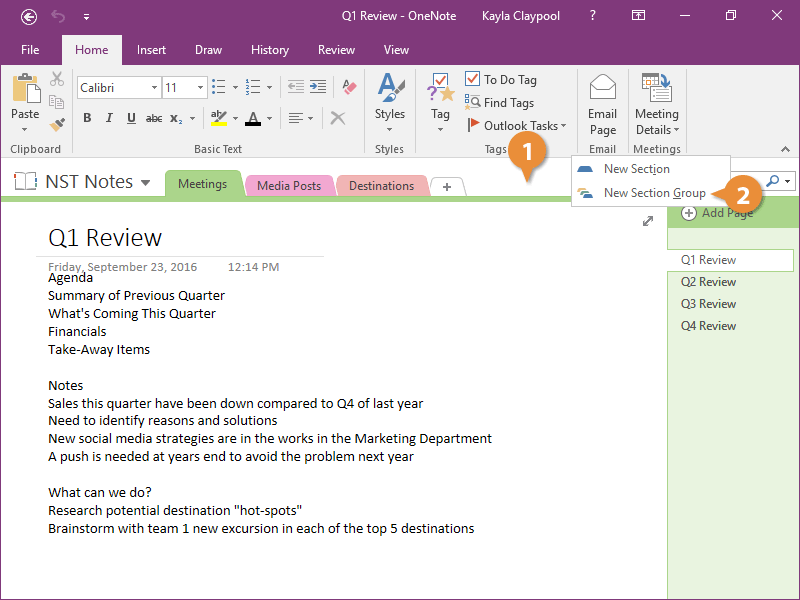
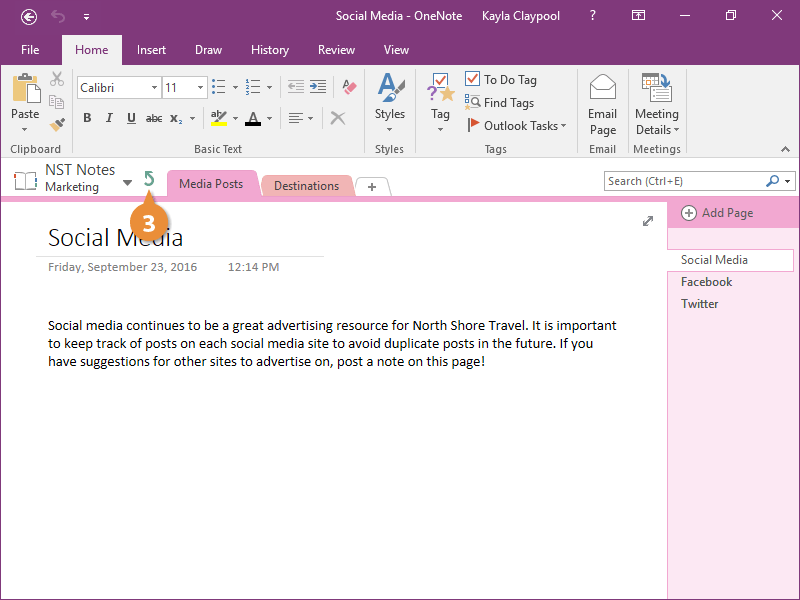
You can use section groups in OneNote to further organize sections. They allow you to group multiple, related sections together.
Add a Section Group
- Right-click in the blank space next to the current sections.
- Select New Section Group.
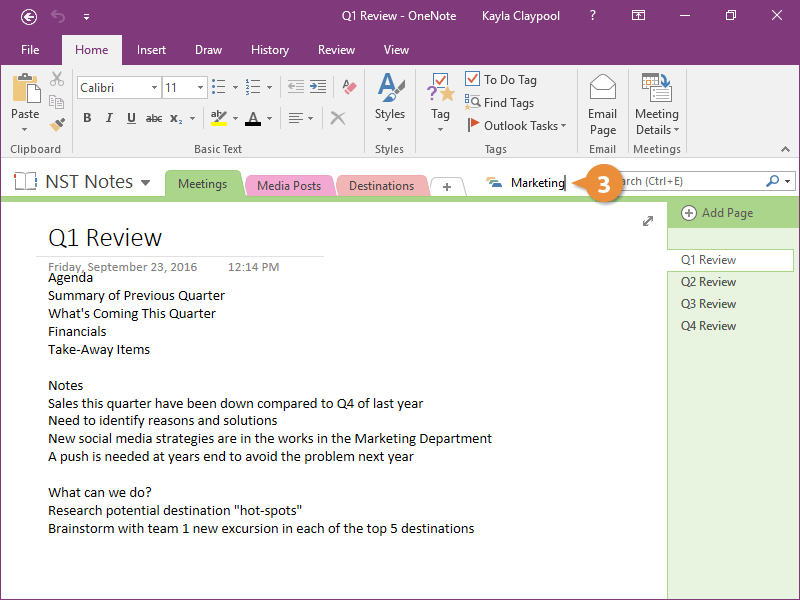
The group appears over on the right and you can just start typing to name it.
- Type a name for the group.
Add a Section to a Group
- Click a section tab and drag it over the section group.
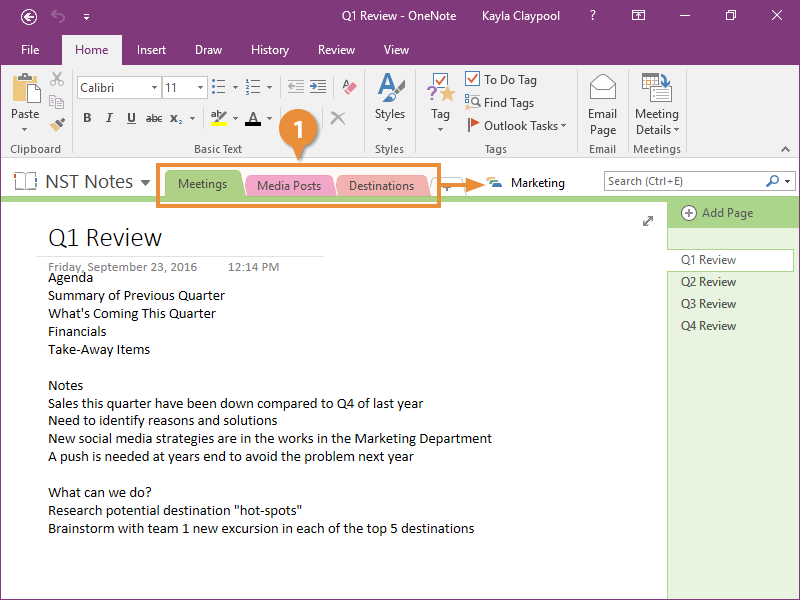
- Click the section group.
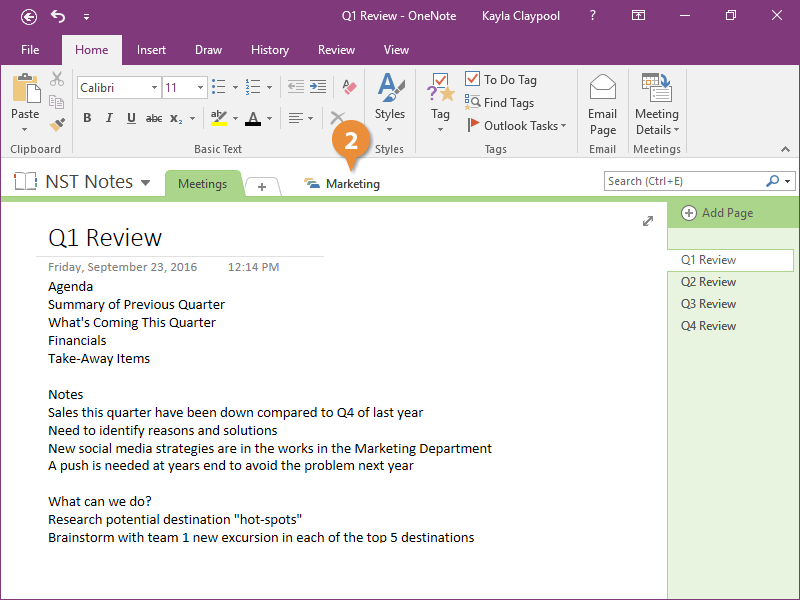
You know you are in a section group because the name appears below the notebook name to the left of the section tabs.
- Click the Navigate to the parent section group button.
Delete a Section Group
If you decide you no longer need your tabs grouped in a separate section, you can delete the section group.
- Navigate to the section group.

- Right-click any sections you want to keep.
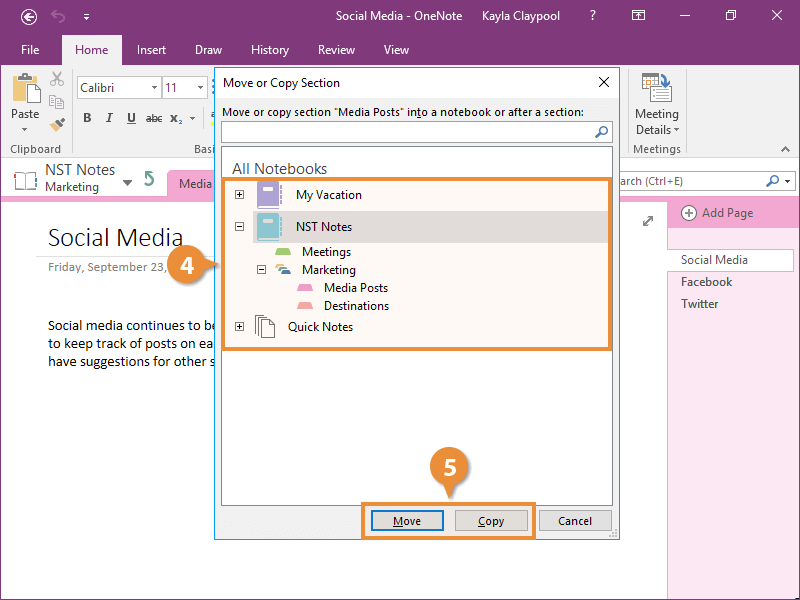
- Select Move or Copy.
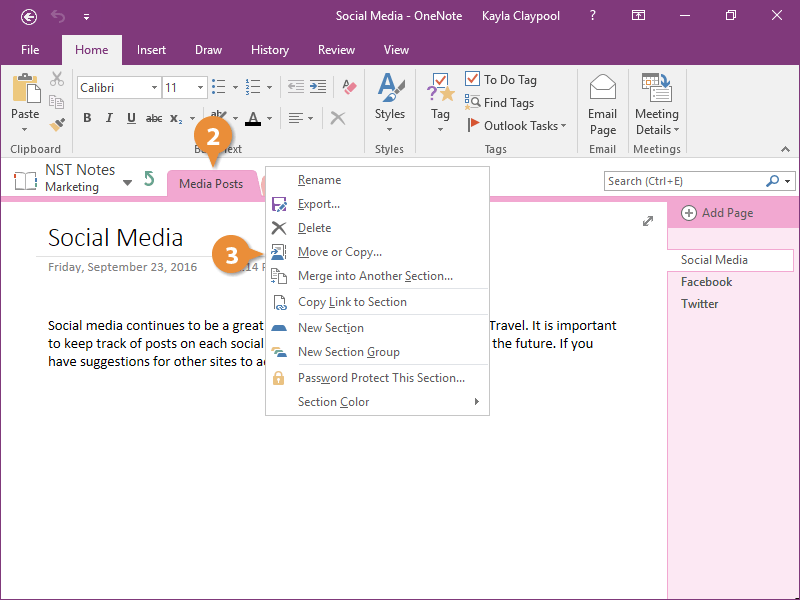
- Choose where to move the section.
- Click Move or Copy.
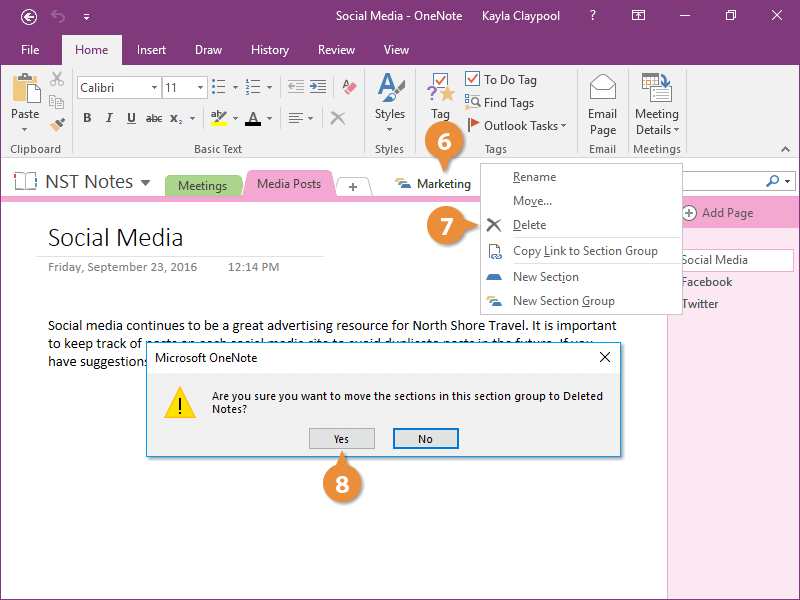
Once everything you still need is moved out of the section group, it can be deleted.
- Right-click the section group.
- Select Delete.
- Click Yes.
The section group is deleted.