
Interactive Tutorial
Microsoft Teams Tags
How to Manage Tags in Microsoft Teams
-
Learn by Doing
-
LMS Ready
-
Earn Certificates

Try this Course with a Free Trial
You can use Tags to easily communicate with a subset of a team. You can assign tags based on job titles, skills, location, or any other relevant attribute.
Create a Tag
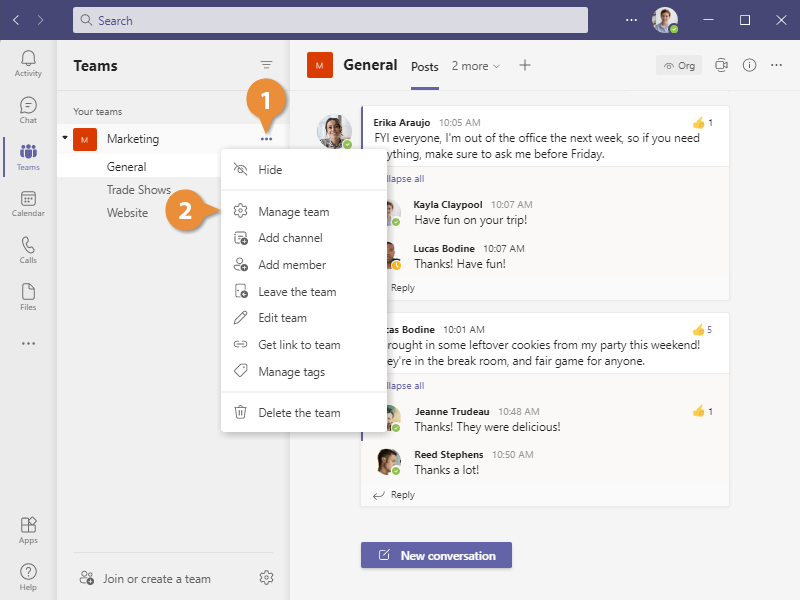
- Click a team's More Options button.
- Select Manage team.
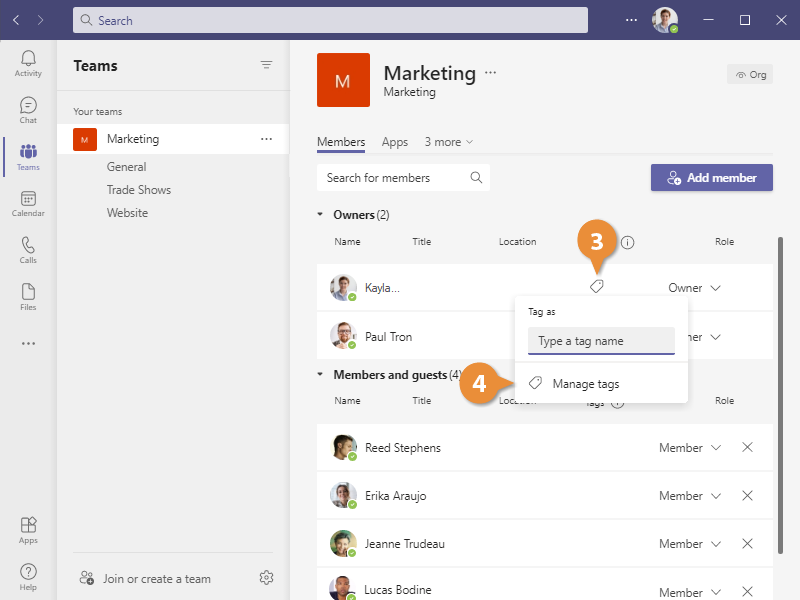
- Click the Add or remove tags button in a user's Tags column.
- Select Manage tags
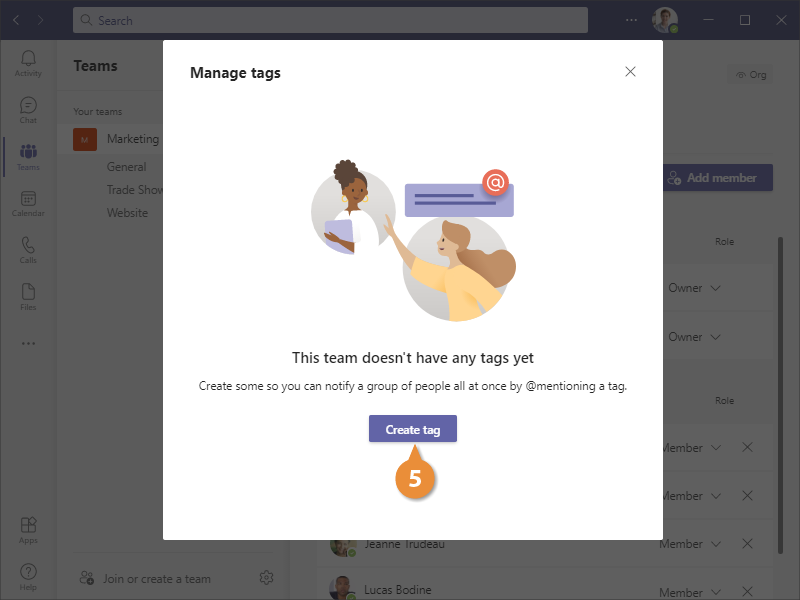
- Click Create tag.
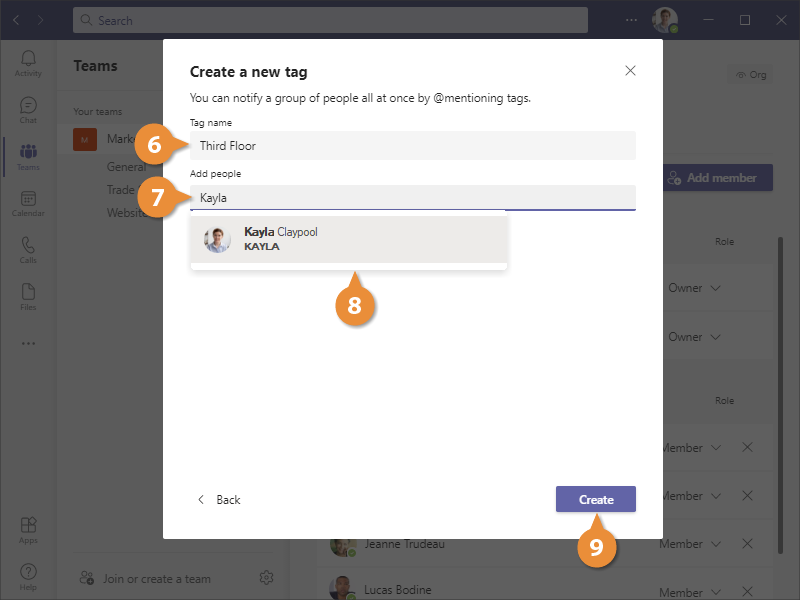
- Give the tag a name.
- Click in the Add people field.
- Enter a name (or names) for the tag to be applied to.
Here you can type the names of a few people who will have that tag assigned and select them from the suggestions.
- Click Create
The tag is created, and is listed in the Manage Tags screen. You can keep adding new tags here, or delete tags you no longer need.
Add a Tag to a User
Once a tag is created, its saved in a list and now you can easily assign it.
- From the Members tab of the Manage Team screen, click the Add or remove tags button in a user’s Tags column.
- Check a tag’s checkbox.
- Click Apply.
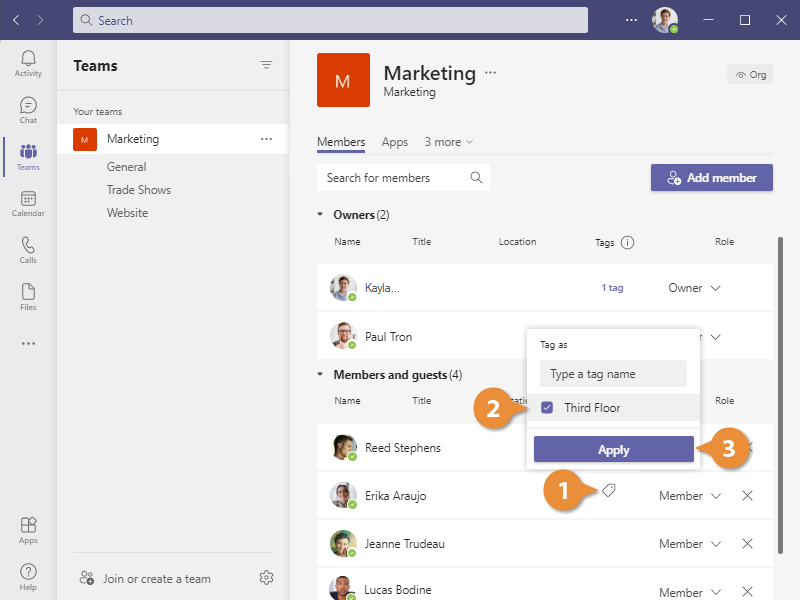
And the tag is added to the user.
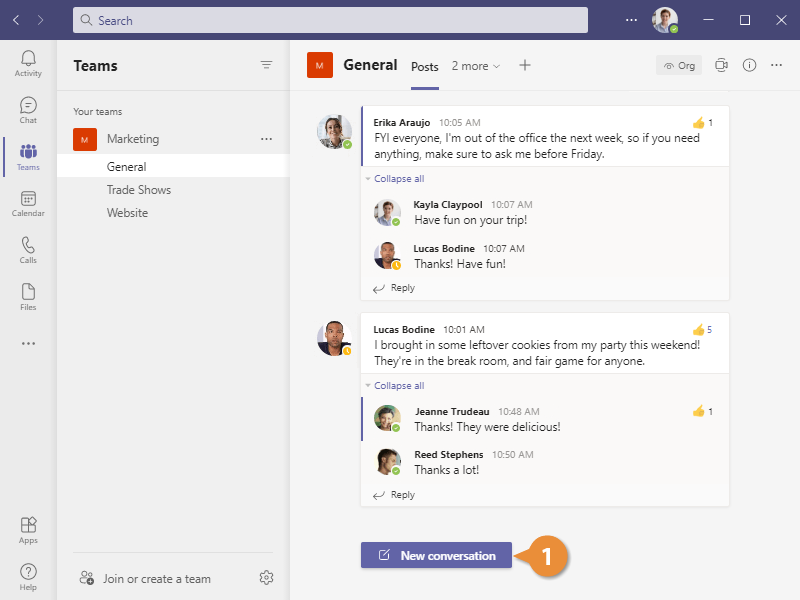
Mention a Tag
Now that you have created and assigned Tags within a team, now you can use it in a conversation.
- Click the New conversation button in a team channel.
- Type an @ symbol.
- Begin typing a tag’s name and select it from the suggestions list.
- When finished with the message, click Send.
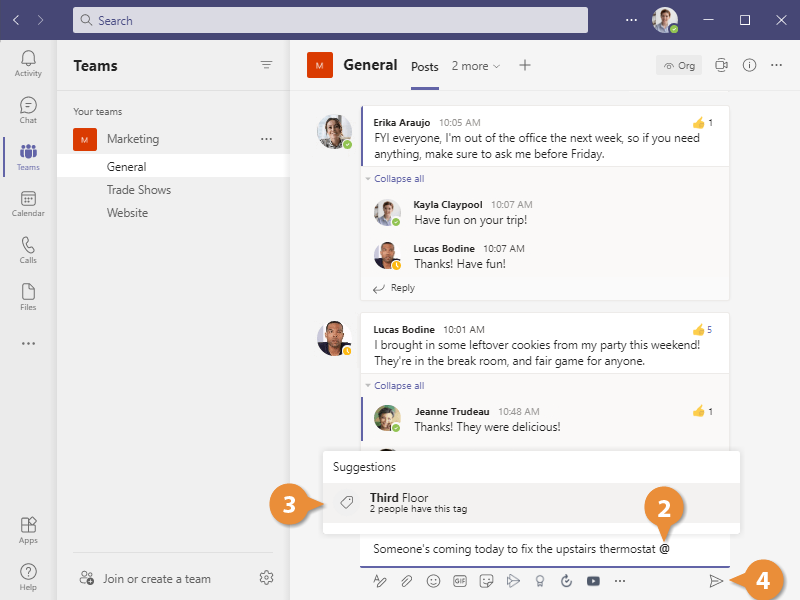
And everyone in the team with that tag will receive a notification.