Interactive Tutorial
Arrange Objects
Layer, Align, and Order Objects in Google Slides to Create Clean and Professional Layouts
-
Learn by Doing
-
LMS Ready
-
Earn Certificates

Try this Course with a Free Trial

You can easily arrange the various objects on a slide to fit your needs.
Rotate an Object
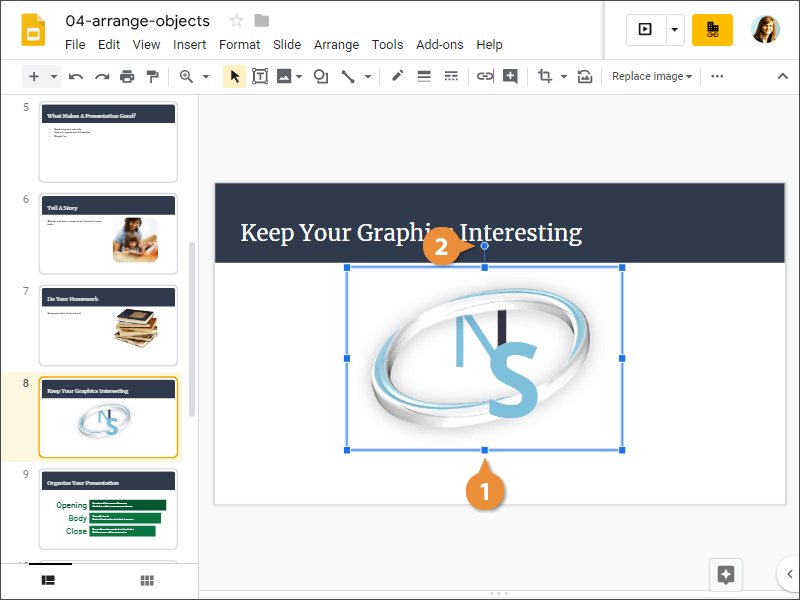
When you rotate an object, you turn it around its center. You can either rotate objects in 90-degree increments or use the rotation handle to freely rotate an object.
- Select an image.
- Click and drag the rotation handle.
Flip an Object
When you flip an object, you create a mirror image of it. Slides allows you to flip an object horizontally or vertically.
- With an object selected, click Arrange on the menu bar.
- Select Rotate.
- Select a flip option.
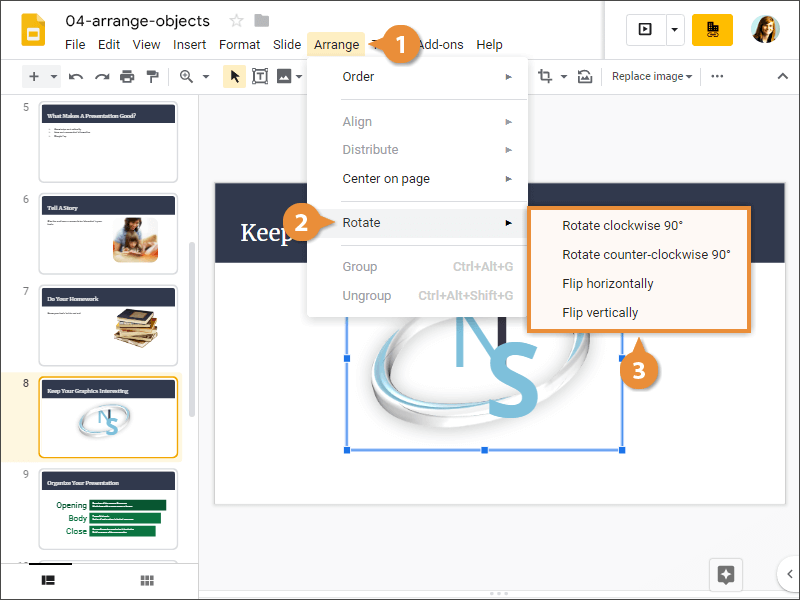
The object is flipped.
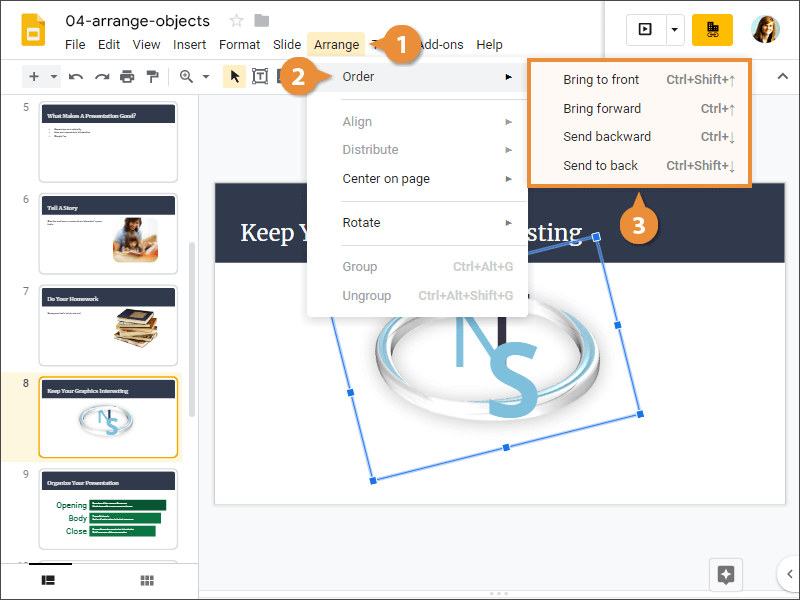
Bring Forward/Send Backward
You can also adjust the order in which stacked objects appear on a slide by bringing them forward or sending them backward.
- With an object selected, click Arrange on the menu bar.
- Select Order.
- Select a reorder option.
Group Objects
You can also group objects so they're treated as a single object and can be moved, rotated, and aligned as a unit.
- Select two or more objects.
- Click Arrange on the menu bar.
- Select Group.
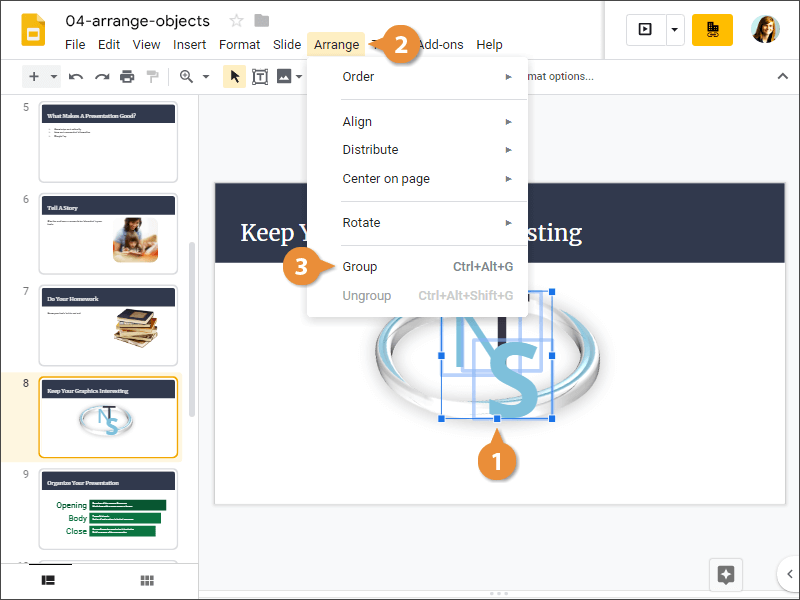
The objects are grouped and will be treated as a single object until you ungroup them.
Align Objects
- Select two or more objects.
- Click Arrange on the menu bar.
- Select Align.
- Select an alignment option.
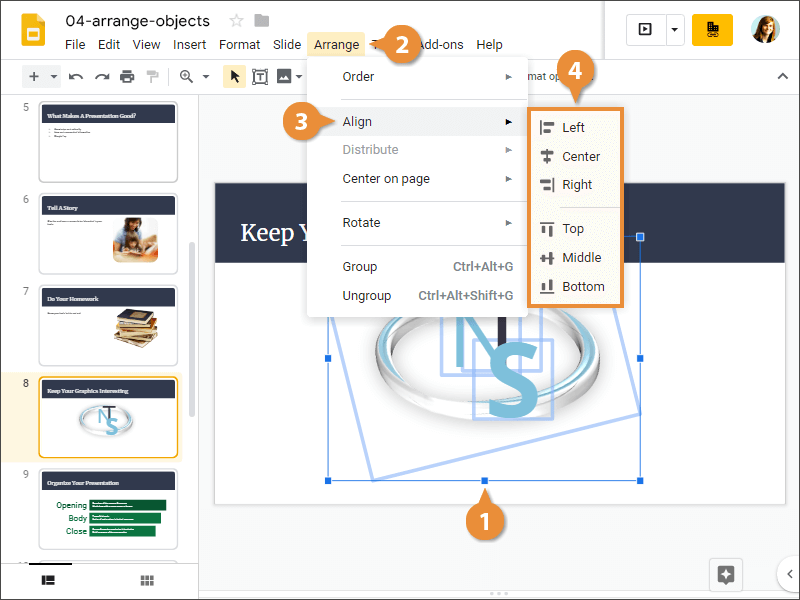
The objects are aligned as you specified.
You can rotate an object 90 degrees in either direction from here, or flip it.
In addition to the resizing handles that appear on the border, a rotation handle will appear just outside of the object.