
Interactive Tutorial
How to Insert Tables Into Google Slides
Add and Format Tables in Google Slides to Organize Data Clearly and Professionally
-
Learn by Doing
-
LMS Ready
-
Earn Certificates

Try this Course with a Free Trial

Insert a Table
- Select the slide you want to add a table to.
- Click Insert on the menu bar.
- Select Table.
- Click to specify the number of columns and rows.
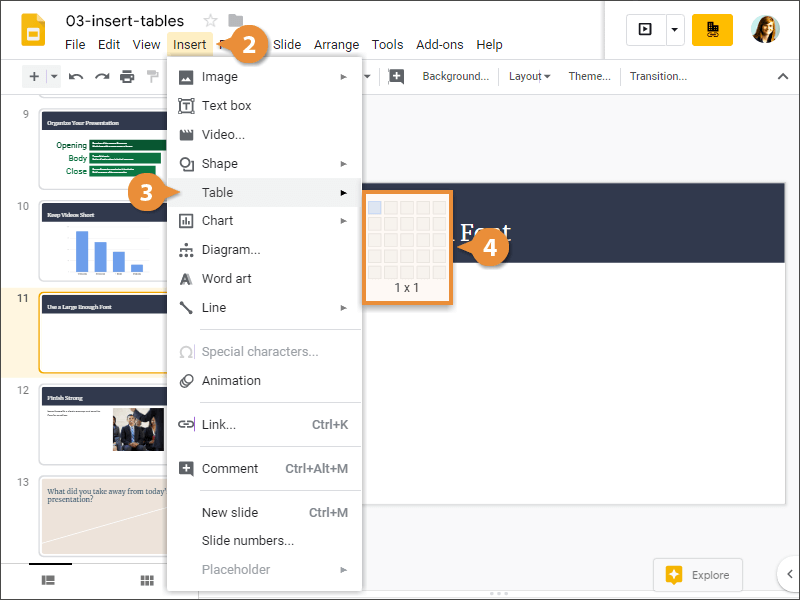
The table is inserted onto the slide.
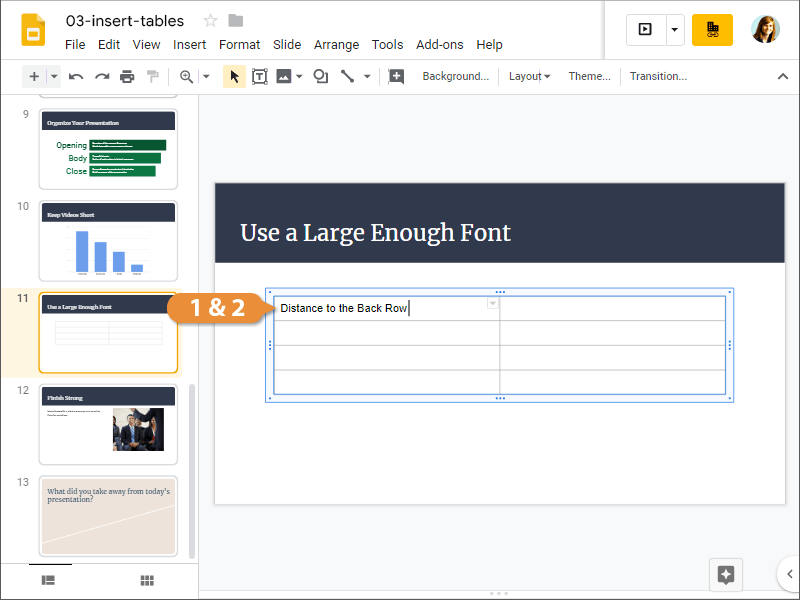
Enter Text into a Table
Now that the table is inserted, it's time to enter some text in it.
- Click in the cell you want to add text to.
- Type your text.
Insert a Row or Column
If you need to, you can easily add more rows and columns.
- Click in a cell next to where you want to add a row or column.
- Click Format on the menu bar.
- Select Table.
Here you see the 4 options for inserting rows and columns:
- Insert row above
- Insert row below
- Insert column left
- Insert column right
- Select an option to insert a row or column.
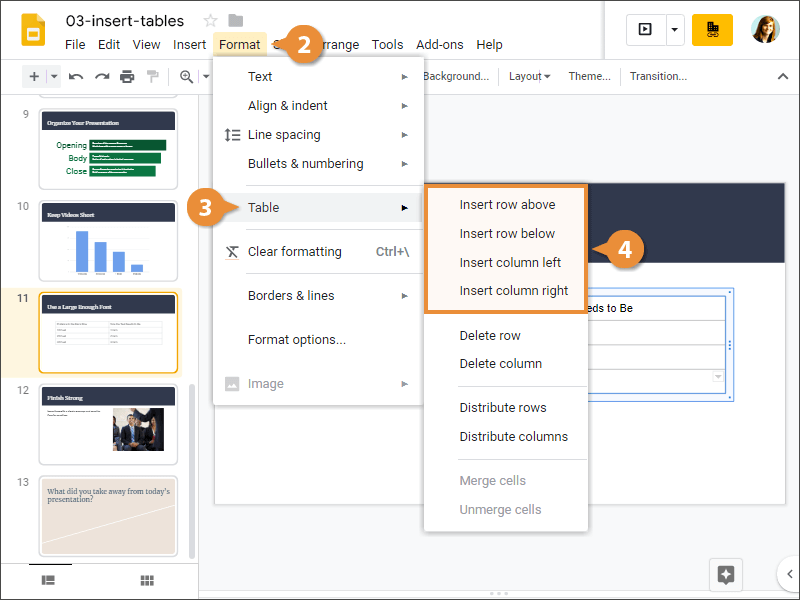
The new row or column is inserted.
Delete a Row or Column
If you later decide that you don't need a row or column, you can delete it.
- Click in a cell in the row or column you want to remove.
- Click Format on the menu bar.
- Select Table.
- Select an option to remove a row or column.
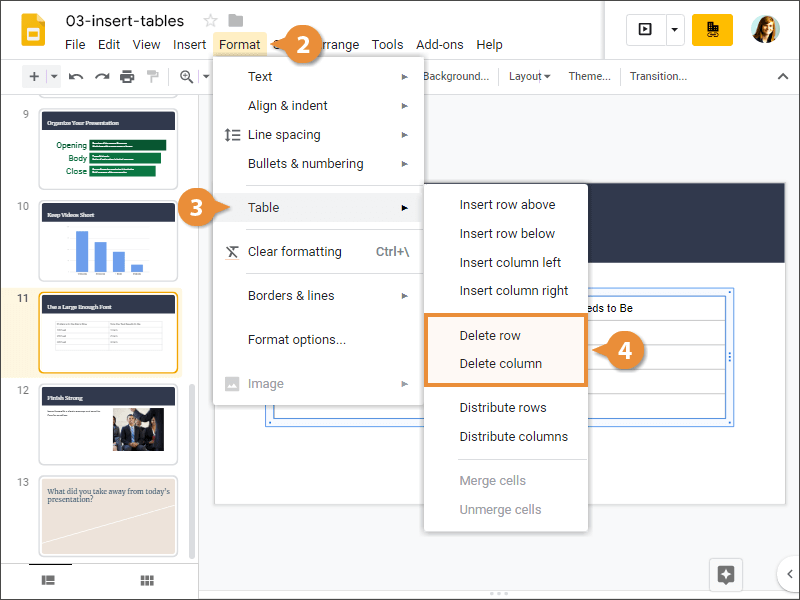
The selected row or column is deleted.