
Interactive Tutorial
Add or Remove Students in Google Classroom
Learn How to Add, Invite, or Remove Students in Google Classroom to Manage Your Class Effectively
-
Learn by Doing
-
LMS Ready
-
Earn Certificates

Try this Course with a Free Trial
Once your class is set up, you are ready to start adding students. There are a couple ways to add students to a class. You can either give students a code that they can use to join, or you can manually add people to the class.
Share a Class Code
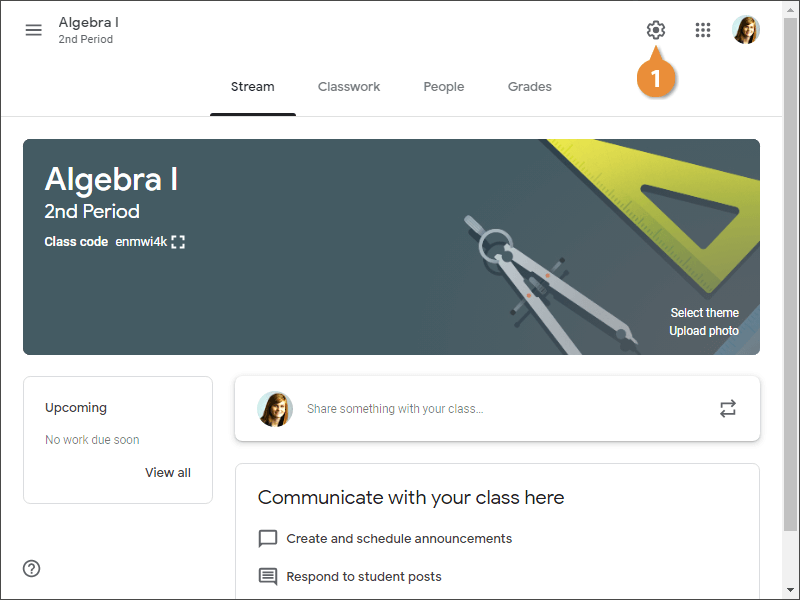
The first and easiest way to add students is by sharing the class code. You'll see the code near the top of the class Stream page, under the class name. This is fine if you want to copy it to send out, but it’s somewhat small for sharing on a projected screen. For that, you’ll want to display a larger version.
- Click the Settings button.
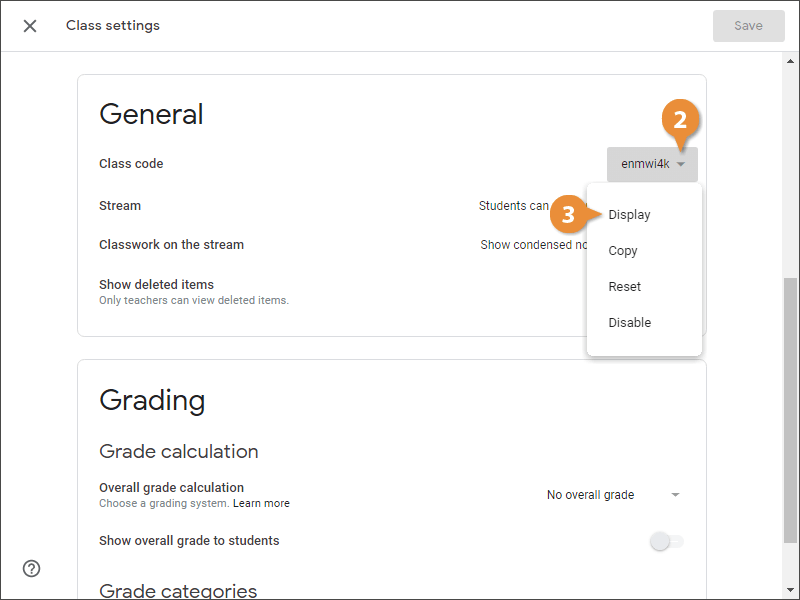
- Click the Class code list arrow.
This menu contains a few different options for working with the code:
- Display: You can display a large version of the code on a projected screen that’s easy for students to read.
- Copy: You can copy the code to send in a message.
- Reset: You can reset the code if maybe the code generated has some unfortunate letter and number combinations.
- Disable: You can disable the code at any time. You may occasionally have students trying to be funny and joining classes they aren't supposed to be in.
- Select Display.
The class code appears enlarged on the screen.
- (Optional) Click the Full screen button.
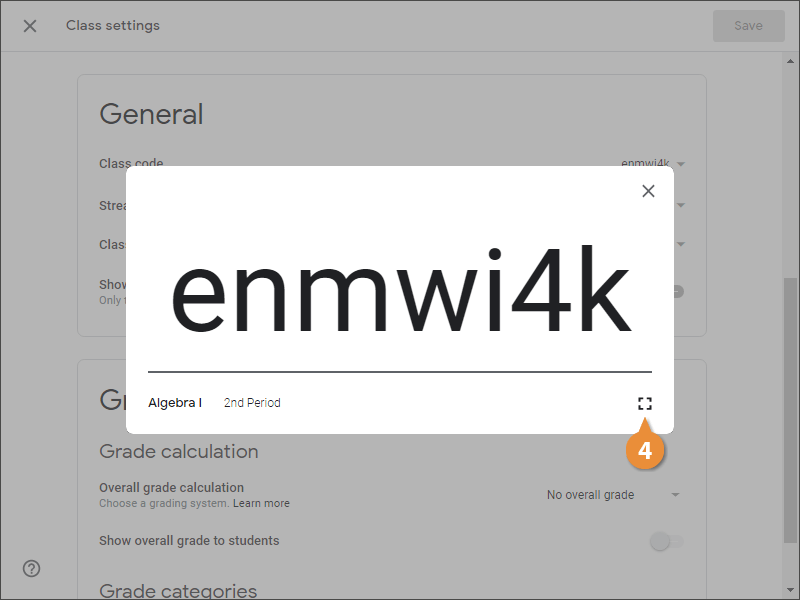
You can now display this screen for the class. Students need to navigate to the Join class screen in their Google Classroom and enter the code. Then they are instantly added to the class. For large, co-located classes, this is the fastest method for adding students.
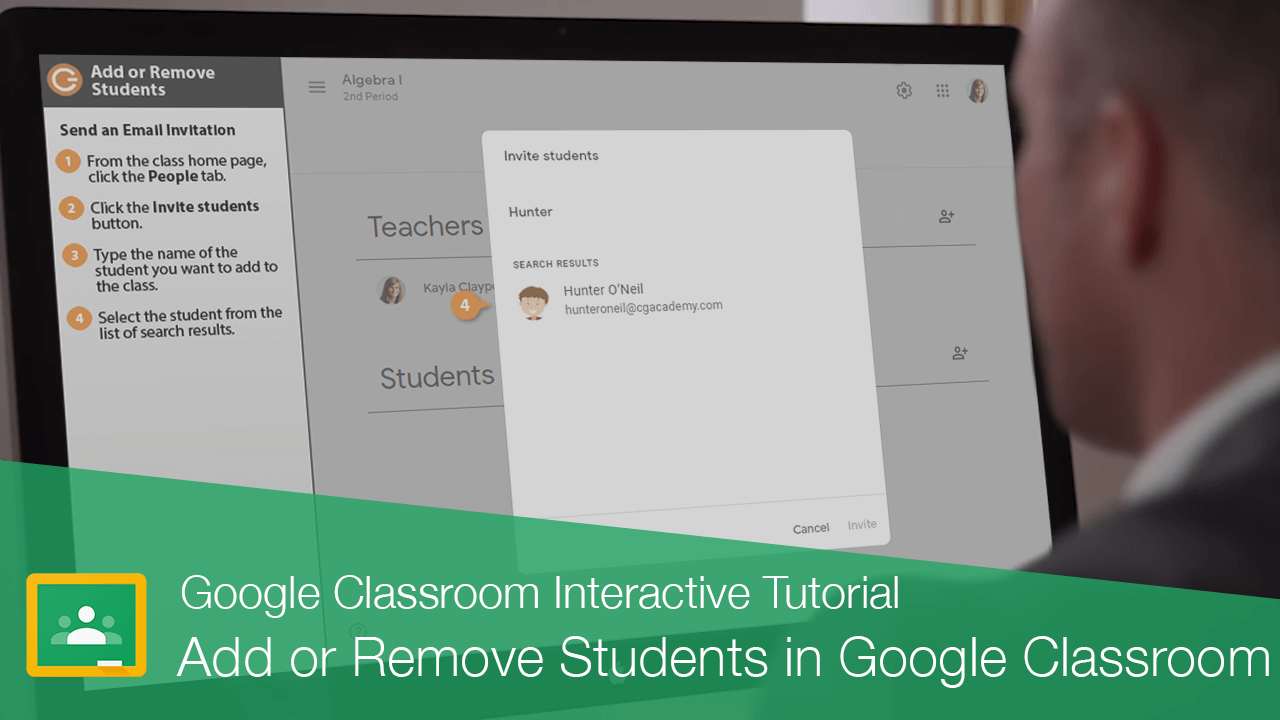
Send an Email Invitation
You may also invite students to a class by sending out an email invitation.
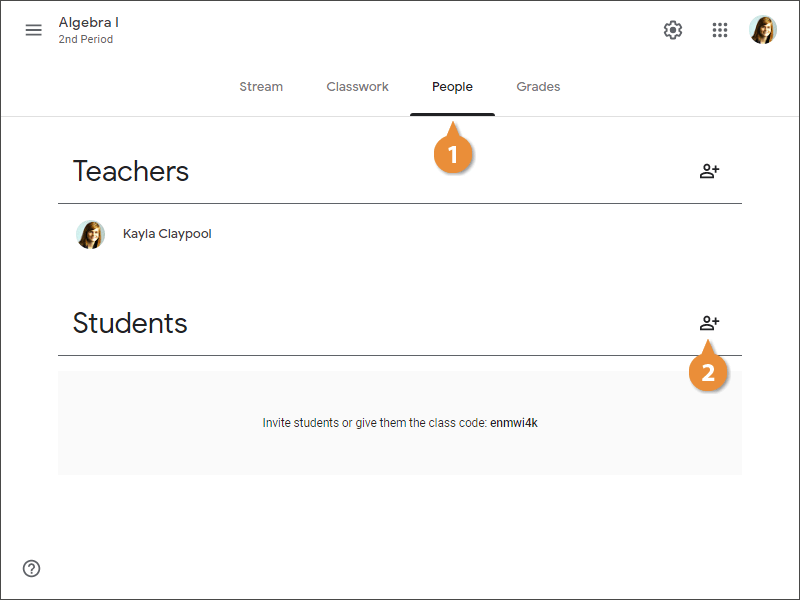
- Click the People tab.
- Click the Invite students button.
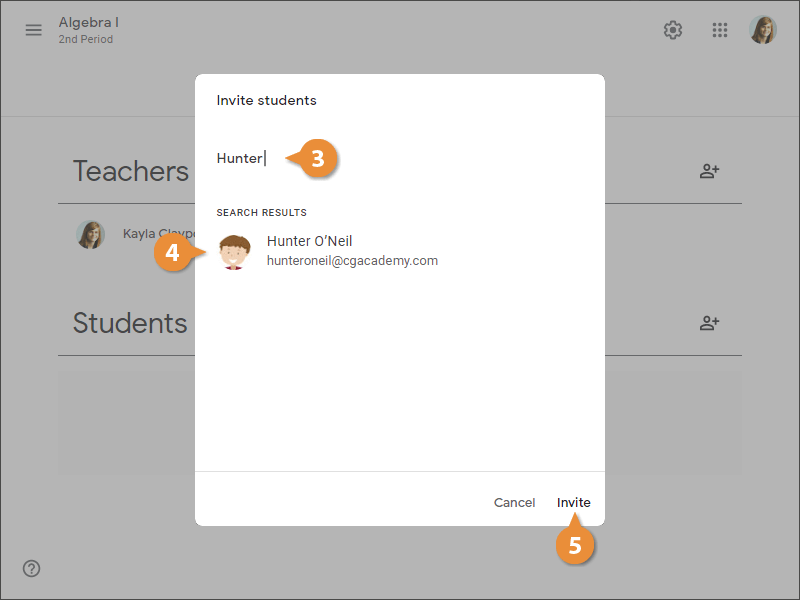
- Type the name of the student you want to add to the class.
You could also use a Google Groups email alias to invite a group of students. You don’t need to be the owner of the group, but you need to have permissions to view the group members and their email addresses in order to invite groups of students.
- Select the student from the list of search results.
- Click Invite.
The student receives an email that they have been invited to join the class. They'll also see the class when they log in to Classroom, and they can click join from there as well. Until the student joins the class, they appear greyed out in the students list.
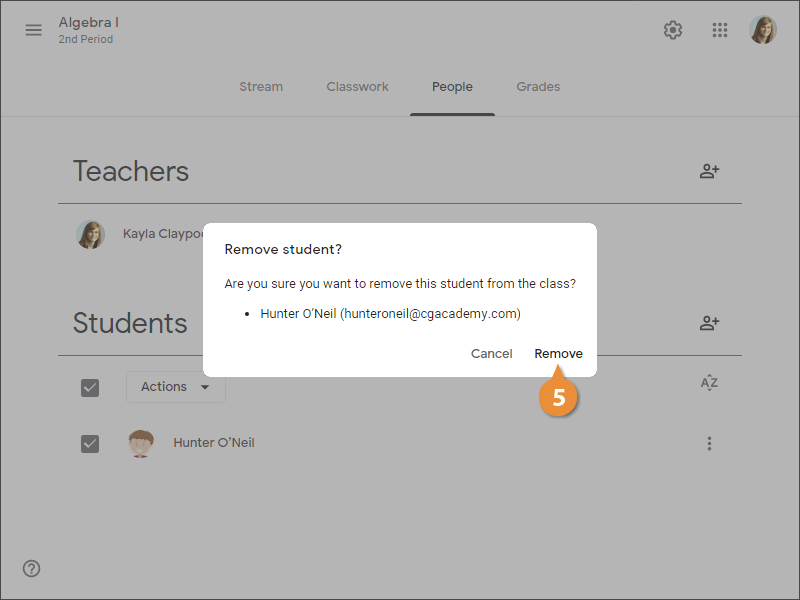
Remove Students from a Class
If you ever need to remove a student—perhaps they drop your class or move away, you can do it with just a few clicks.
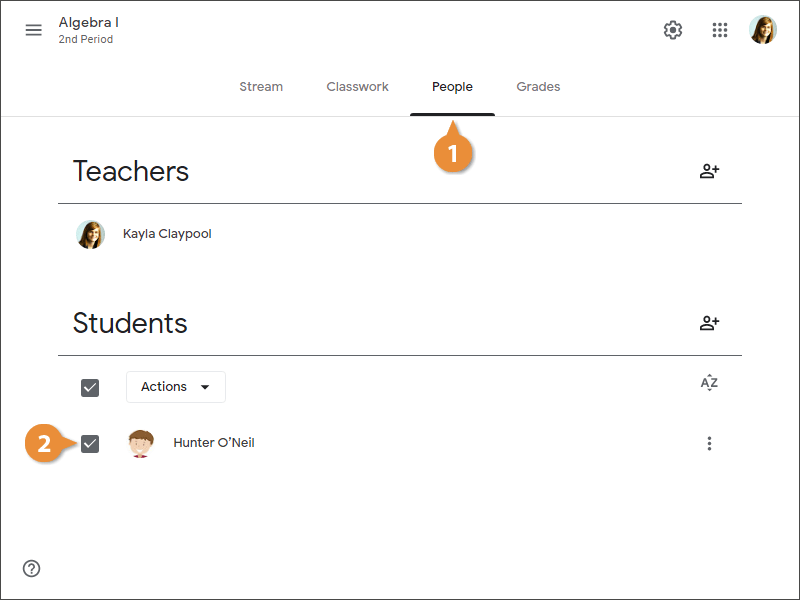
- Click the People tab.
- Select the check box for the student you want to remove.
You can select more than one student at a time, if needed.
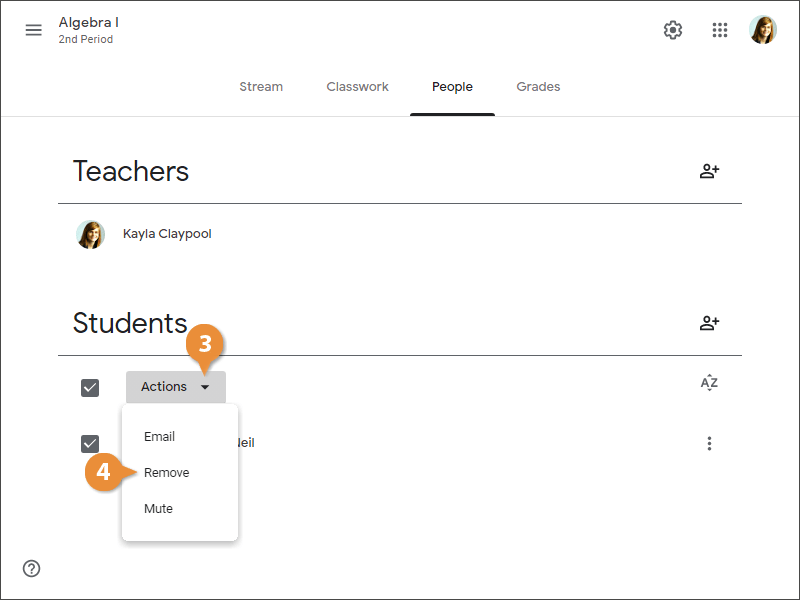
- Click the Actions list arrow.
- Select Remove.
The dialog box asks if you're sure you want to remove the student from the class.
- Click Remove.
The student is removed from the class. Their classwork remains in class folders and their posts remain on the class stream. If you want to remove those as well, you will have to manually delete them.