Interactive Tutorial
How to Filter Emails in Gmail
Use Gmail Filters to Automatically Sort, Label, and Manage Incoming Emails for Better Organization
-
Learn by Doing
-
LMS Ready
-
Earn Certificates

Try this Course with a Free Trial
Filters are a way to help you organize incoming email. By creating a filter, you can trigger certain actions when an incoming email meets the requirements you set.
Create a Filter
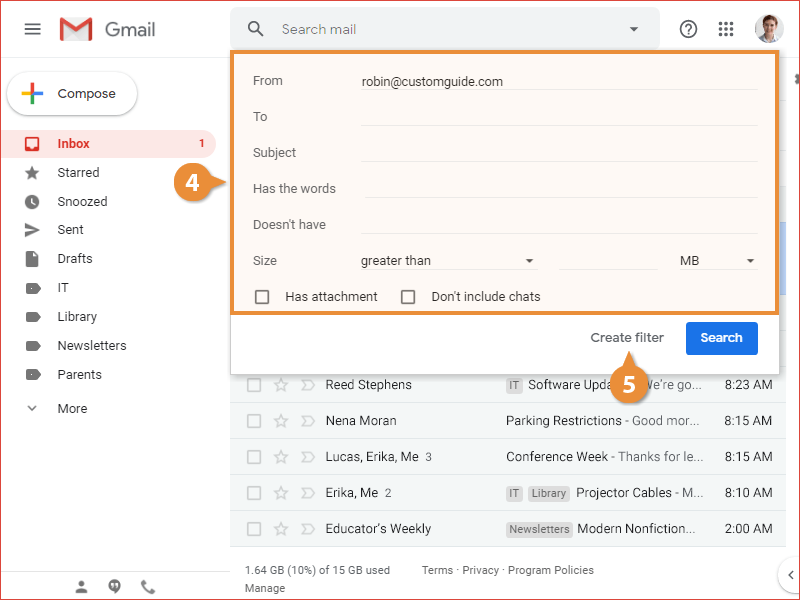
- Click the Show search options button in the Search field.
- Set up search criteria that the filter will be based on.
- Click Create filter.

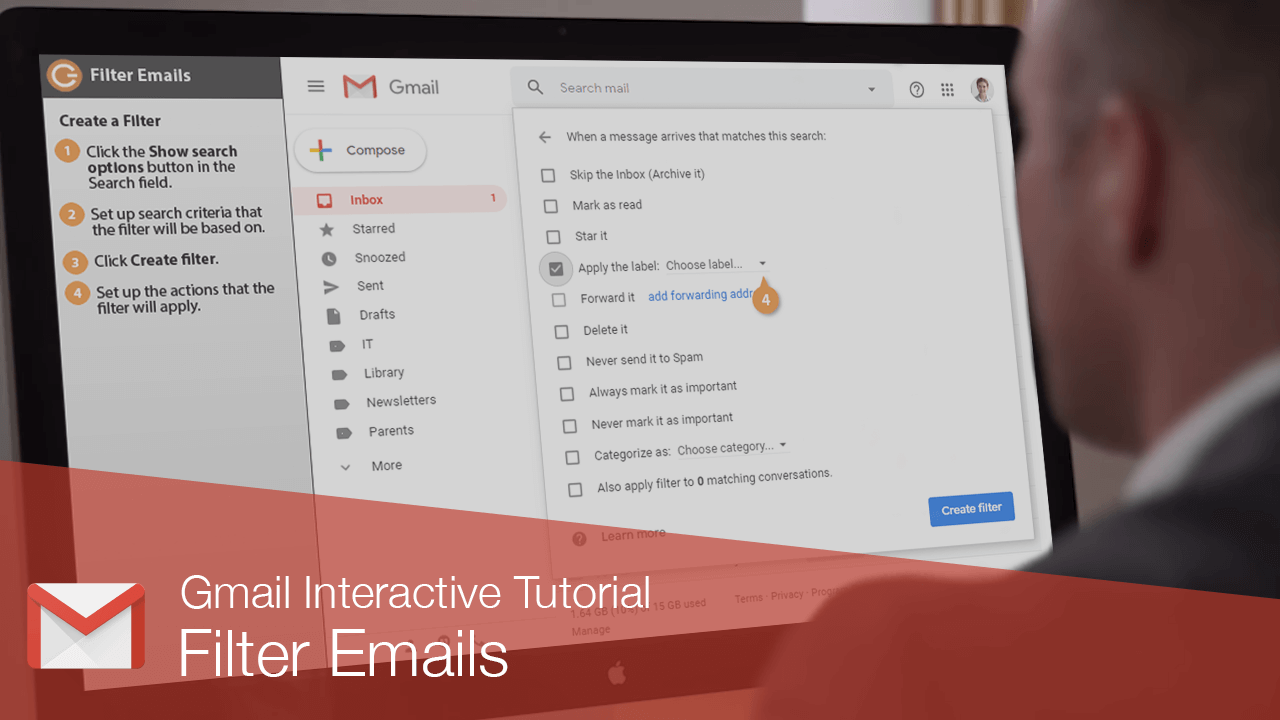
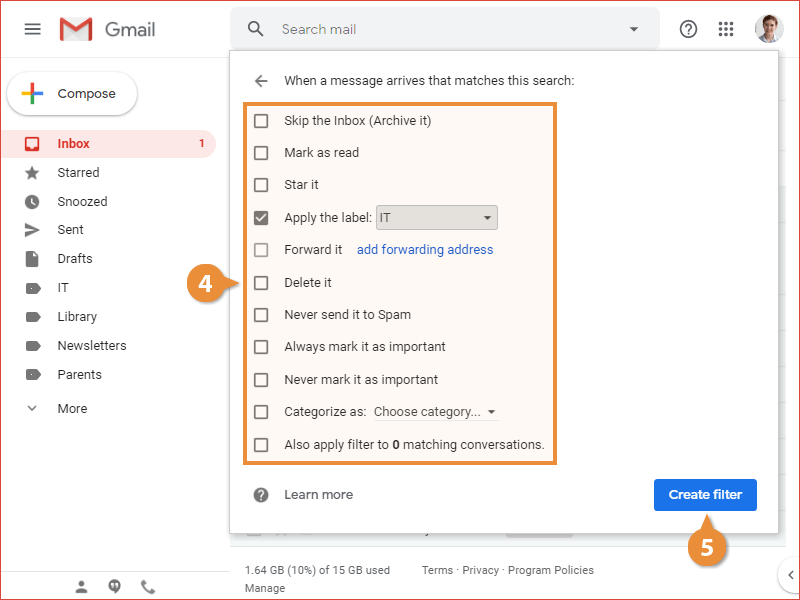
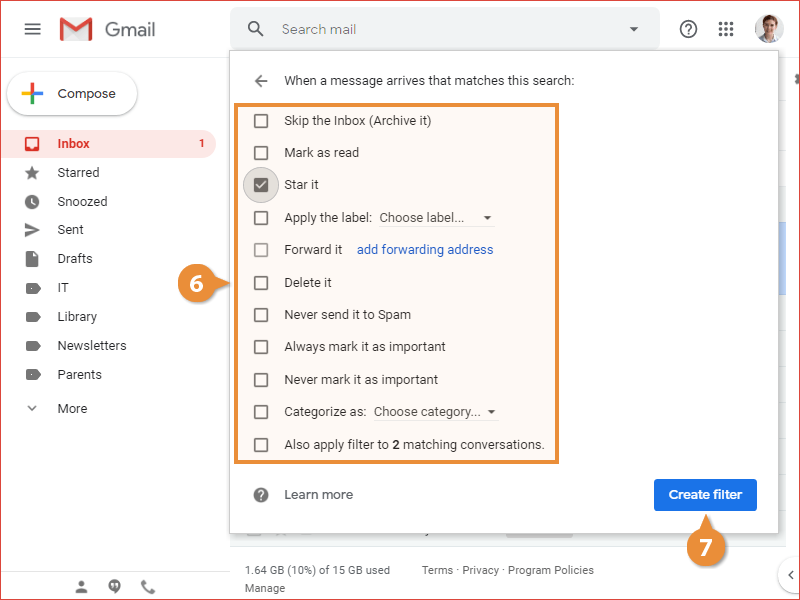
A list of actions appears, where you can choose one or more actions to apply to email messages that match the criteria you set.
- Set up the actions that the filter will apply.
- Click Create filter.
The filter is created, and all email messages that meet the criteria you set will have the actions you selected applied automatically.
Create a Filter Using Example Email
You can create an email filter based on an email you’ve already received. This will start a new filter with the first criteria, the From field, already filled in.
- Select the email(s) you want to base a filter on.
- Click the More actions button on the toolbar.
- Select Filter messages like these.
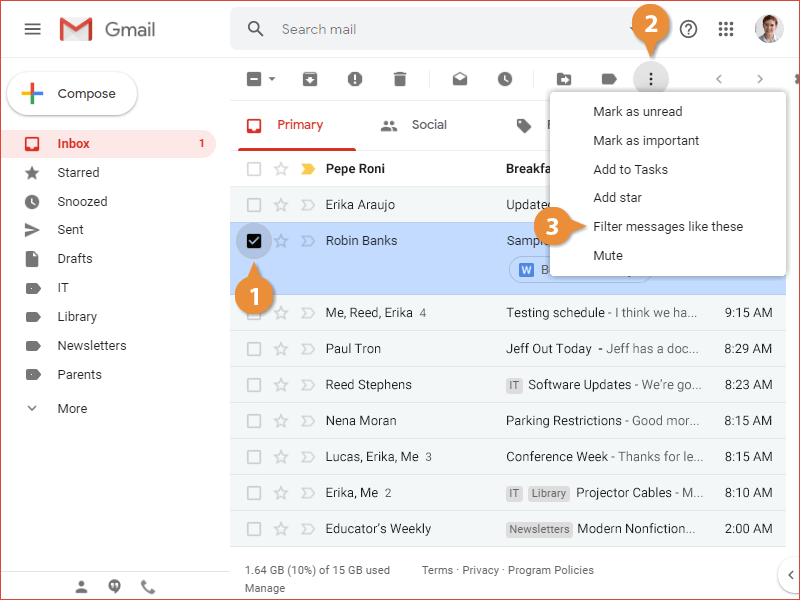
A new filter is started with the From field filled in with the sender of the selected email.
- Set up any additional search criteria you need.
- Click Create filter.
- Set up the actions that the filter will apply.
- Click Create filter.
The filter is created and will be applied to new email messages that you receive.
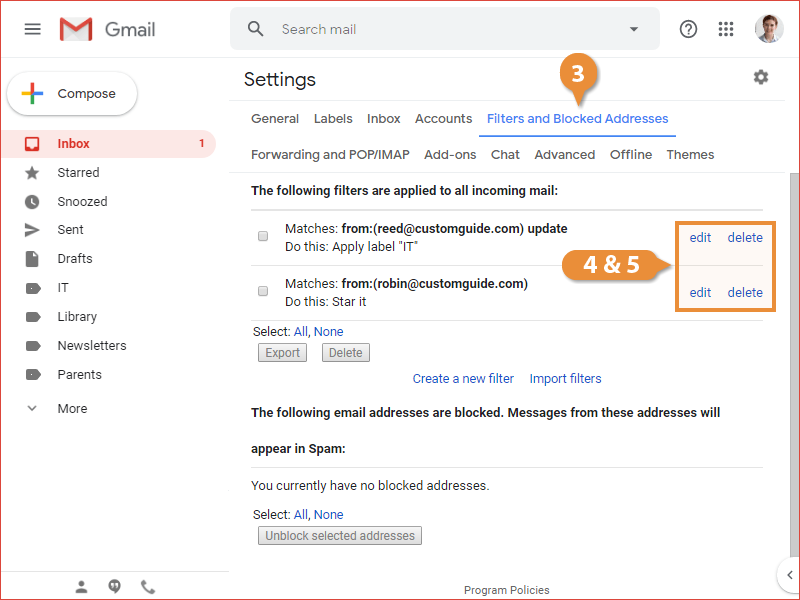
Manage Filters
Once you’ve created some filters, you can always go back and edit or remove them.
- Click the Settings icon on the toolbar.
- Select Settings.
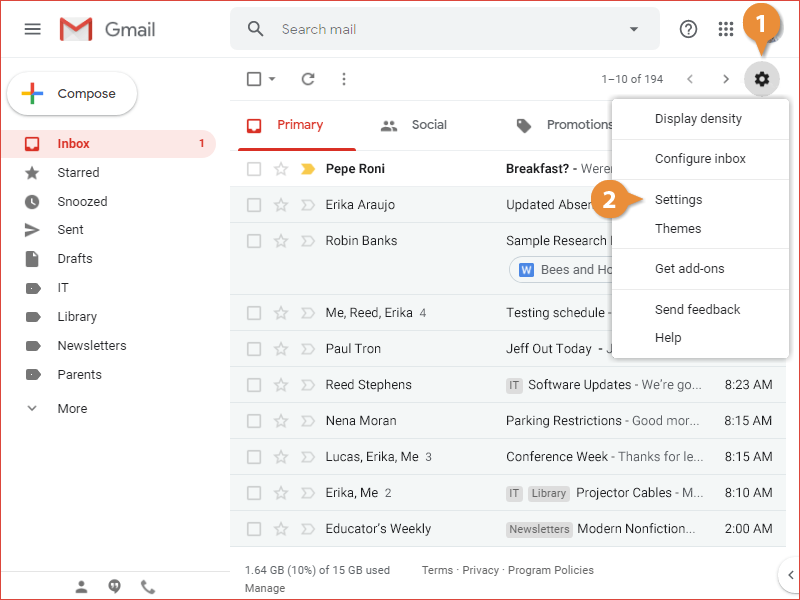
- Click the Filters and Blocked Addresses tab.
This Settings page displays all of the filters that you’ve created.
- Click a filter's Edit button to edit its settings (optional).
- Click a filter's Delete button to remove it (optional).