Interactive Tutorial
How to Create a Label in Gmail
Create and Manage Labels in Gmail to Categorize Emails and Improve Inbox Organization
-
Learn by Doing
-
LMS Ready
-
Earn Certificates

Try this Course with a Free Trial

If you've used other email services, you may have used folders to organize your inbox. You could move emails into a folder manually, or by creating a filter to automatically sort everything that came in.
Labels in Gmail are similar to folders, allowing you to manually or automatically sort your email. Just like folders in other email services, your labels will be listed in the left pane, allowing you to click a label to view all of its emails. Unlike folders, however, you can apply multiple labels to a single message, allowing you to effectively keep it in several places at once.
Create a Label
- Click the More link in the left pane.
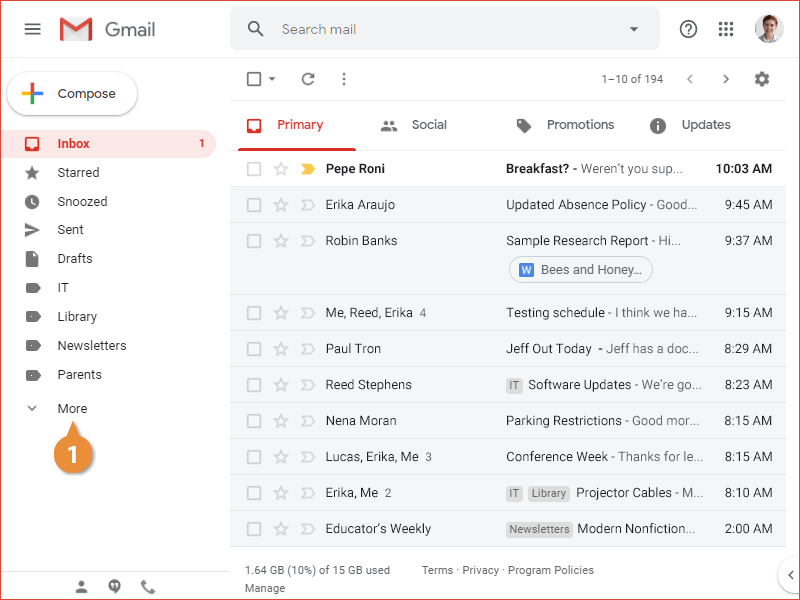
The left pane expands, showing more categories and options.
- Click Create new label.
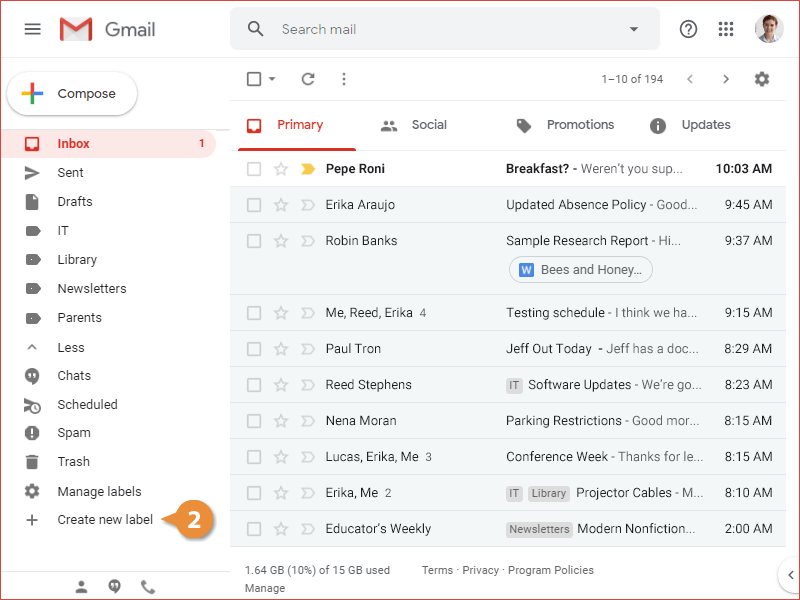
The New Label dialog box appears.
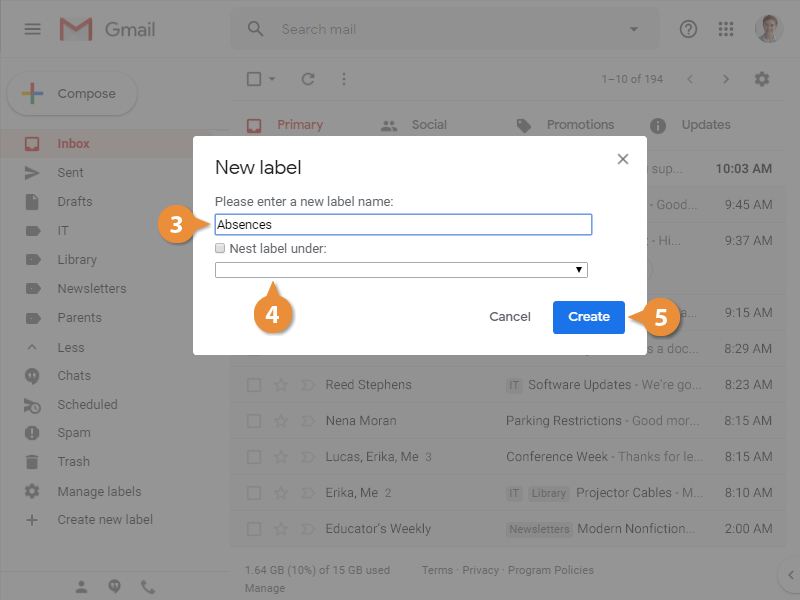
- Give the label a name.
- Choose another label to nest this label under (optional).
You don’t need to nest labels, but it can be useful if you want to subcategorize email.
- Click Create.
The label is created and can be applied to email messages.
Apply a Label to an Email
You can apply one or more labels to an email to categorize it.
- Select an email.
- Click the Labels button on the toolbar.
A menu appears, listing all of the labels you've created so far. You can also create a new label directly from this menu, if you don't have one that fits.
- Select the labels you want to apply.
- Click Apply.
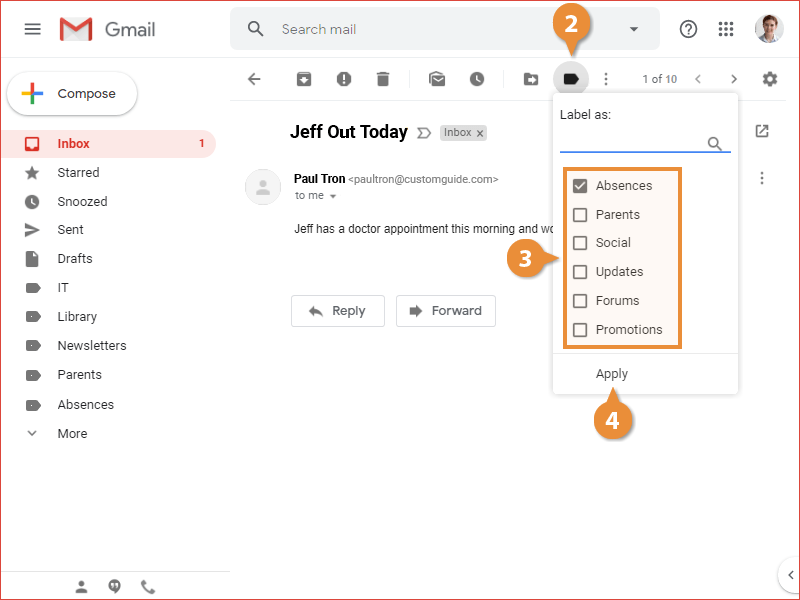
The label is applied to the email message, appearing as a tag next to the subject.