The graphics and objects inserted in your workbooks have properties you can update to control how they behave. You can also add alt text so your spreadsheet is accessible for individuals with difficulties reading text and graphics on screen.
Once an object is inserted, you can adjust its properties to control how the object is moved and sized, whether it prints, and if its locked.
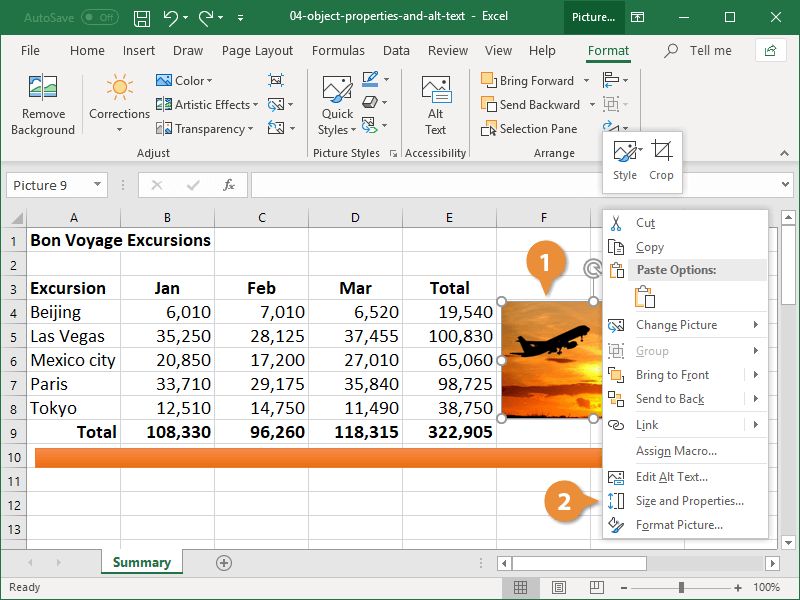
- Right-click an image.
- Select Size & Properties.
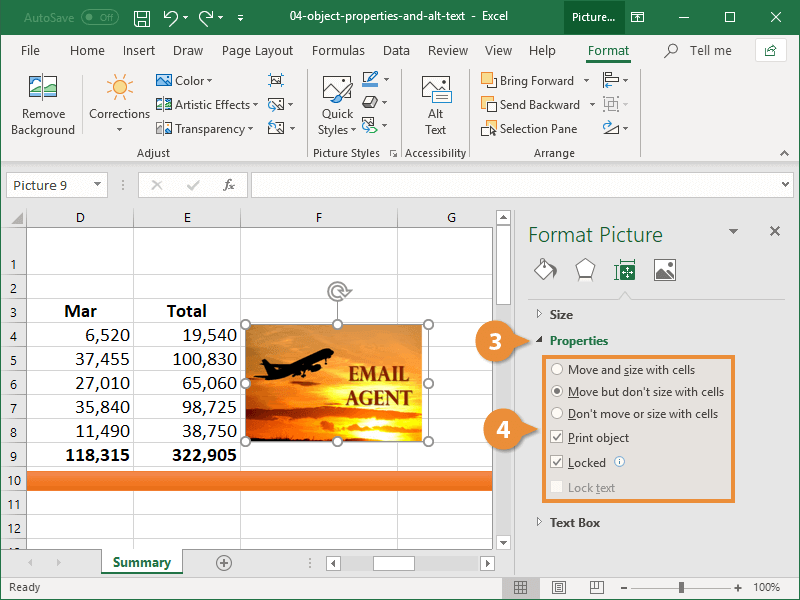
The Format Picture pane appears at the right.
- Expand the Properties heading.
- Select a Properties option.
- Move and size with cells: If you resize cells around the object, it will move along with the cells. When you resize cells the object covers, it stretches with them.
- Move but don’t size with cells: If you resize cells around the object, it will move along with the cells. When you resize from the Format tab, it won't stretch with them.
- Don’t move or size with cells: The object will remain the same size and in the same position when the cells around it are resized.
Alternative text is used by screen reading programs to describe a picture, chart, or graphic to a user who may have difficulty seeing it.
If your spreadsheet might be viewed by someone who relies on a screen reader, make sure that every image includes alternative text so that they can have a fuller understanding of its content.
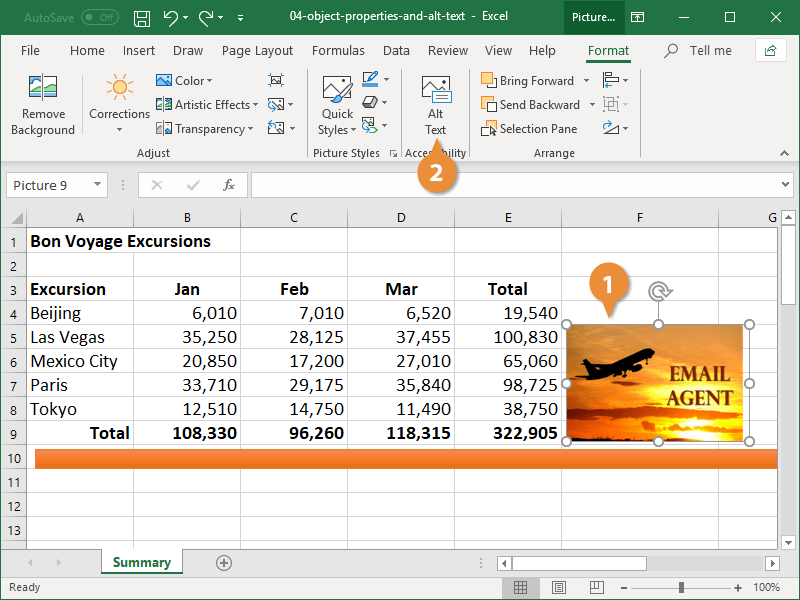
- Select the image.
- Click the Alt Text button on the Format tab.
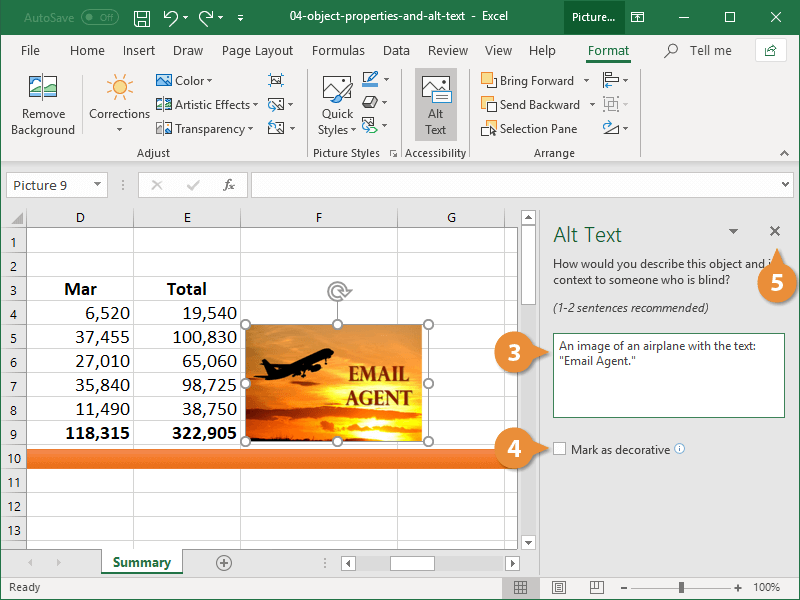
The Alt Text pane opens, where you can enter a description of the image.
- Enter a description in the Description field.
A good description will start general and become specific. For example, “An image of an airplane with the text ‘Email Agent'."
- (Optional) Check the Mark as decorative check box.
This will instruct the screen reading software to describe it as decorative, and you won't need to write alt text for it.
- Close the Format Picture pane when you're finished.
Now, when a screen reader comes to this image, the title and description will be read aloud.


