
Interactive Tutorial
Document Properties Excel
Learn How to View and Edit Document Properties in Excel to Manage File Details and Metadata Effectively
-
Learn by Doing
-
LMS Ready
-
Earn Certificates

Try this Course with a Free Trial
Document properties are bits of information that describe and identify a workbook, such as a title, author name, subject, and keywords in the workbook.
View Document Properties
Here’s how to view a workbook’s properties...
- Click the File tab.

- Click Info.
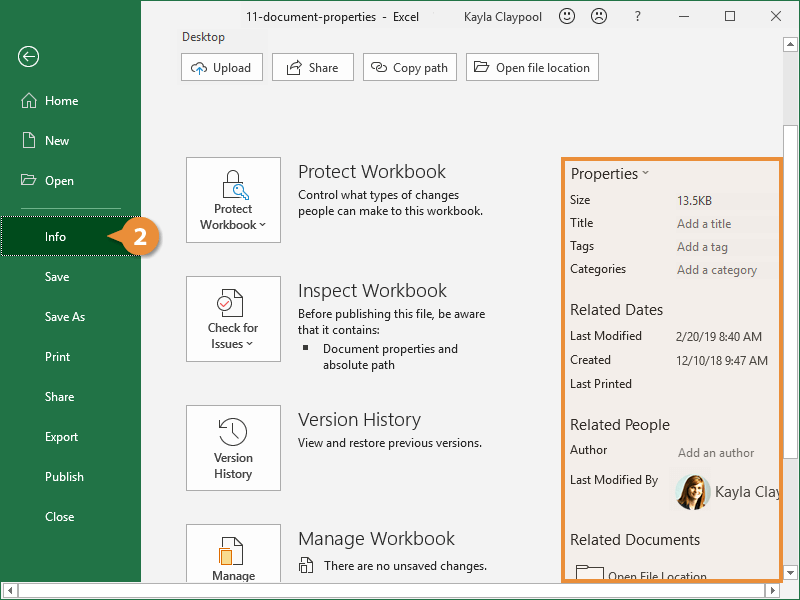
The right side of the Info tab in Backstage view displays the workbook’s properties.
Edit Properties
Some workbook properties are updated automatically, but you must manually update others.
- Click the File tab.
- In the Info tab of Backstage view, click in the property field you want to edit.
- Add in the necessary information and click outside the field when you’re finished.
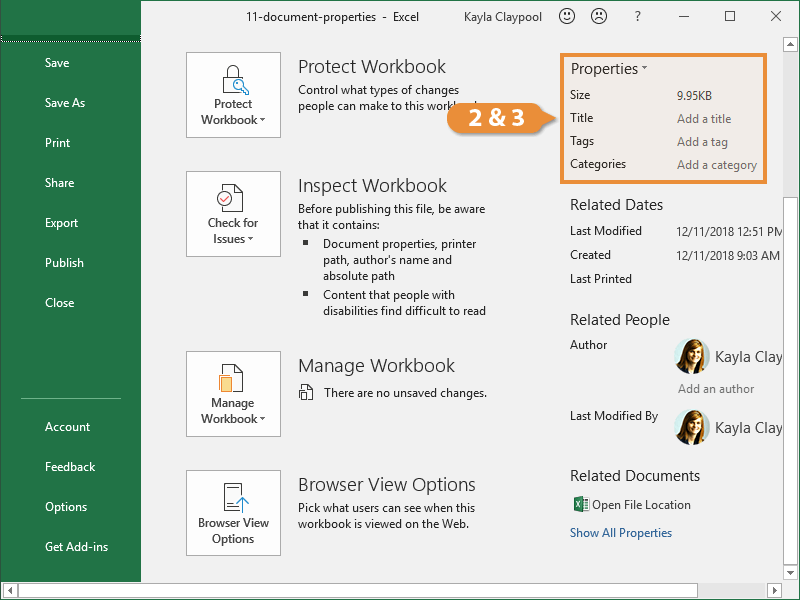
- Repeat Steps 2 and 3 for any additional fields you want to add or change.
- Click the leftarrow to leave backstage view when you’re done.
Add an Author
Adding an Author is another property that's helpful to edit so you know who owns the file.
- In the Info tab of Backstage view, click in the Author field.
- Click the Search the address book button.
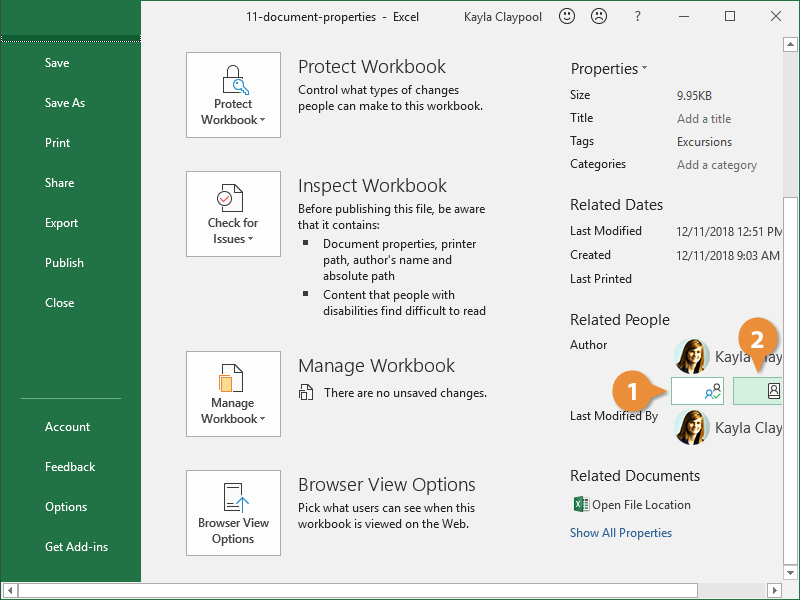
The Address Book dialog box displays and shows your available contacts.
- Select an author from the contacts list.
- Click To.
- Click OK.
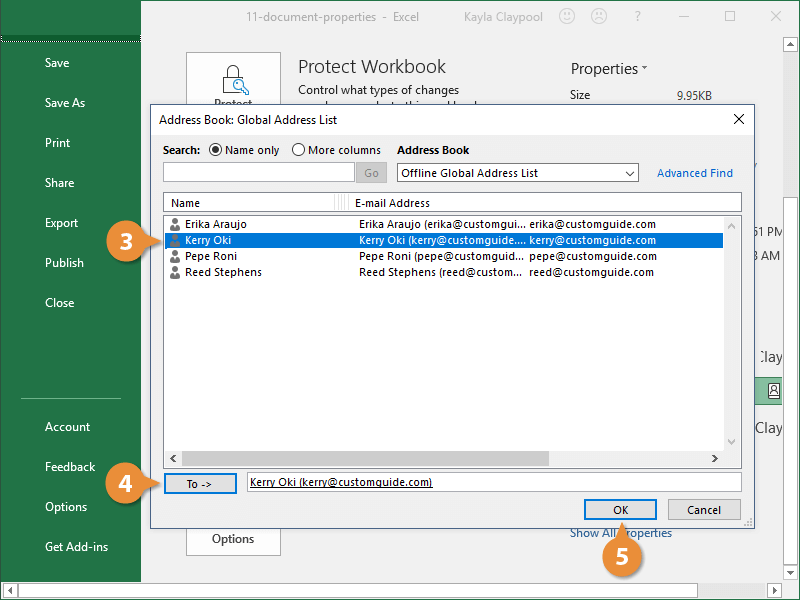
The contact you selected is assigned as the workbook’s author.
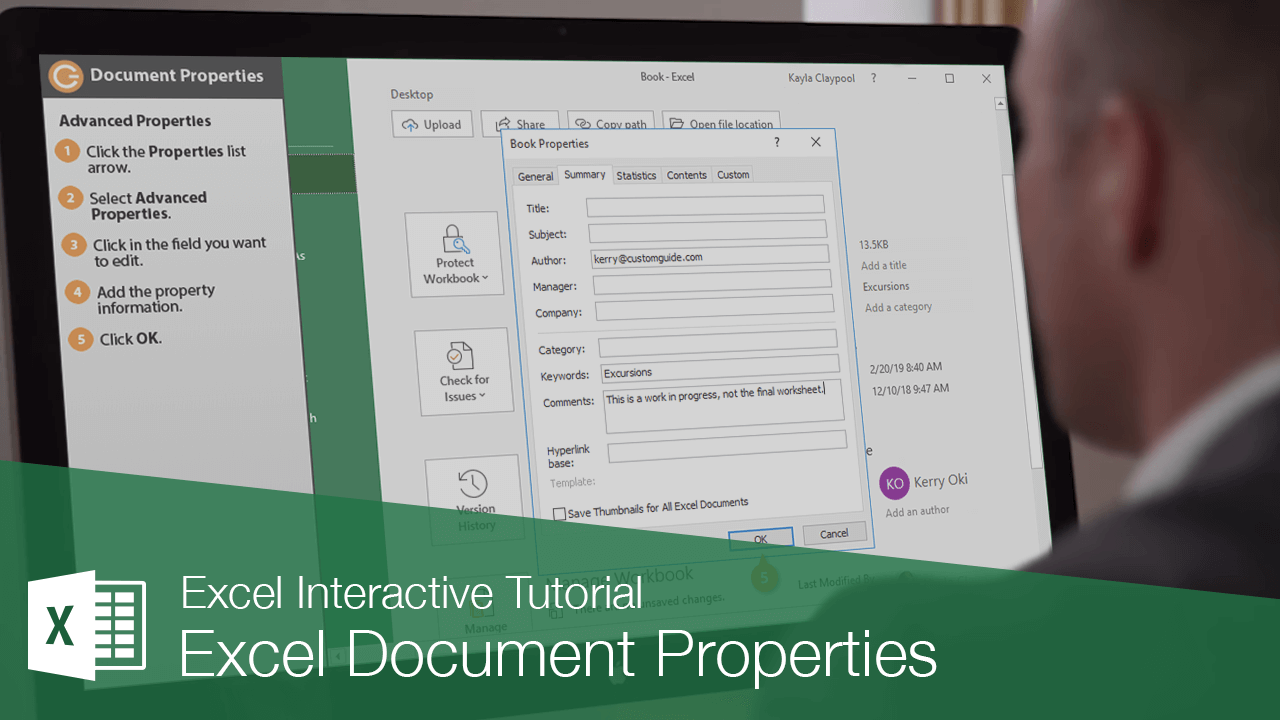
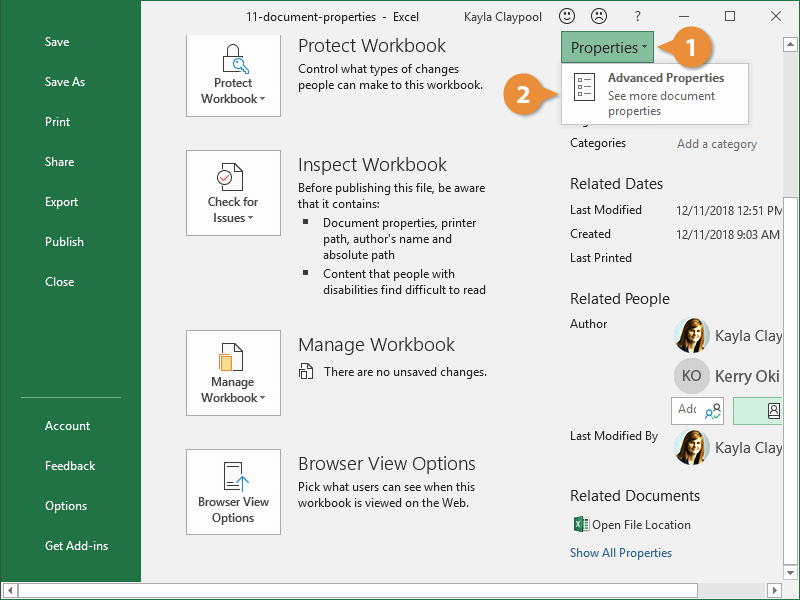
Advanced Properties
There are also some advanced properties you can edit that don't show up on the Info page.
- Click the Properties button.
- Select Advanced Properties button.
Here you see some of the properties we've already modified and some that aren't visible by default on the Info page.
- Click in the field you want to edit.
- Add the property information.
- Click OK.
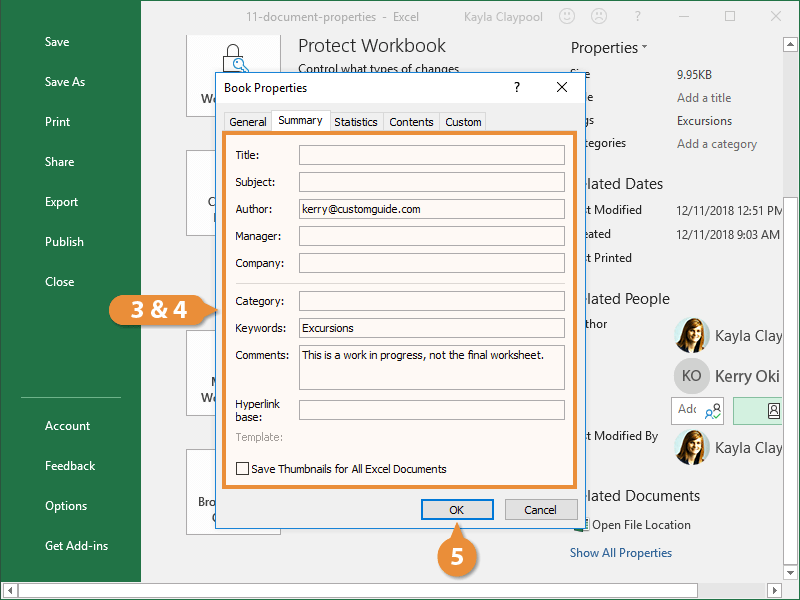
The properties are added to the workbook. You can click Show All Properties to see them.