

Windows Backup
Protect Your Files by Setting Up Automatic Backups and Restoring Data in Windows
Try this Course with a Free Trial

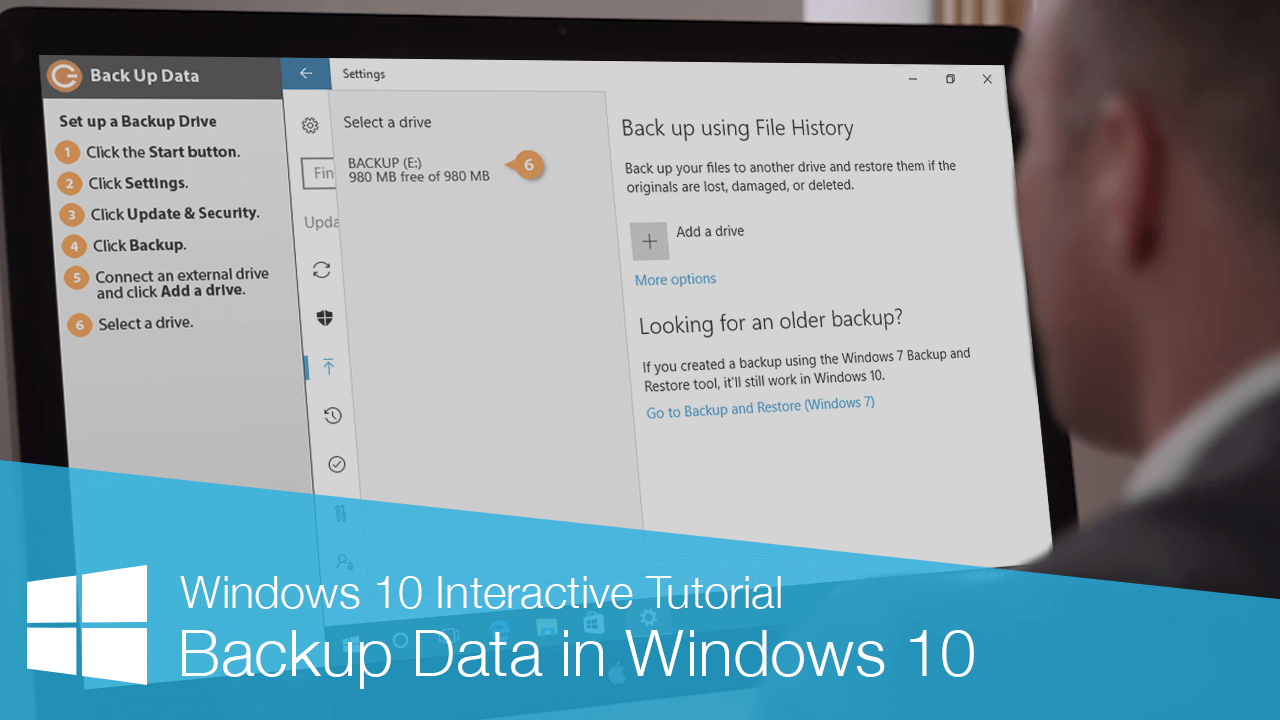
Backing up data is beneficial for restoring information should anything happen to your computer.
Add a Backup Drive
You can get started by setting up a back-up drive.
- Click the Start button.
- Click the Settings button.
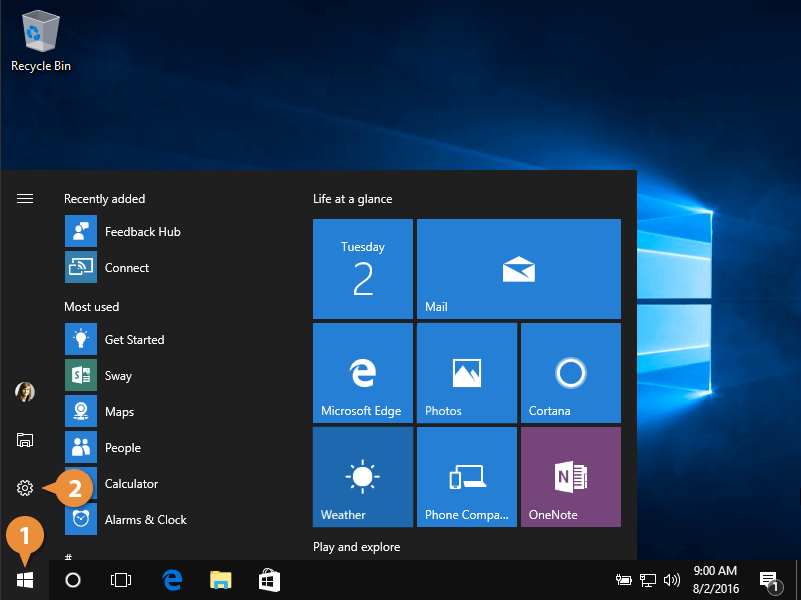
Setting categories appear.
- Click Update & security.
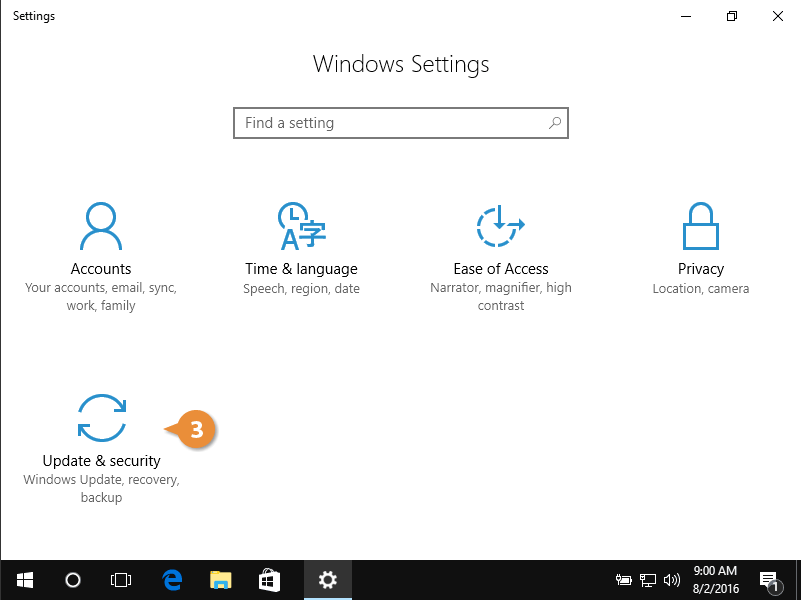
Update, security, and backup settings appear.
- Choose Backup.
Any connected external hard drives appear.
- Connect an external hard drive, and then click Add a drive.
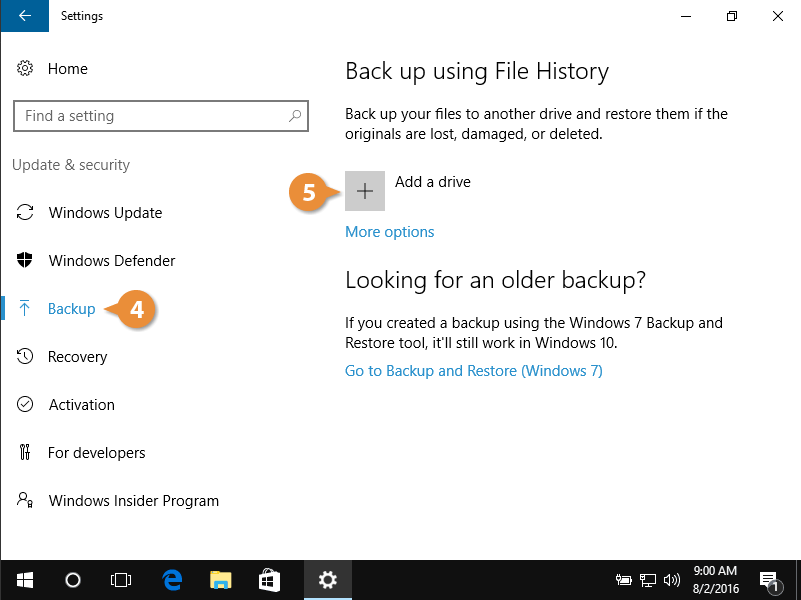
- Select a drive from the list.
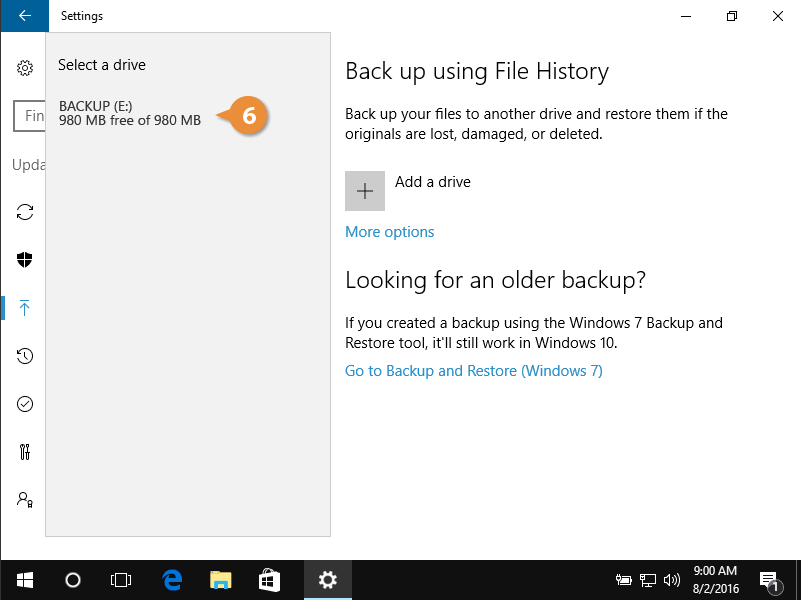
Backups will occur automatically to the hard drive.
Customize a Backup
Here's how you customize how your backup will work.
- Click More options under Back up using File History.
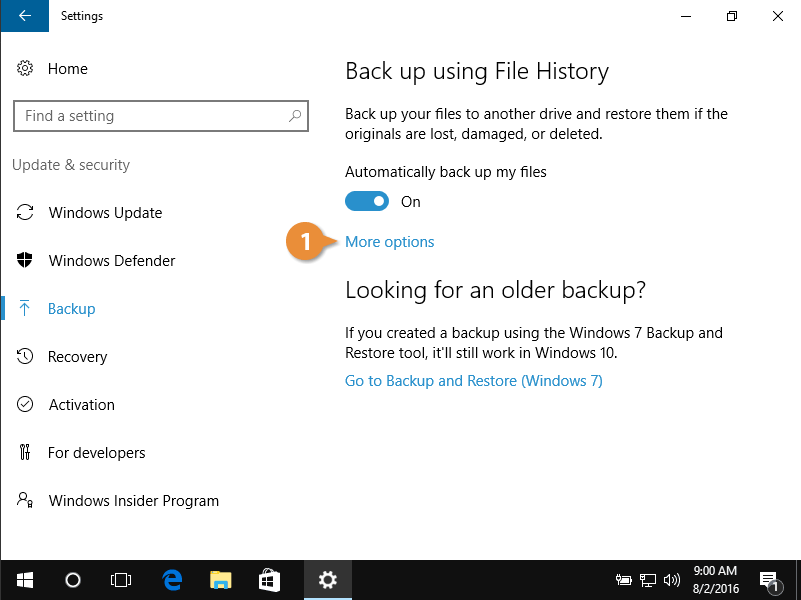
- Configure your backup settings according to your specifications.
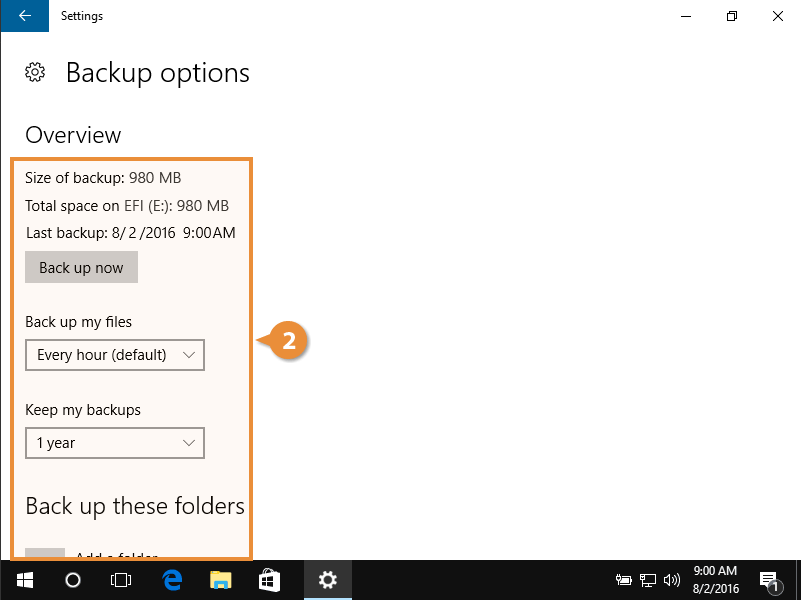
Choose when to back up files, how long to keep backups, and while folders to include in backups.
Restore Your Files
Follow these steps to restore your backed-up files.
- Enter Control in the search field.
- Choose Control Panel.
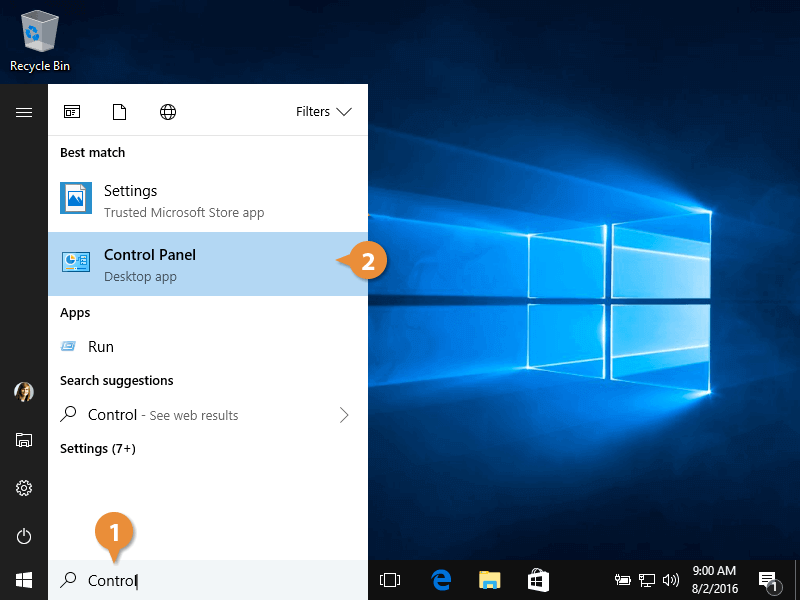
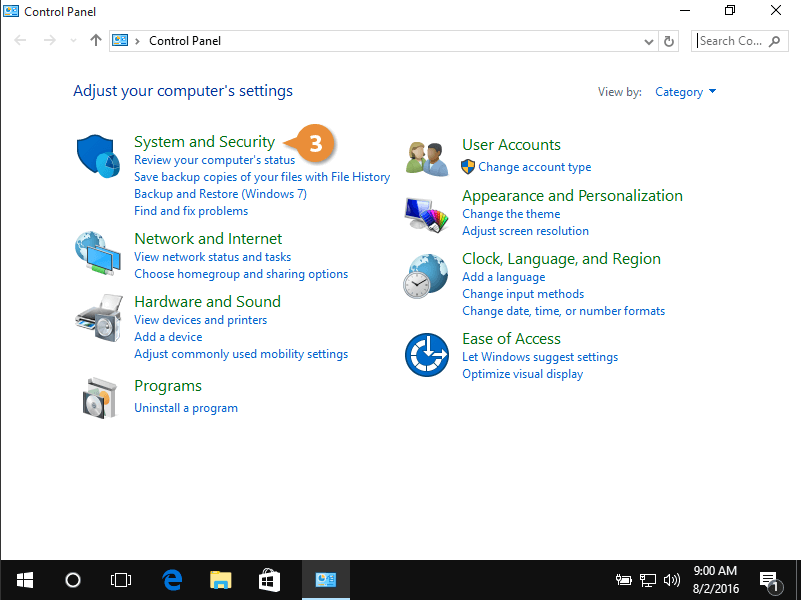
Your computer settings appear.
- Click System and Security.
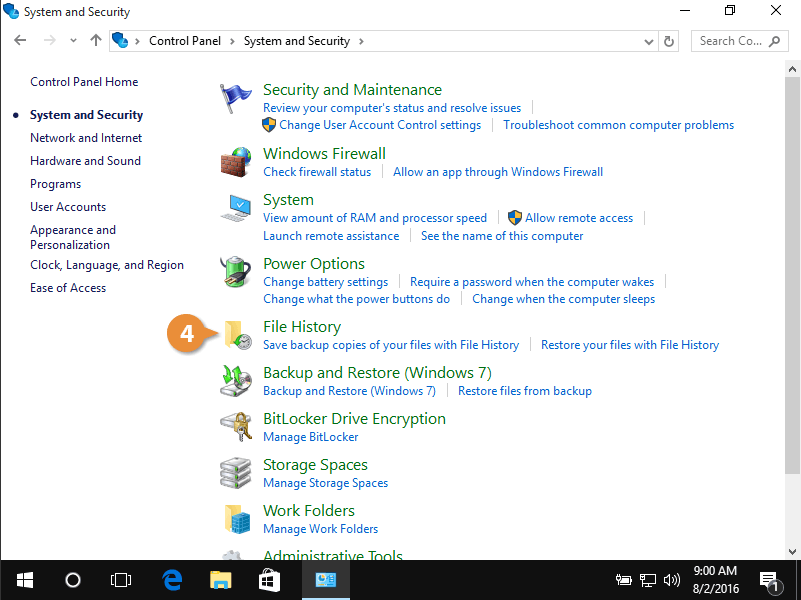
- Click File History.
- Choose Restore personal files.
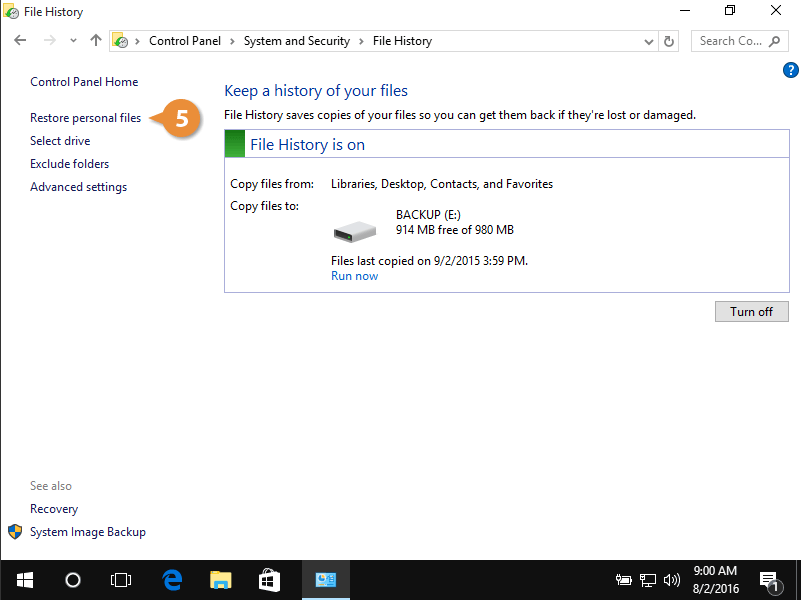
The File History window with your backed-up data appears. The most-recent backup is listed first.
- Click the Previous Version button.
The previous backup appears.
- Select an individual file or entire folder to restore.
- Click the Restore button.
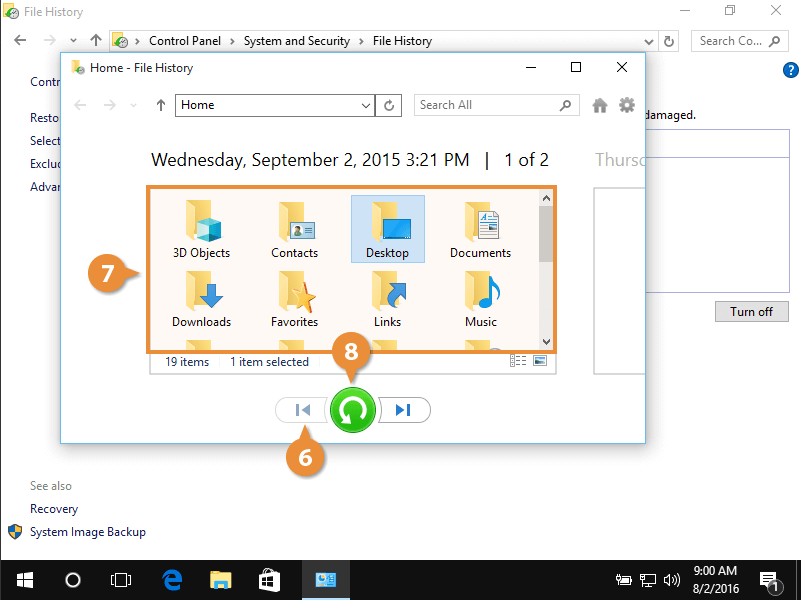
The backup files are restored.