

Slideshow Tools Google Slides
Use Slideshow Tools in Google Slides to Control, Time, and Enhance Your Presentation
Try this Course with a Free Trial

Once you have started a presentation, Slides has tools that you can use to enhance your audience's experience.
Use the Pointer Tool
You can use the pointer tool to highlight certain parts of the screen.
- While presenting, click the Pointer button on the toolbar.
The mouse cursor changes to a laser pointer.
- Use the pointer to point to parts of the slide.
- Click the Pointer button again to turn it off.
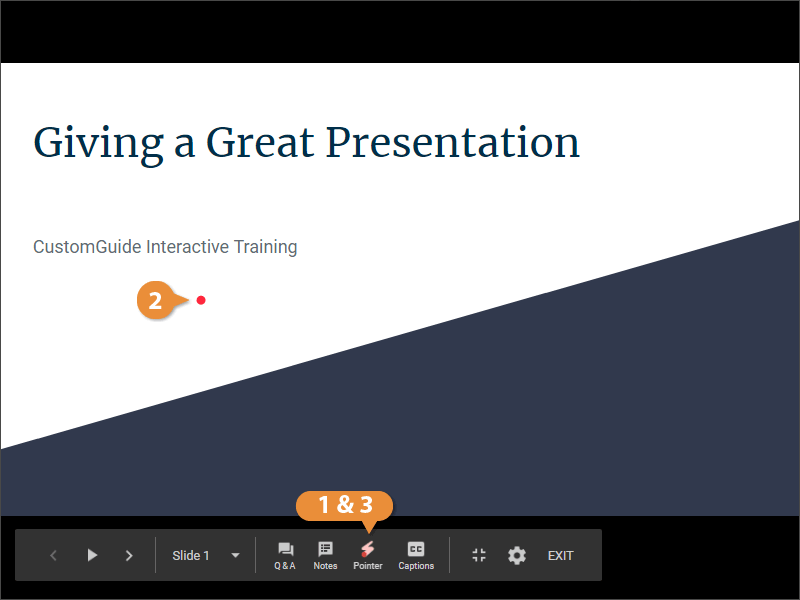
The cursor returns to normal.
Use Closed Captioning
Another tool you can use when presenting is the automatic closed captioning. This will use your computer's microphone to record your voice and automatically transcribe what you say, displaying it at the bottom of the screen. This feature only works in English, though, and requires you to use the Chrome browser on a computer to present.
- While presenting, click the Captions button on the toolbar.
If you haven't used it before, your computer may ask for permission to use the microphone.
- If necessary, click Allow so your browser can access your microphone.
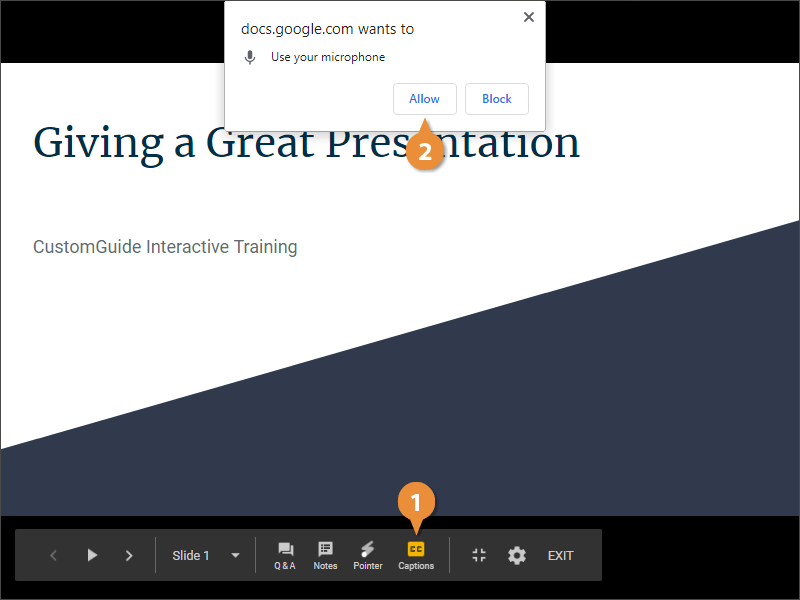
The slideshow shrinks a bit to make room for closed captions.
- Speak toward the microphone for your narration to be automatically transcribed.
It won't be perfect, and it won't include punctuation, but it can still be a helpful tool.
- Click the Captions button again to turn it off.
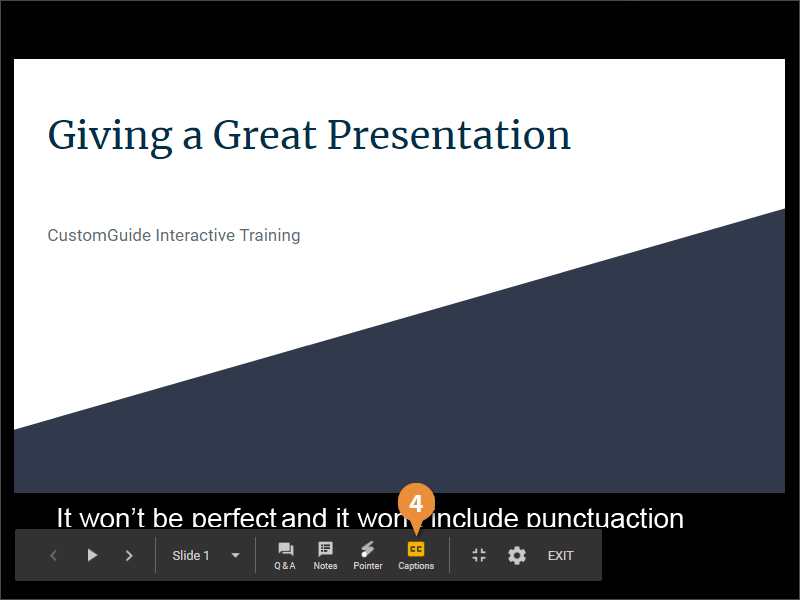
The captions disappear, and the slideshow returns to full size.
- Speak toward the microphone for your narration to be automatically transcribed.
- While presenting, click the Captions button on the toolbar.