Google Forms Sections
Create and Use Sections in Google Forms to Organize and Streamline Responses
Try this Course with a Free Trial

If you’re working with a longer form, you can separate it into different sections. Each section will appear as a separate page when the form is filled out. You can even use sections to create branching forms, where someone can be sent to different sections based on how they answered an earlier question.
Add a Form Section
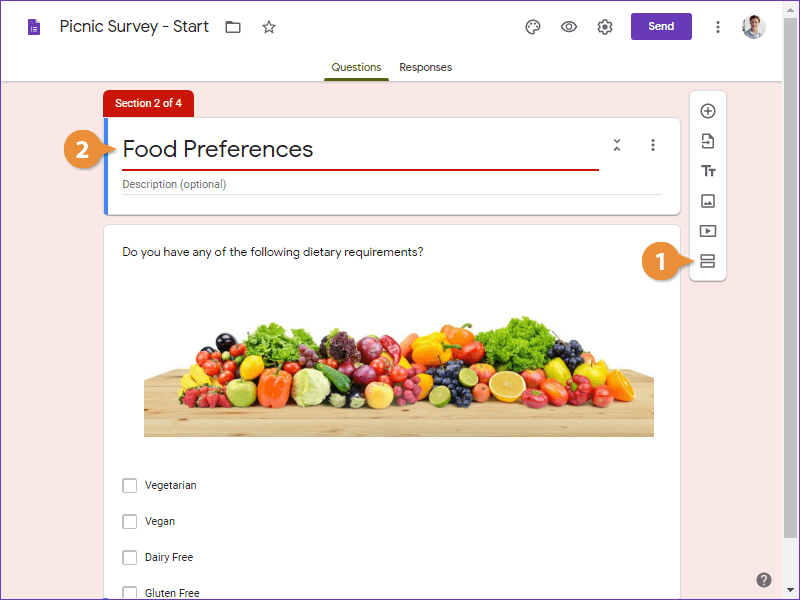
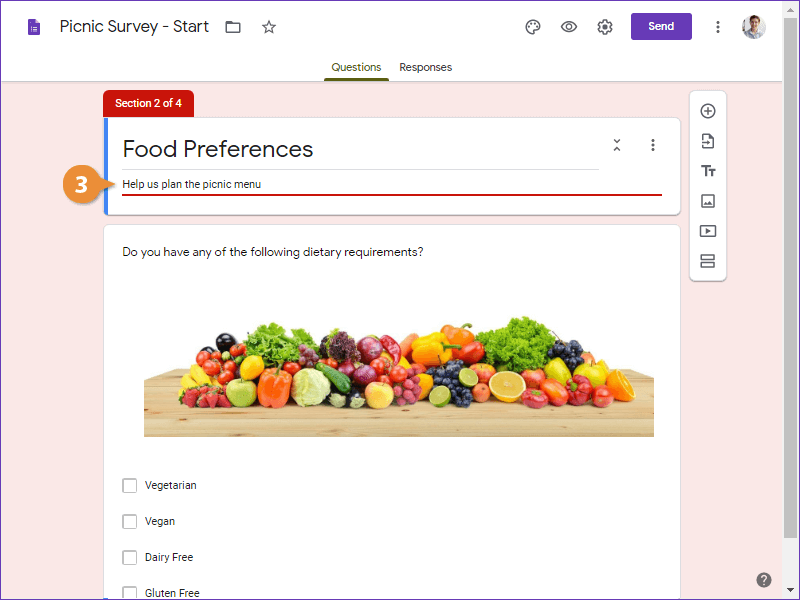
The section is added, and all of the questions in the form that come after it will appear on that section's page. You can add new questions to a section using the toolbar, or by dragging existing questions below the section header.
Collapse or Expand a Section
- Click the Collapse button to collapse that section's questions.
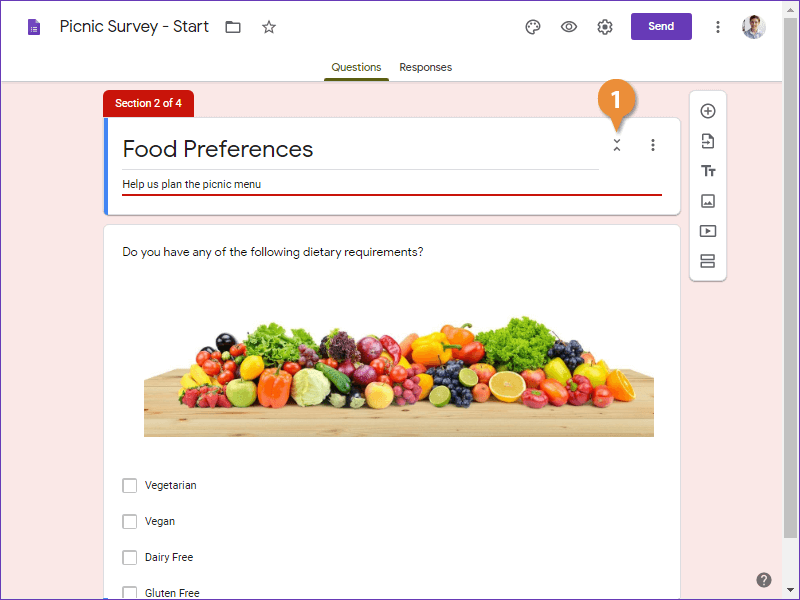
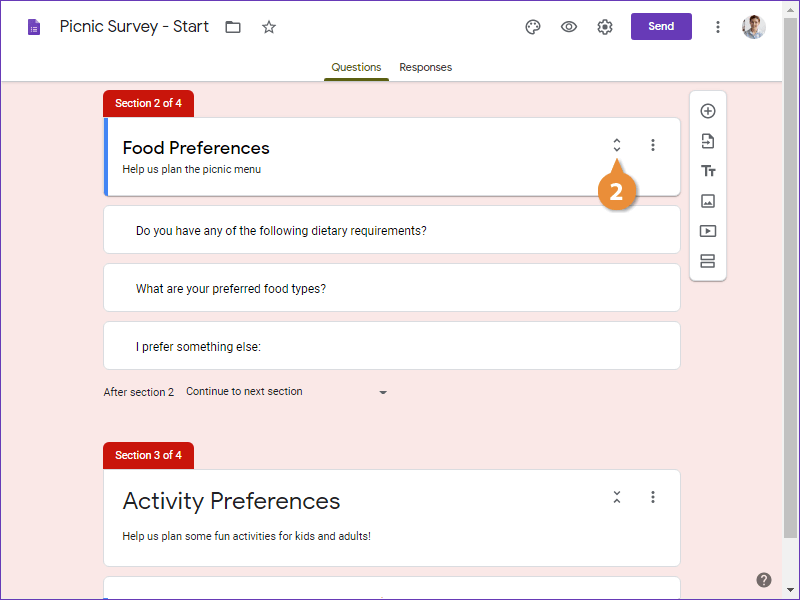
And all of the questions collapse down. The Collapse button also changes to the Expand button, which you can click to expand the questions again.
- Click the Expand button to expand that section's questions.
Move a Section
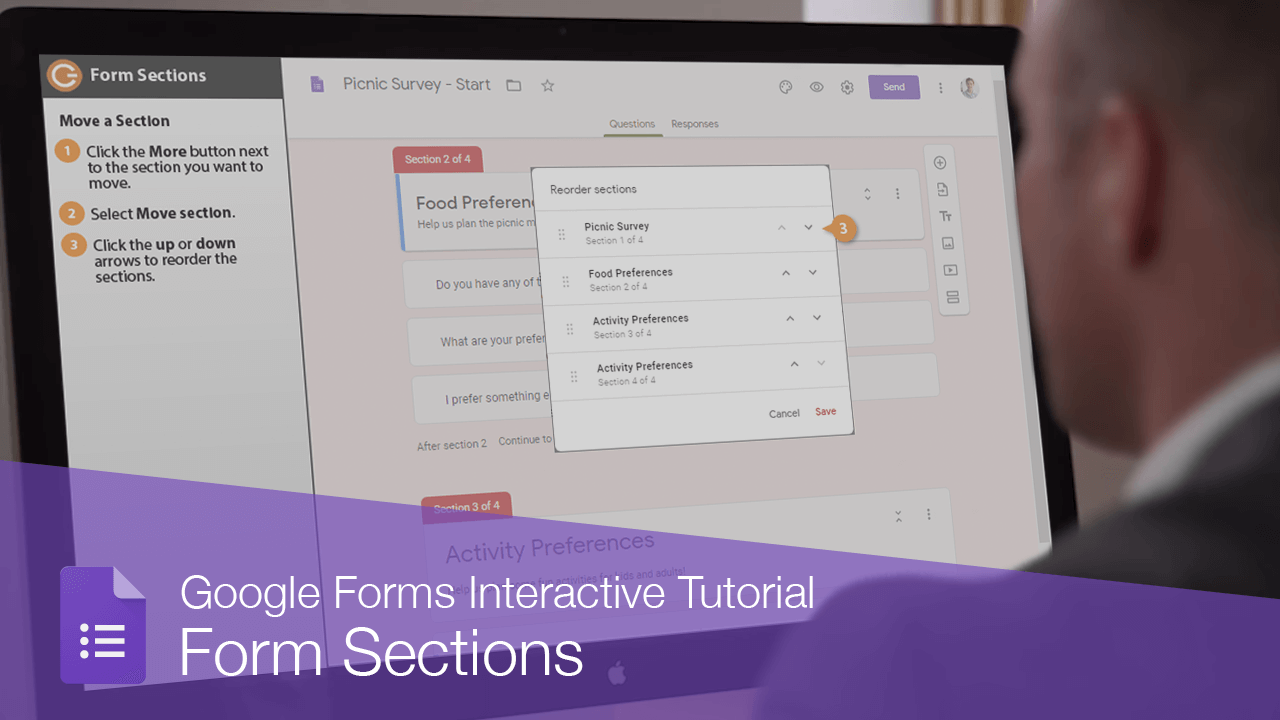
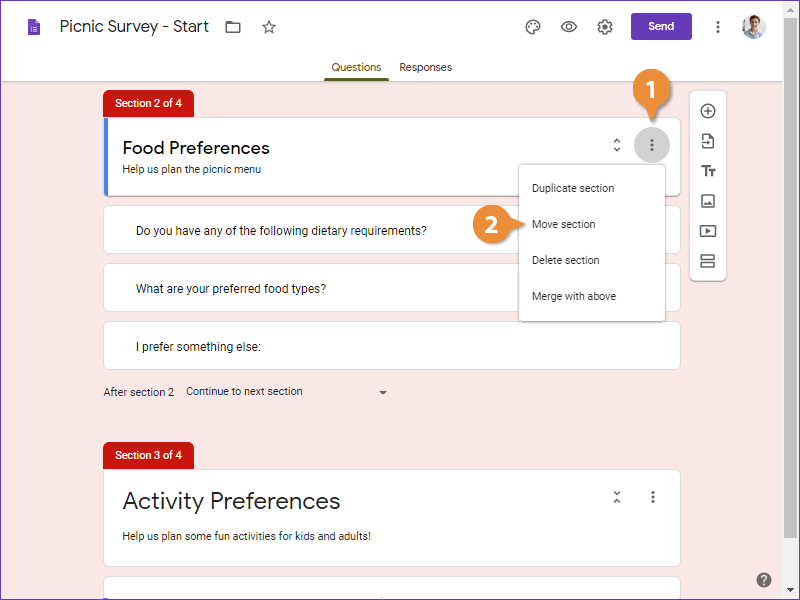
- Click the More button next to the section you want to move.
- Select Move section.
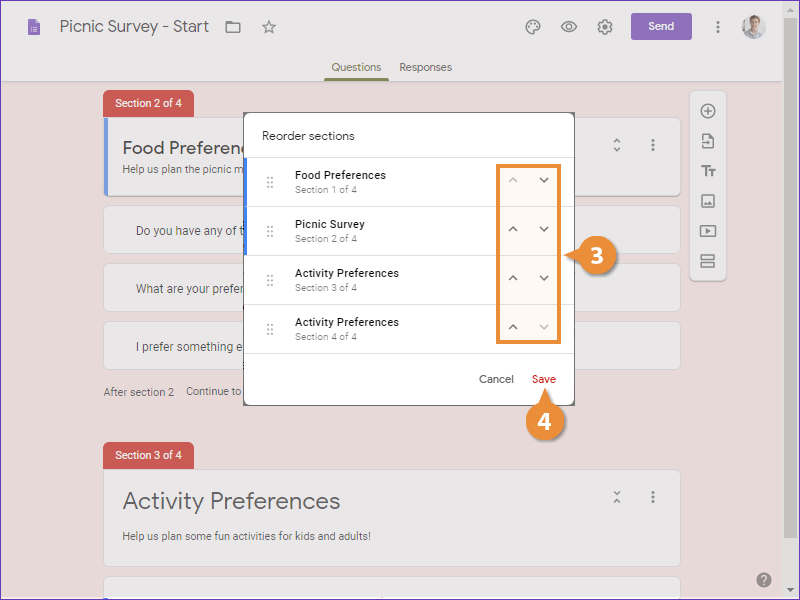
The Reorder sections dialog box appears, listing all the sections in the form. Use the up and down arrows to move the sections around.
- Click the up or down arrows to reorder the sections.
- Click Save.
Merge a Section
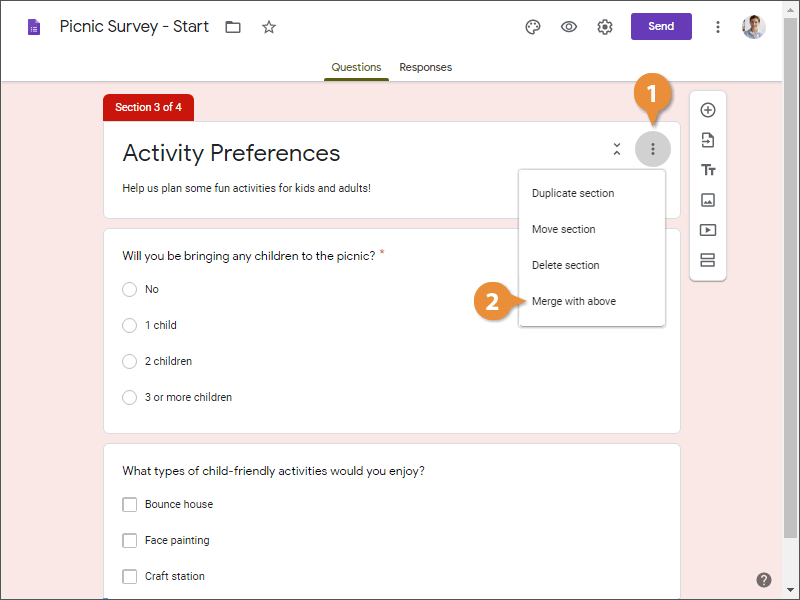
- Click the section's More button.
- Select Merge with above.
Delete a Section
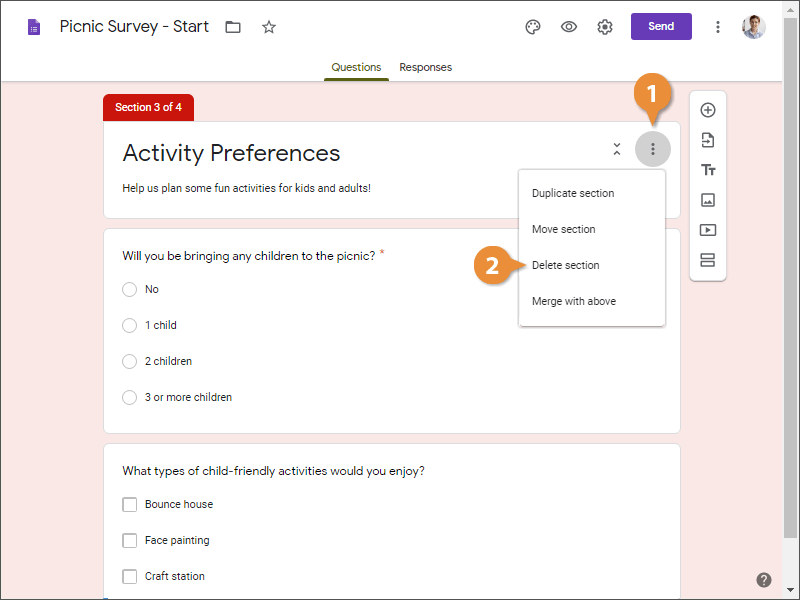
You can delete a section if you no longer need it. Let’s delete the duplicated section from this form.
- Click the More button next to the section you want to delete.
- Select Delete section to delete a section and its questions.