

Create a New Style in Excel
Learn How to Create and Customize New Cell Styles in Excel for Consistent Formatting Across Workbooks
Try this Course with a Free Trial

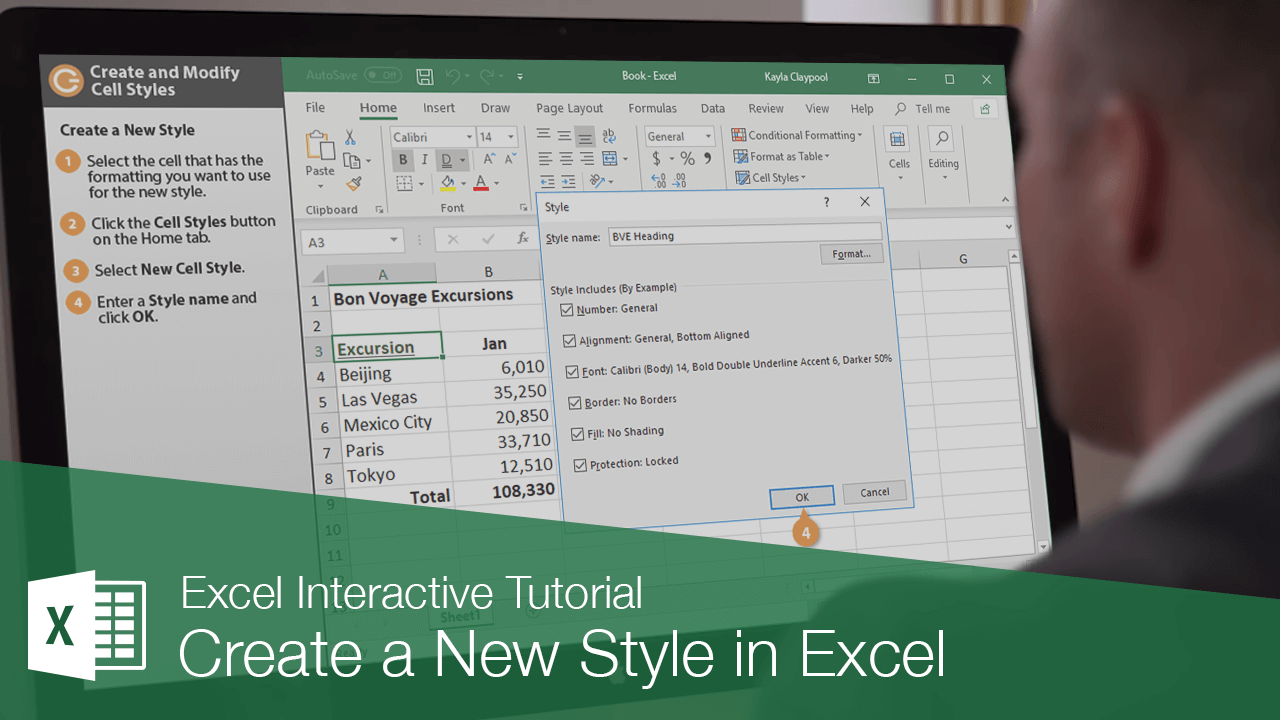
If you find that you keep applying the same formatting over and over, create a style with that formatting so you can apply those formatting settings with one click.
Create a New Style
The easiest way to create a style is to do so from a cell that already has the formatting you want to capture.
- Select the cell that has the formatting you want to use for the new style.
- Click the Cell Styles button on the Home tab.
- Select New Cell Style.
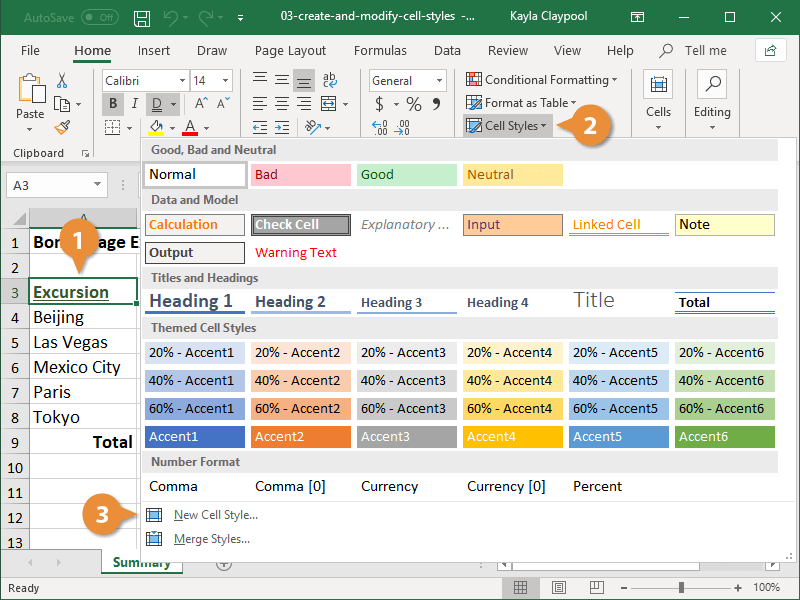
The Style dialog box opens and the formatting from the selected cell is captured.
- Enter a name in the Style name field.
- Click OK.
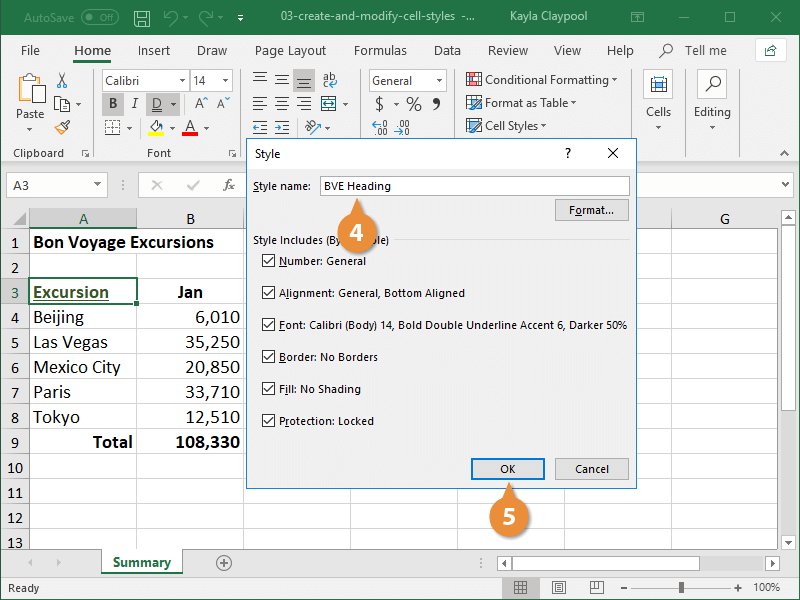
The style is now saved and can be used in any Excel worksheet.
Cell styles are associated with the theme that is being used for the workbook. If you switch to a new theme, the cell styles will update to match it.
Modify a Style
If you decide you need to change an existing style, you can easily make modifications. Any updates you make will automatically be reflected in any cells that have the style applied.
- Click the Cell Styles button.
- Right-click the cell style you want to modify.
- Select Modify.
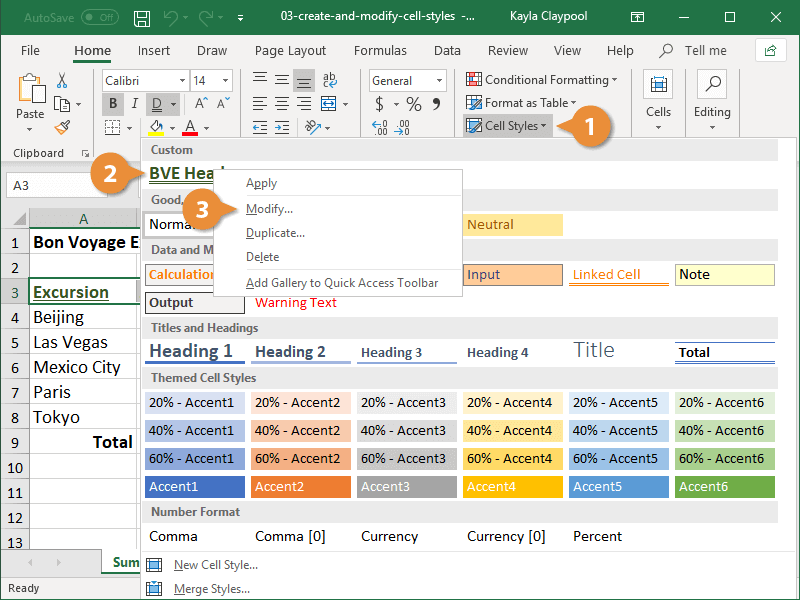
To duplicate a style before making changes, select Duplicate from the menu instead.
- Click the Format button.
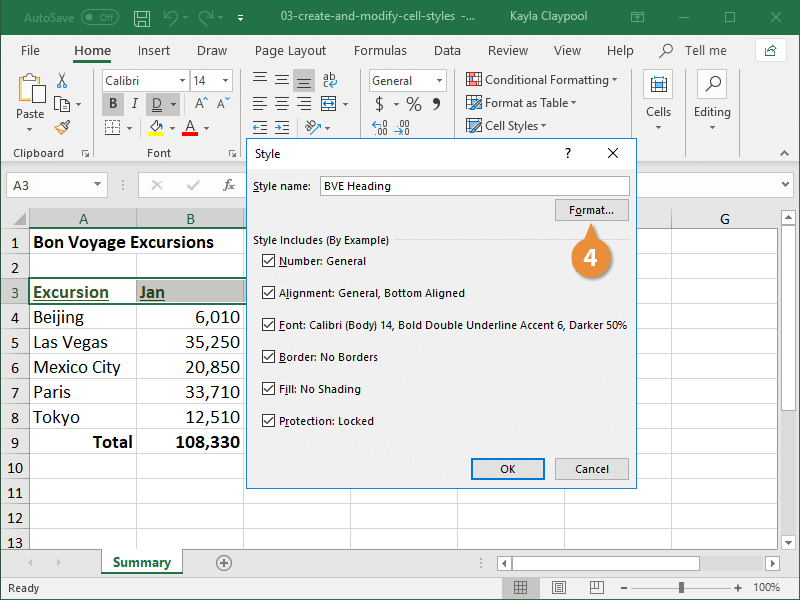
- Select the formatting options you want to use.
- Click OK.
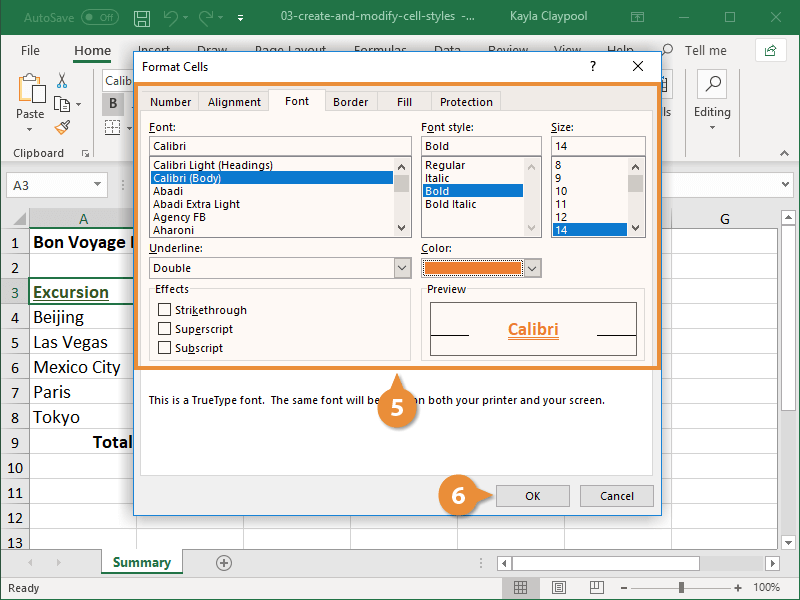
- Click OK again.
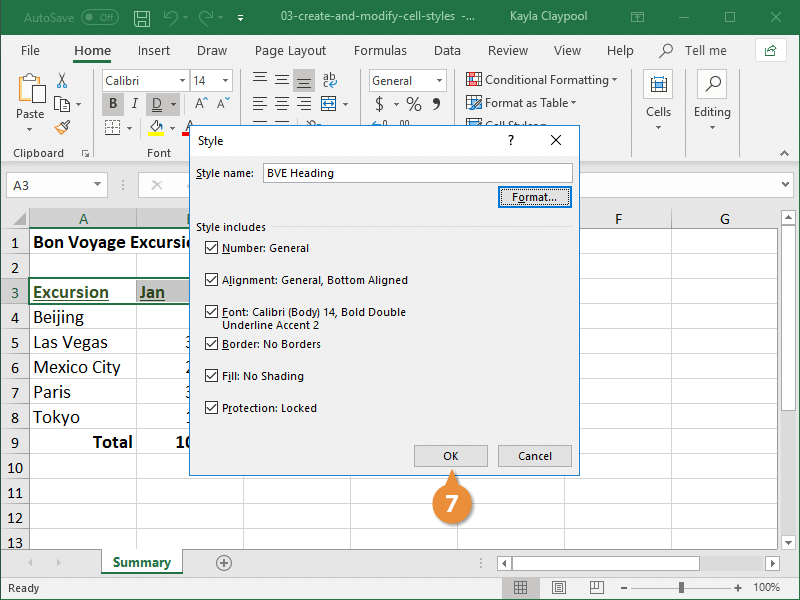
The style is updated and any cells with the style applied are automatically updated.
To remove a cell style from all cells and delete the cell style itself, click the Cell Styles button on the Home tab. Then right-click the style and select Delete.