

Captivate Closed Captioning
Add closed captions to make your Captivate projects accessible and ADA-compliant
Try this Course with a Free Trial

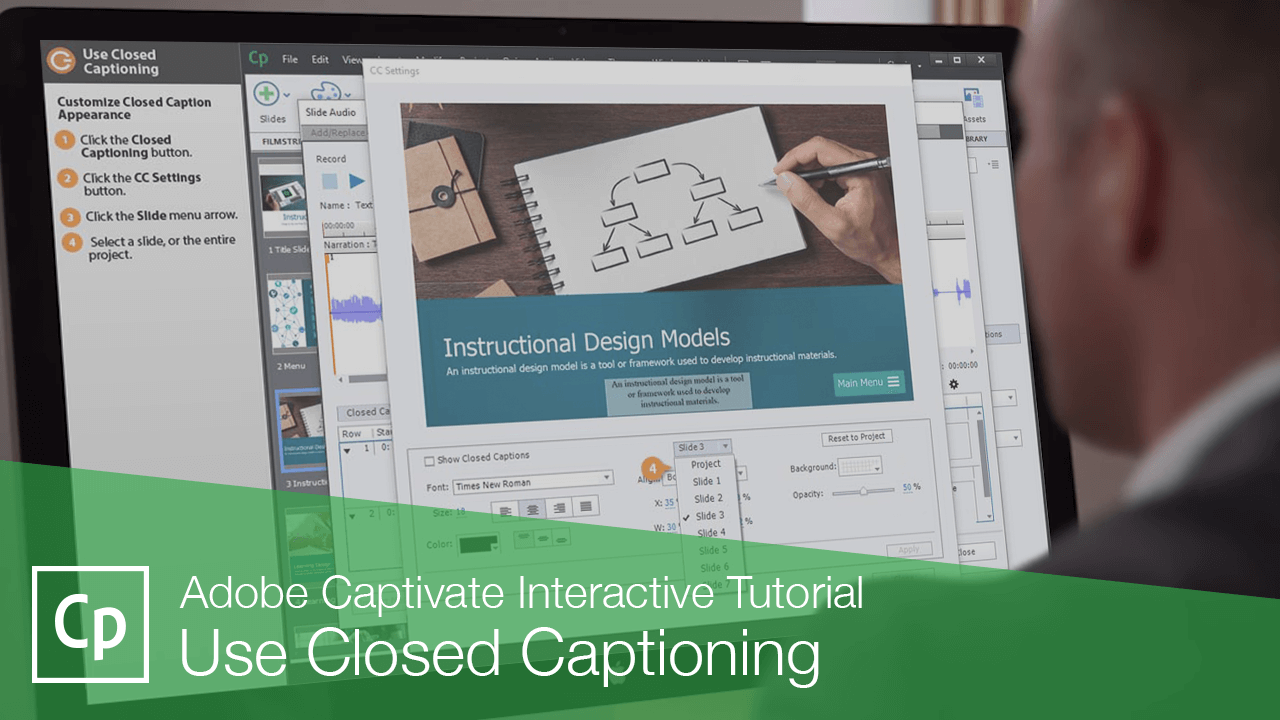
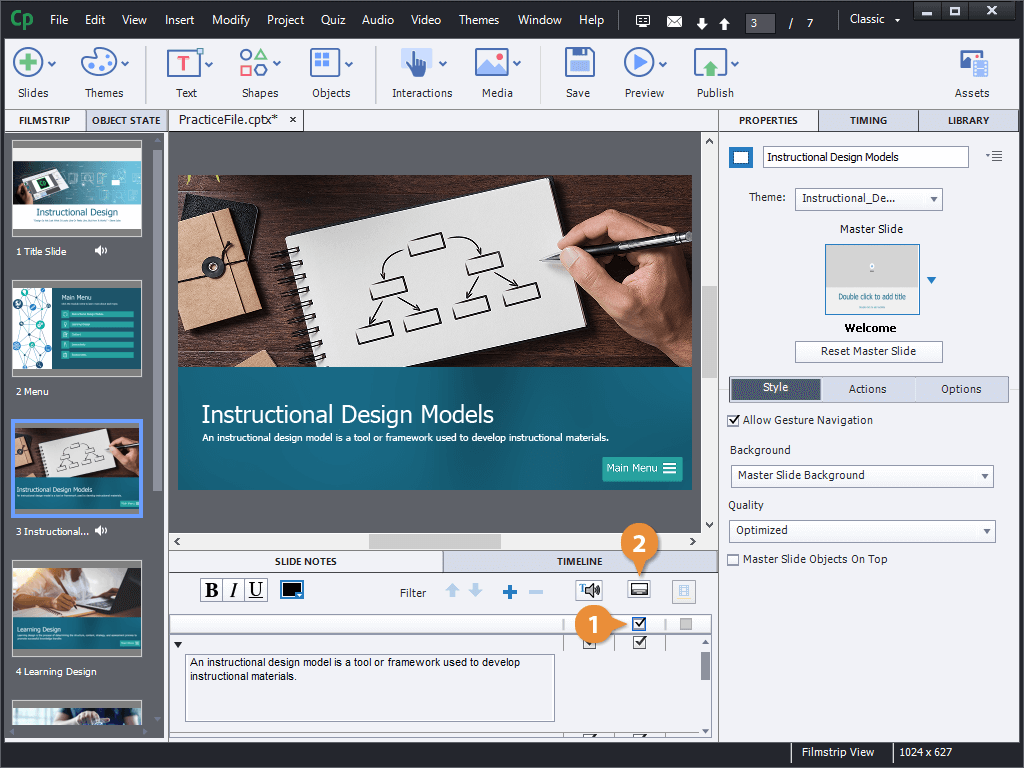
If you're using audio narration in a project, you can create closed captioning to go with it. Closed captions use the Slide Notes field for the text that will be displayed, so first make sure that the Slide Notes pane is displayed.
Display and Enter Slide Notes
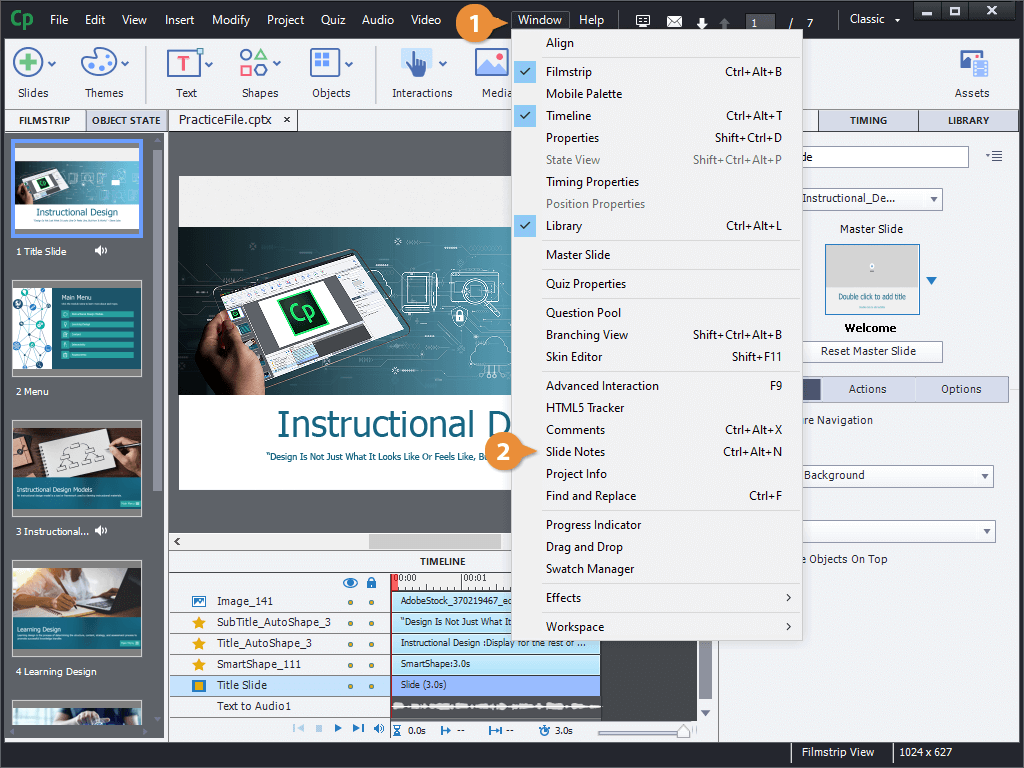
- Click Window on the menu bar.
- Select Slide Notes.
- Click the Add Slide Note button to add a slide note (if necessary).
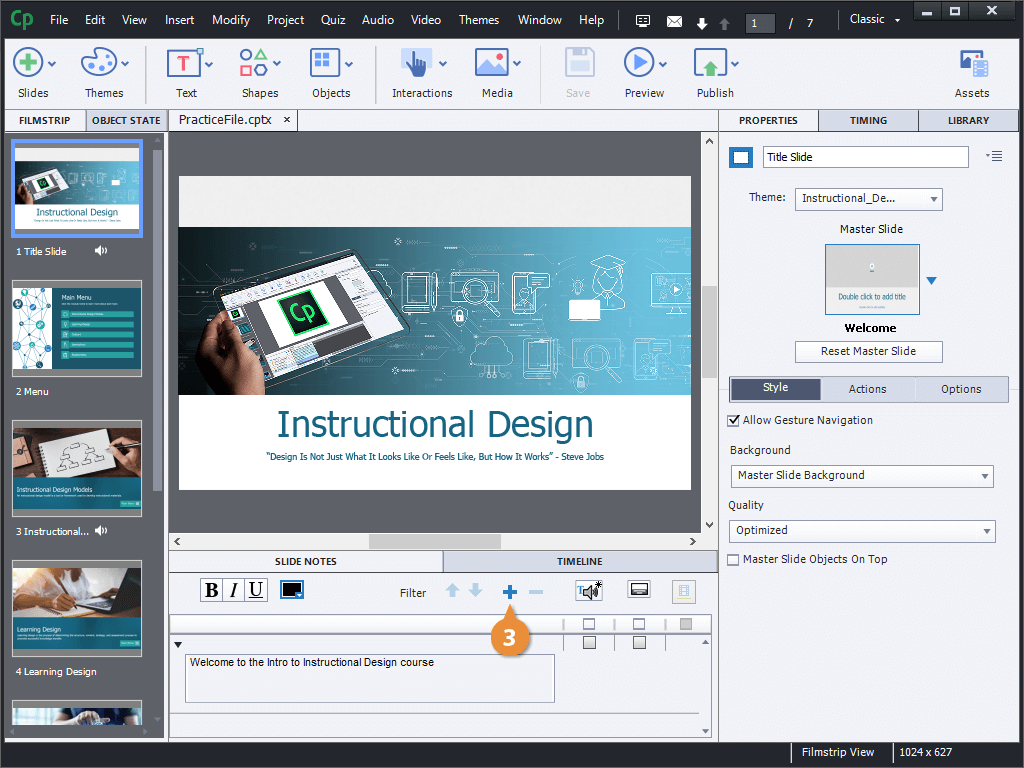
The Slide Notes pane opens. If you had previously generated text-to-speech audio for some placeholder narration, it will appear here.
Add Closed Captioning
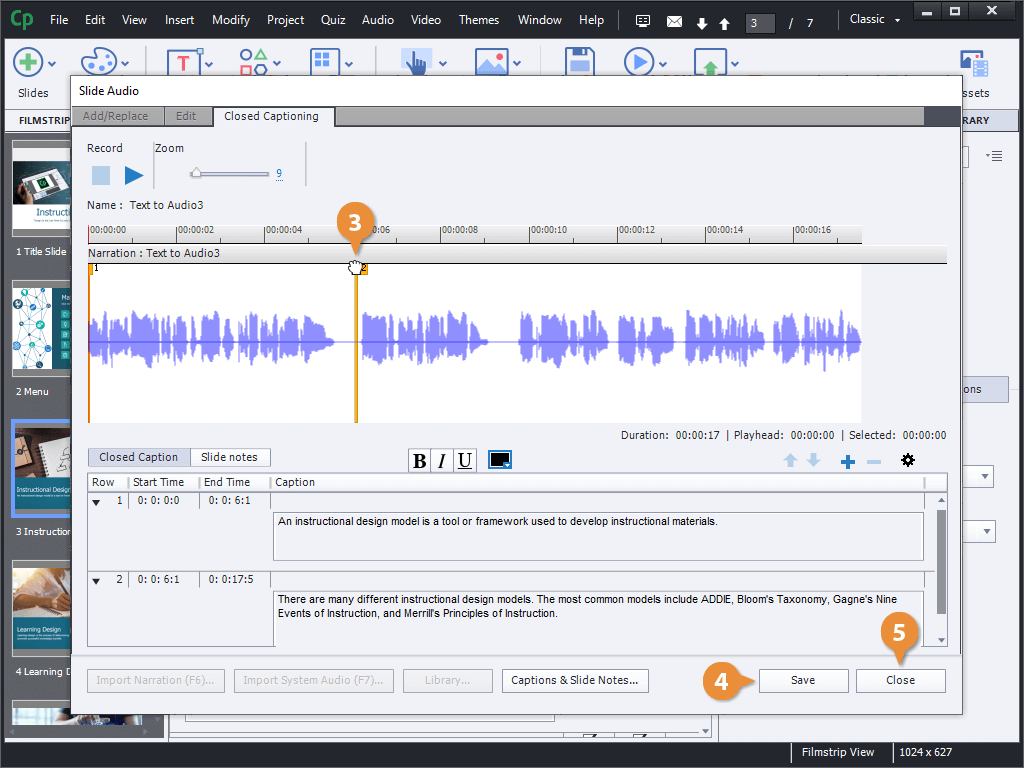
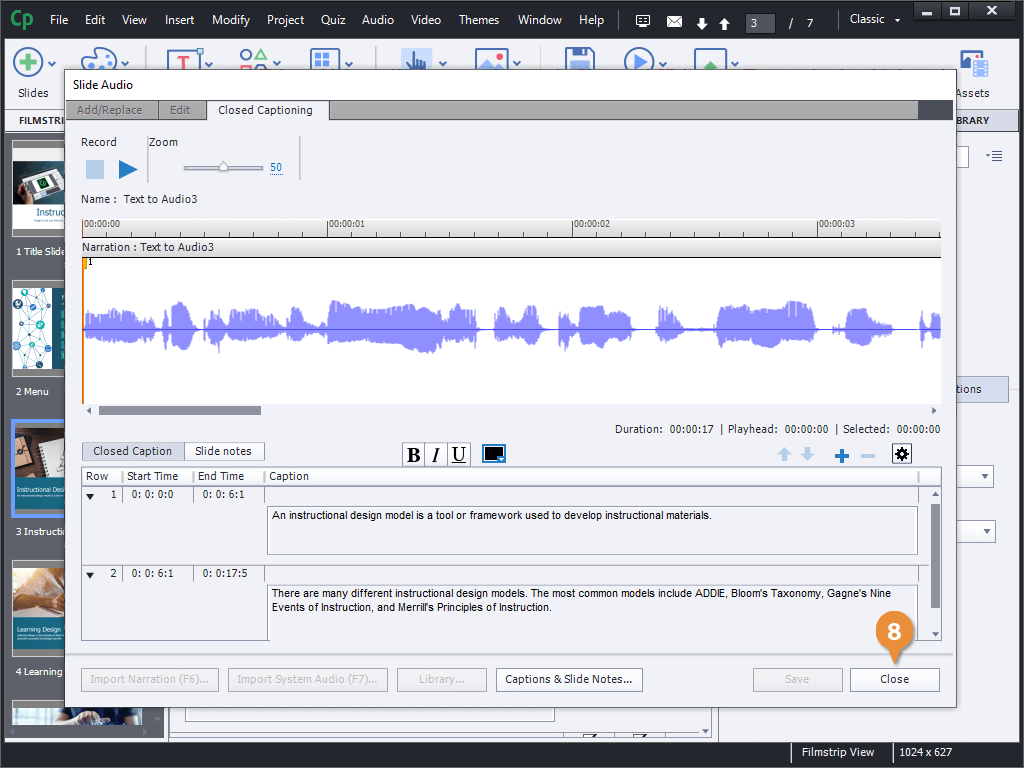
If you have a slide with longer narration, you can split it up into multiple slide notes and adjust the time that each note appears.
- Check the Audio CC checkbox next to a note.
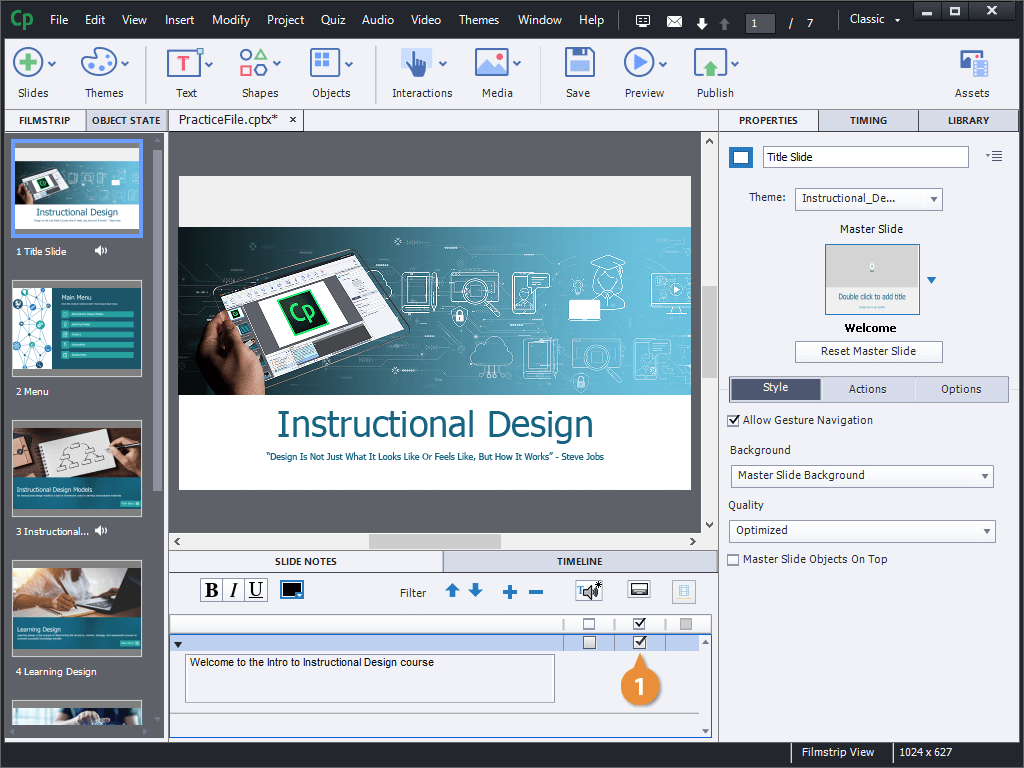
Edit Closed Caption Timing
Customize Closed Caption Appearance
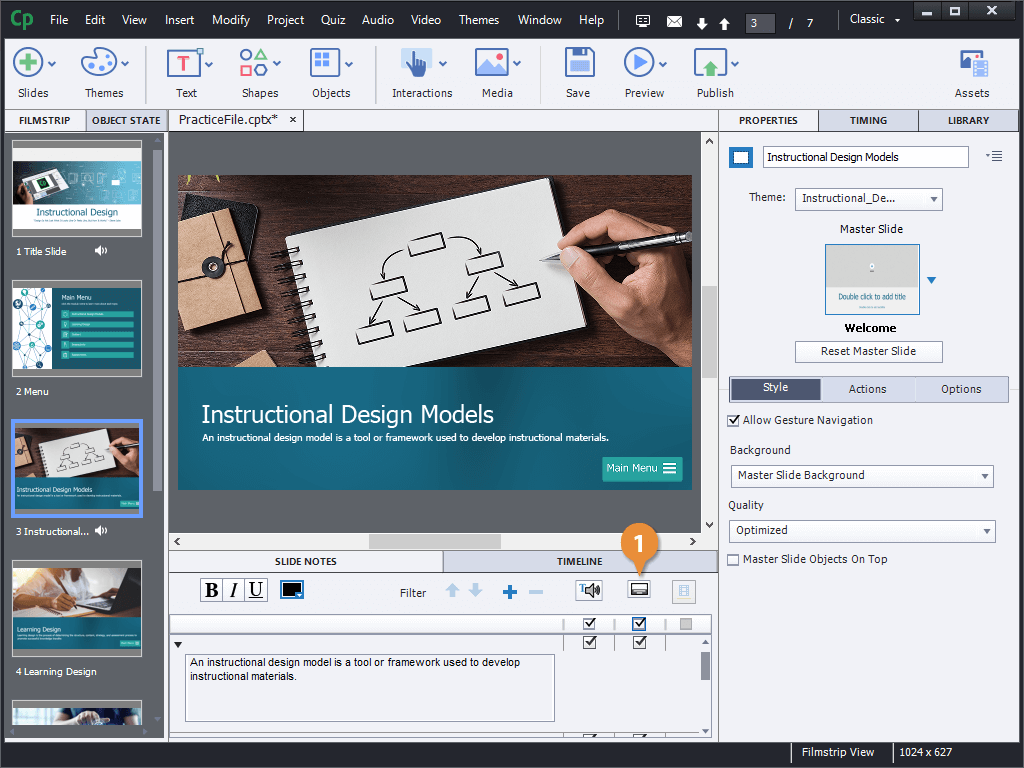
- Click the Closed Captioning button.
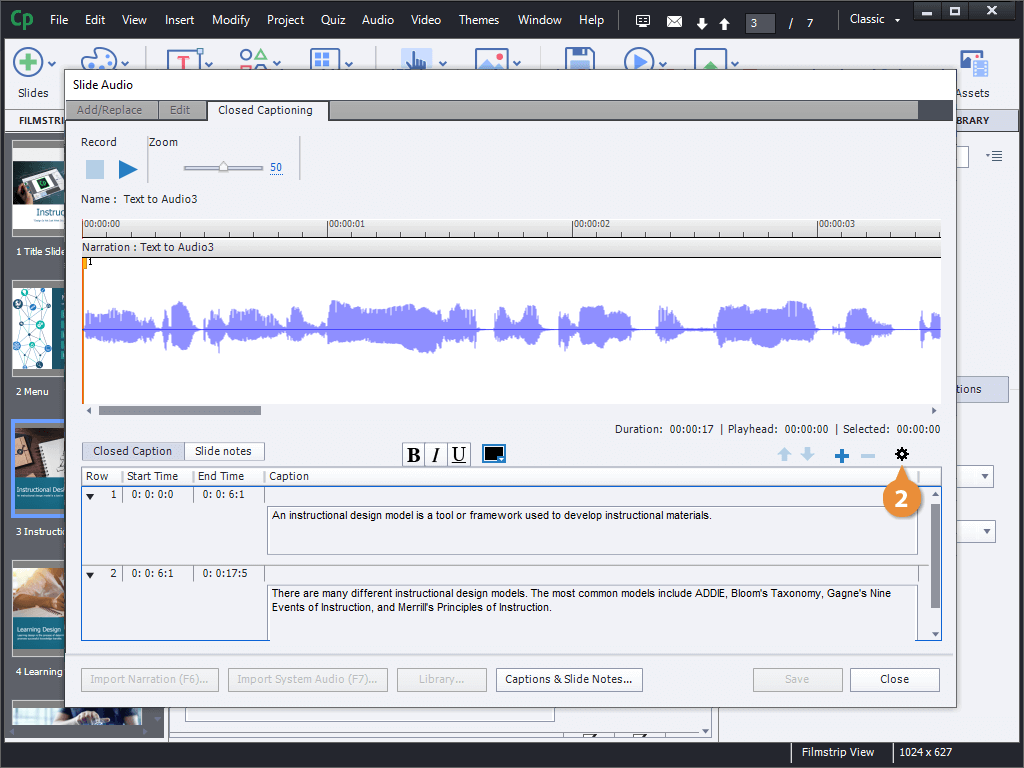
- Click the CC Settings button.
- Click the Slide menu arrow.
- Select a slide, or the entire project.
- Use the options to customize the appearance of the text and background.
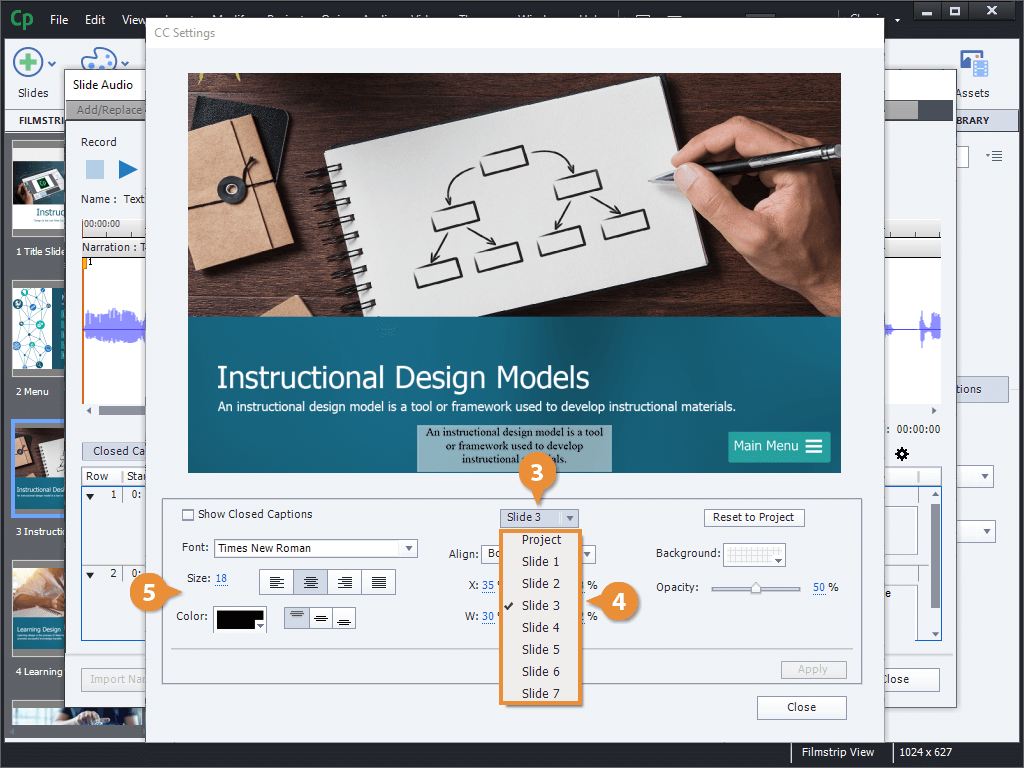
- Click Apply.
- Click Close.

- Click Close.
The CC Settings window opens up for the selected slide, previewing how the closed captions will look.
The size and position of the caption box is represented as percentages of the project's size, instead of pixels.