Using a normal action on a button press lets you do a single thing, such as navigating to another slide, showing or hiding an image, or assigning a value to a variable. Advanced Actions let you combine a sequence of actions into one triggered event.
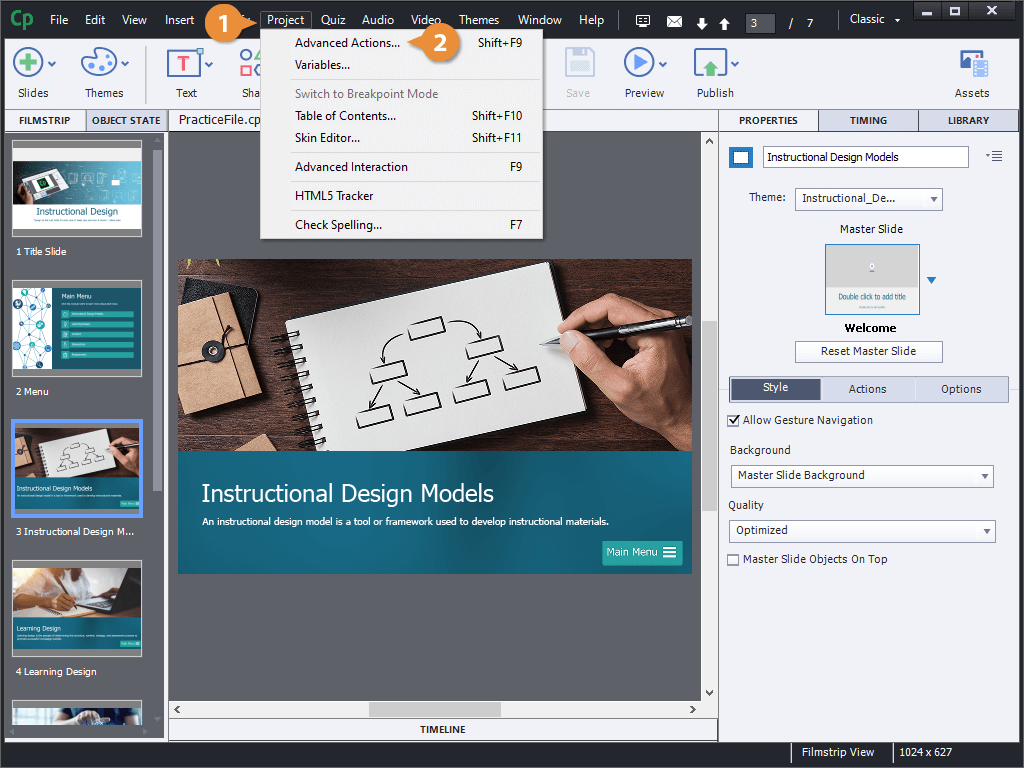
- Click Project on the menu bar.
- Select Advanced Actions.
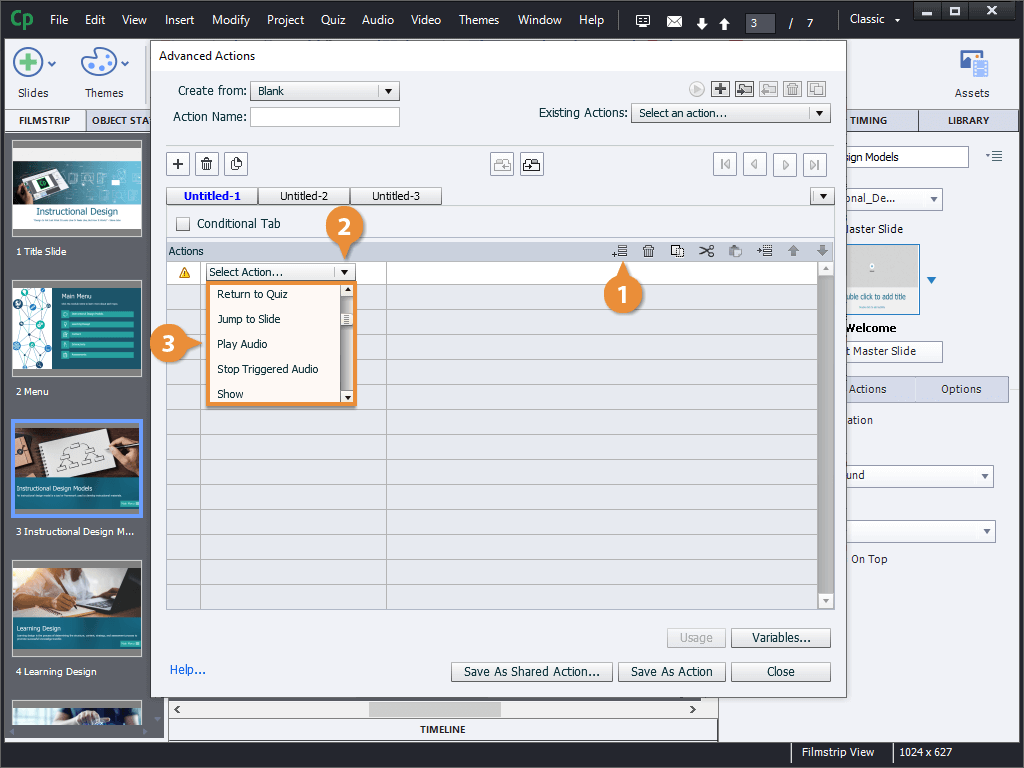
The Advanced Actions window opens up, with a blank advanced action started. Most of the window is taken up by the list of actions, with each row representing a possible action.
Above that you'll see some tabs, called Decision groups. If your advanced action has multiple conditions that it checks for, each decision group can contain a separate set of actions.
- Click the Add button.
- Click the Select Action menu arrow.
- Select an action.
- Set that action's options (if necessary).
- Repeat steps 1-4 to add more actions (if necessary).
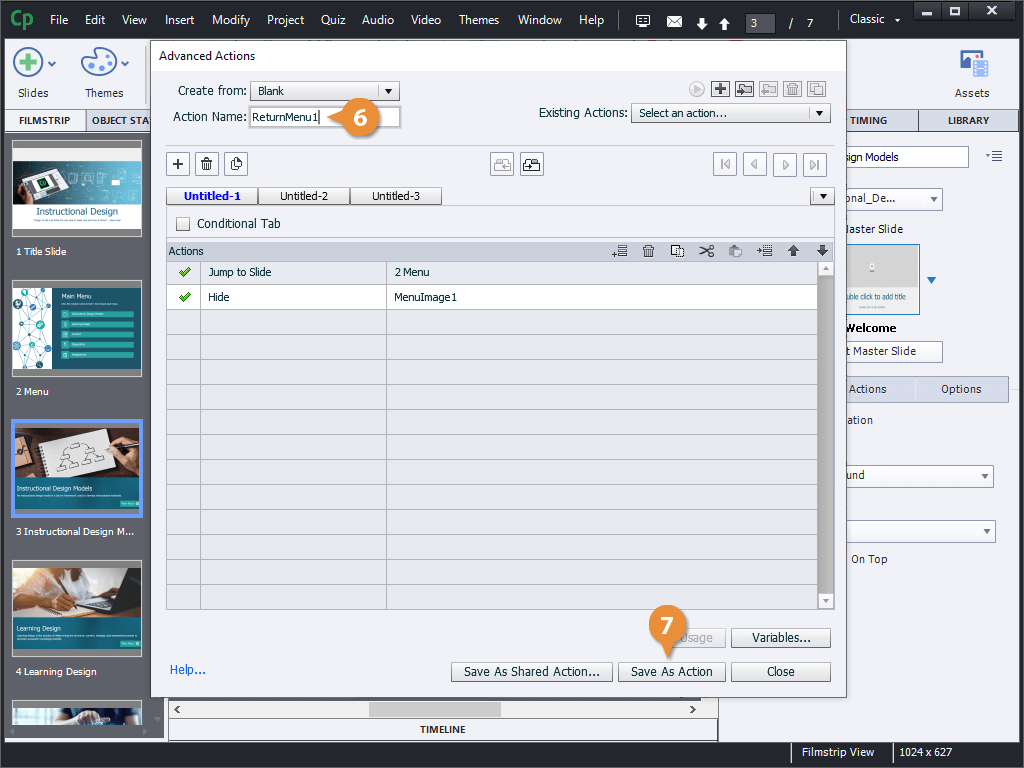
- Enter a name in the Action Name field.
- Click the Save Action button.
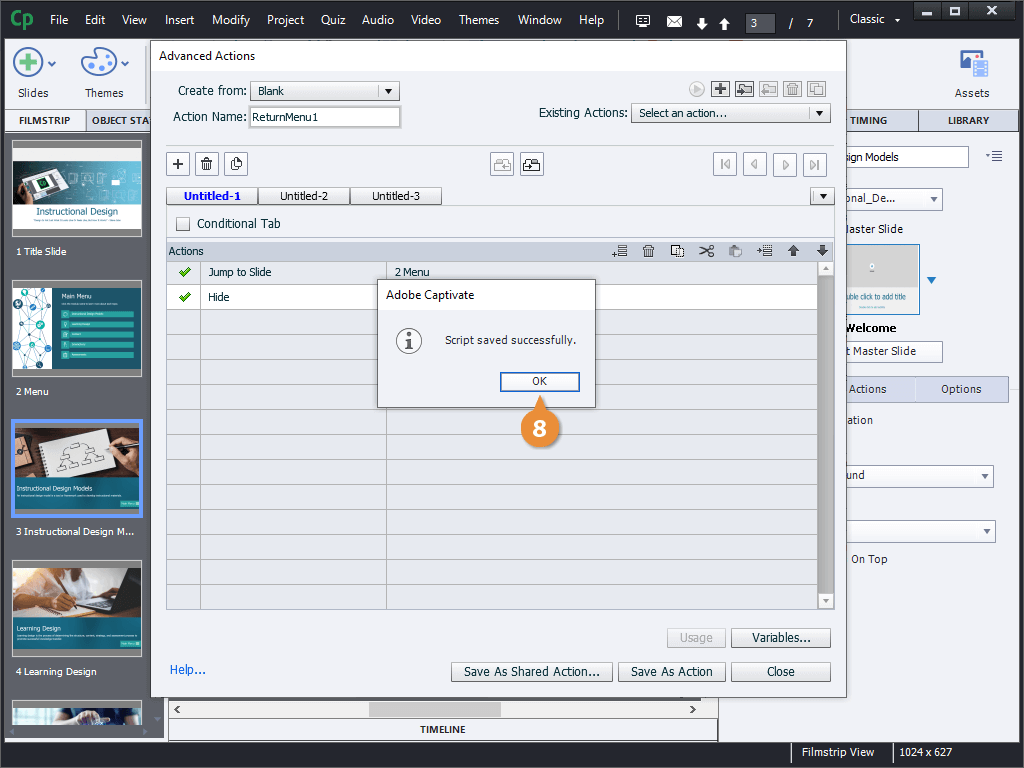
- Click OK.
The advanced action is saved, and can be applied to a button or click box in this project.
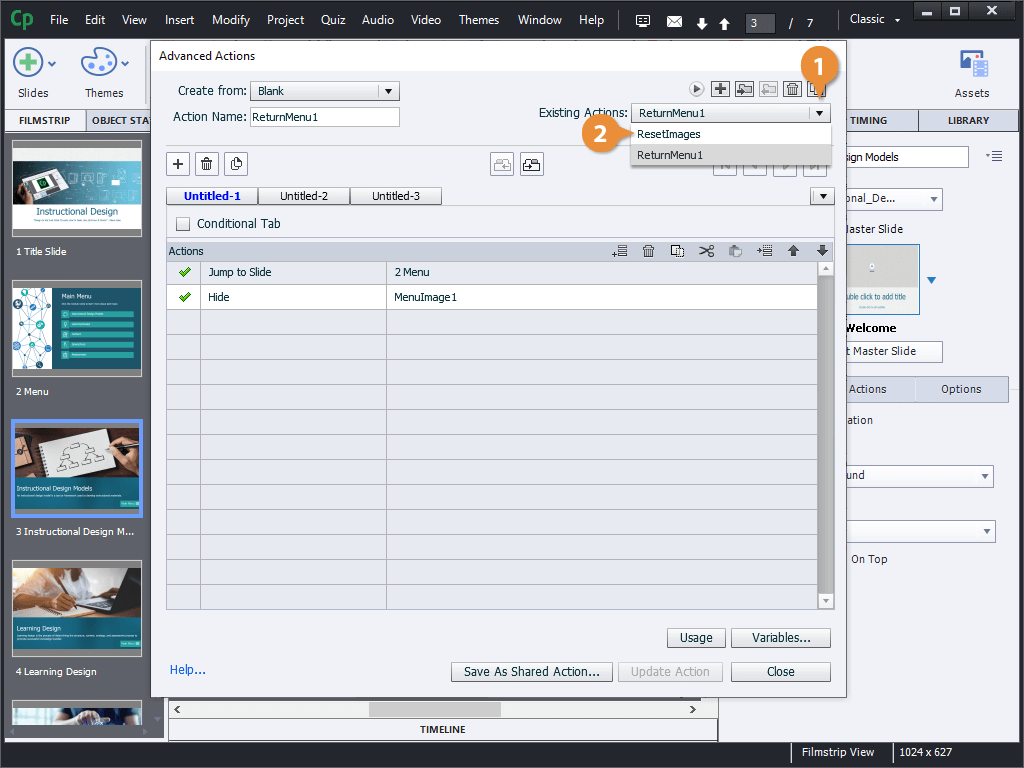
- Click the Existing Actions menu arrow.
- Select an advanced action.
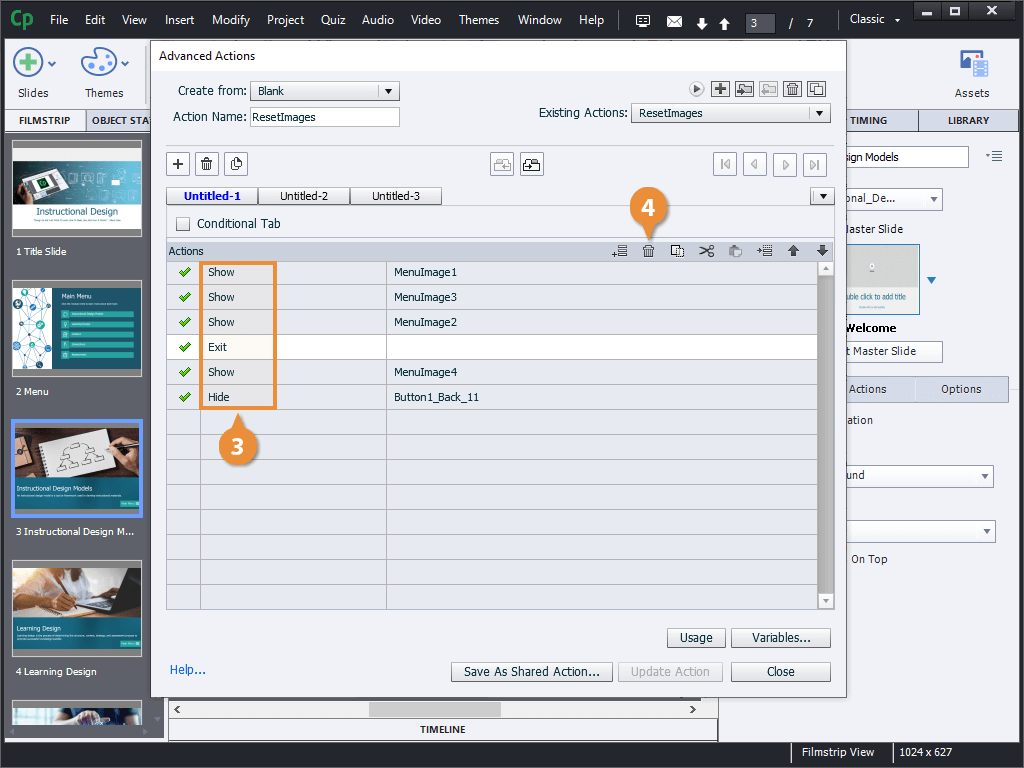
The selected advanced action appears. You can add new actions, remove unnecessary ones, and reorder or edit the existing actions.
- Select an action.
- (Optional) Click the Remove button to remove an action.
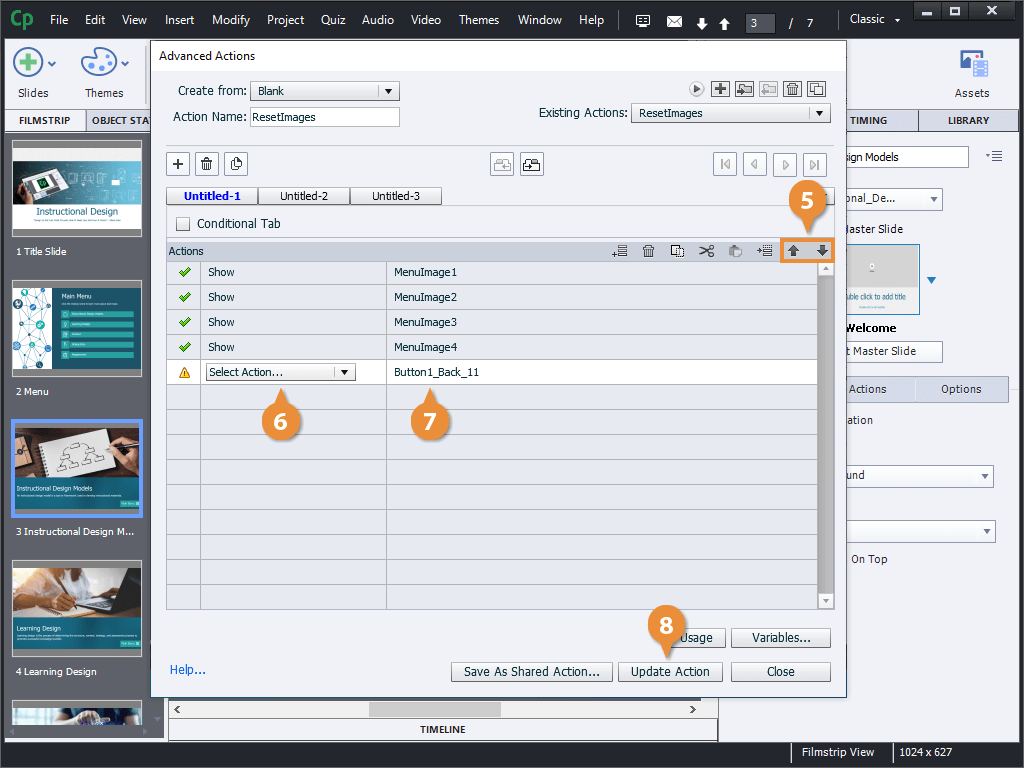
- (Optional) Click the Move Up or Move Down buttons to move the action up or down in the action list.
You can also edit an action to change the action that gets performed, or change an action's settings.
- (Optional) Double-click an action to reset the action performed.
- Edit an action's options (if necessary).
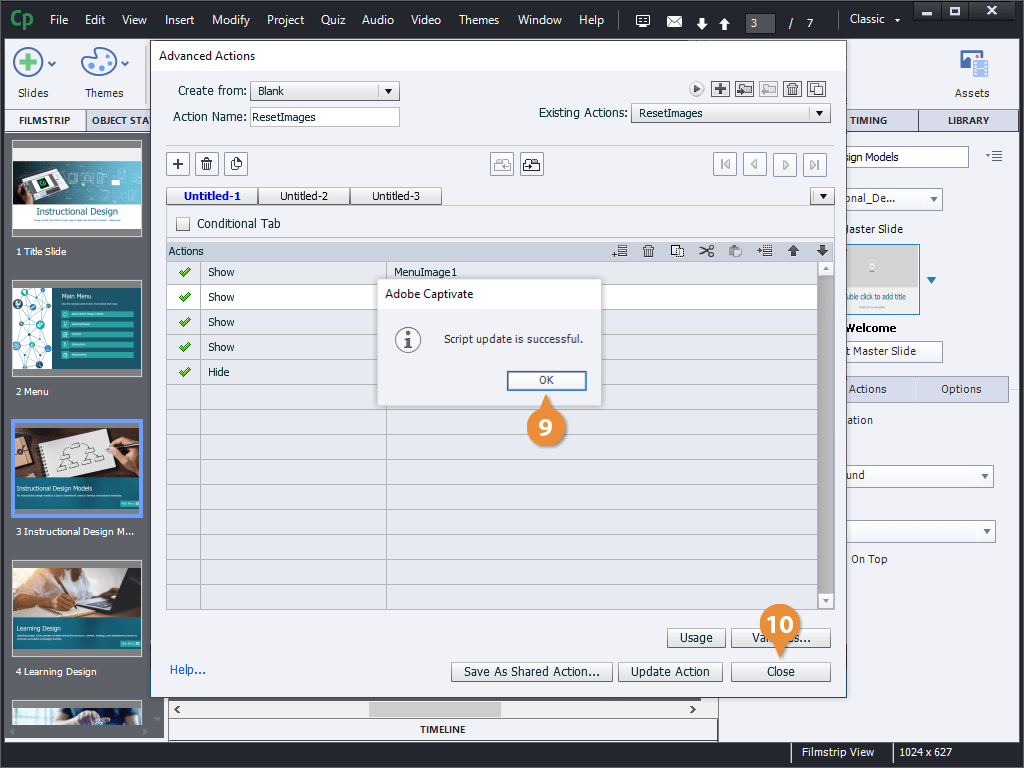
- Click the Update Action button.
- Click OK.
- Click the Close button.
- Select a button or click box.
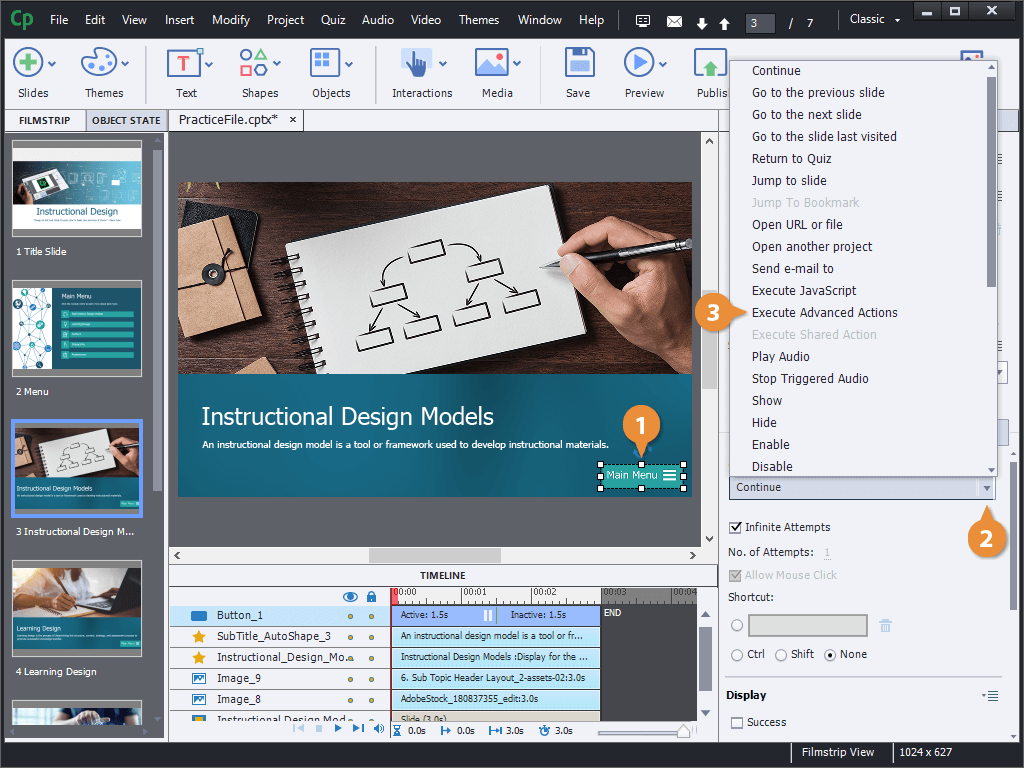
- Click the On Success menu arrow on the Actions tab of the Properties panel.
- Select Execute Advanced Actions.
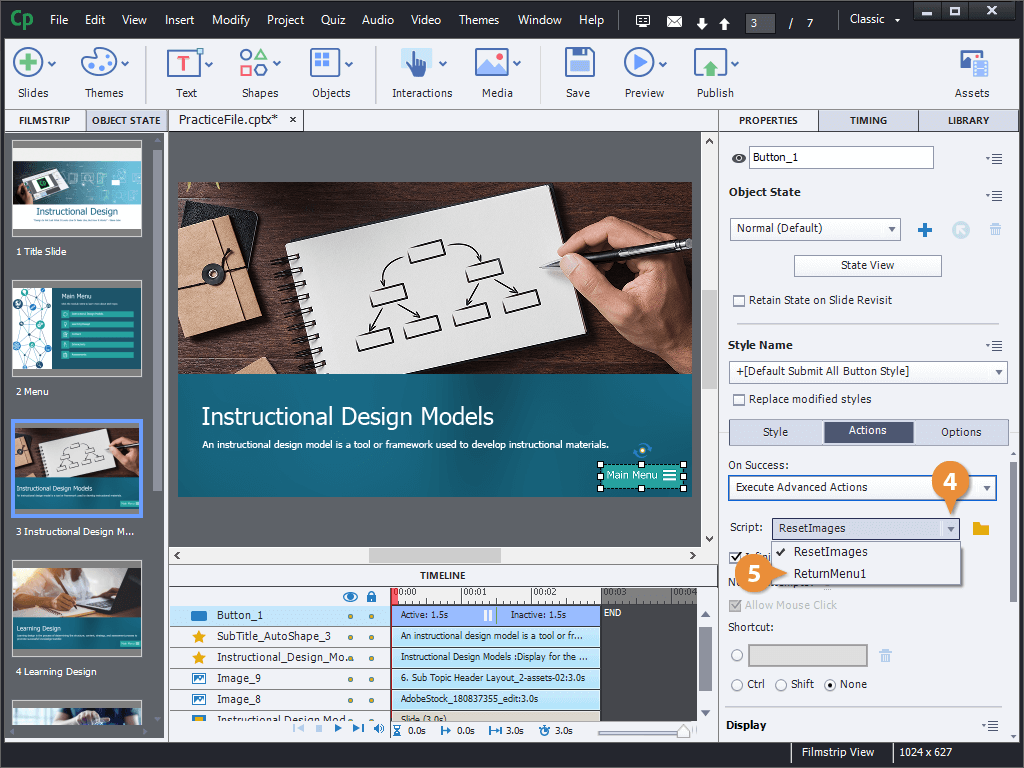
- Click the Script menu arrow.
- Select an advanced action.

