
Interactive Tutorial
Label Wizard Access
Design and print custom mailing labels quickly using the Label Wizard in Access”
-
Learn by Doing
-
LMS Ready
-
Earn Certificates

Try this Course with a Free Trial
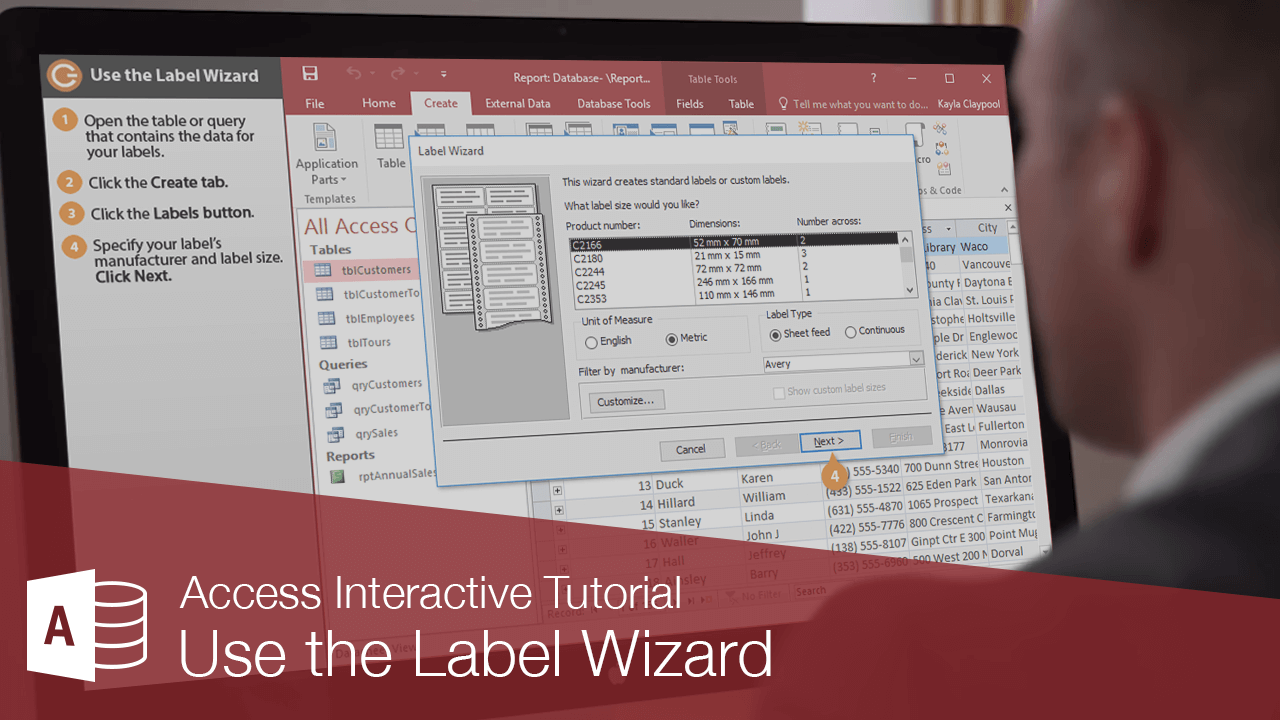
For bulk mailings, nothing is more efficient than a stack of well-organized mailing labels. The Access Label Wizard helps you quickly create labels using data from your Access database. The Label Wizard supports a huge variety of label sizes and brands. In this lesson, you will use the Label Wizard to create a set of mailing labels.
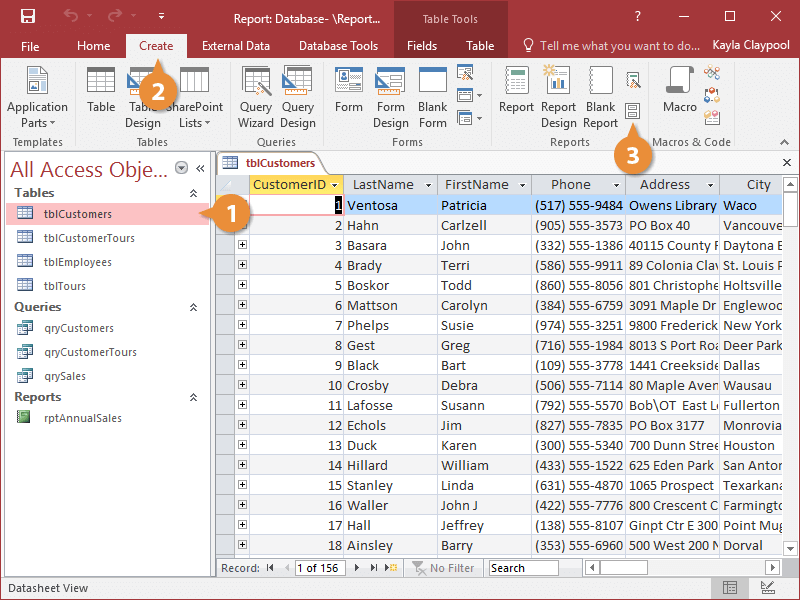
- Open the table or query that contains the data for your labels.
- Click the Create tab.
- Click the Labels button.
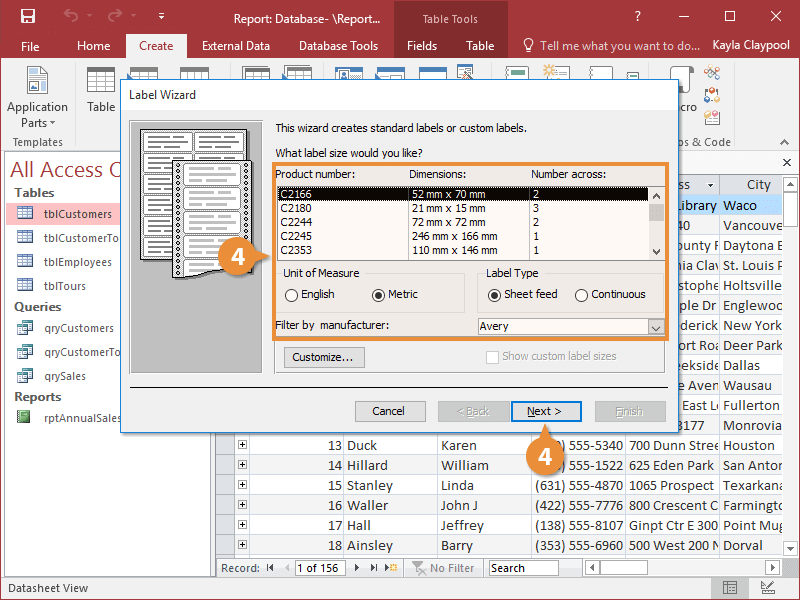
The Label Wizard dialog box appears, listing the various types of labels by product number. Simply scroll down and find the number that matches the one on your label box.
If you can't find your label type, click the Customize button and tell the Label Wizard how to set up your nonstandard labels.
- Specify your label's manufacturer and label size and click Next.
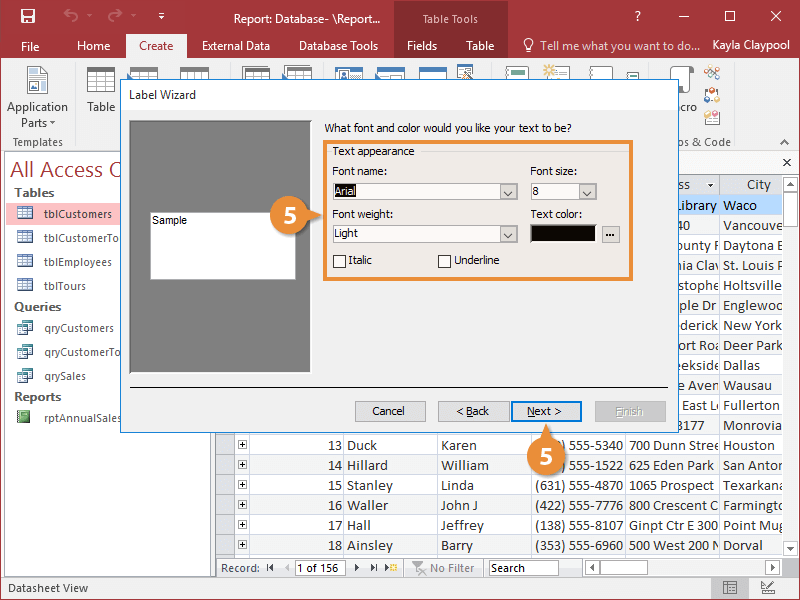
The next window of the Label Wizard lets you change the font used in your label.
- Select the font and font formatting options you want to use for your label and click Next.
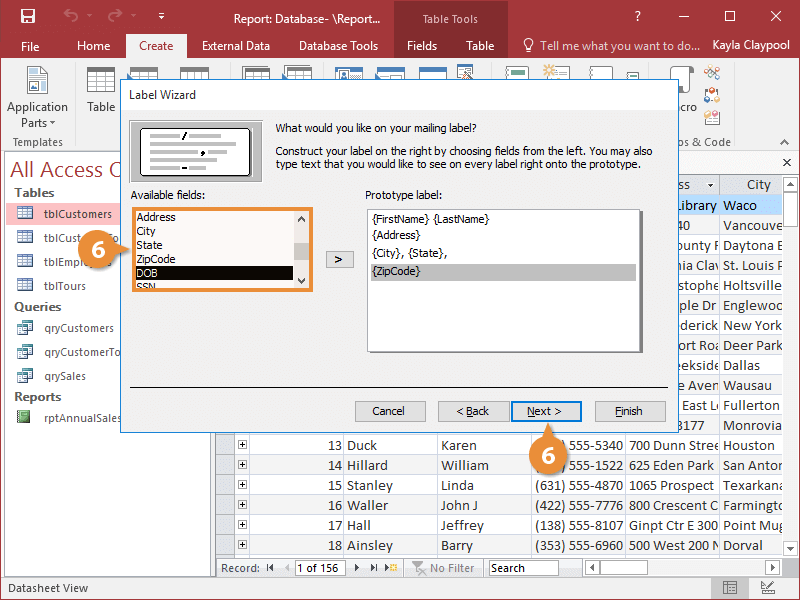
It's time to tell the Label Wizard which fields you want to use.
If you want to place fields on separate rows, you'll need to press Enter in the Prototype label area to move to the next row before inserting the field.
Also, if you want certain text to appear on every label—such as a comma between the city and state—you can type the text in the Prototype label area.
- Double-click each field you want to use. Click Next.
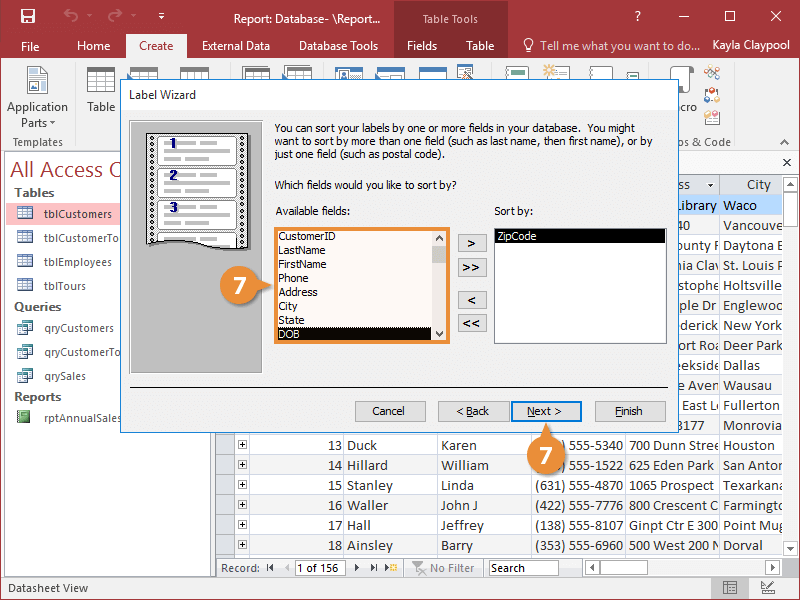
Next you can determine the order of your labels by sorting.
- Specify the fields that you want to use to sort your labels. Click Next.
You can sort by multiple fields if desired.
- Give your report a name and click Finish.

Access creates the mailing labels and displays them on screen.
- Specify your label's manufacturer and label size and click Next.