
Interactive Tutorial
How to Create a Lookup Field in Access
Simplify data entry by creating lookup fields to select values in Access
-
Learn by Doing
-
LMS Ready
-
Earn Certificates

Try this Course with a Free Trial

A lookup field lets you add information to a field from a list of values. There are two ways that a lookup field can get its list of values:
- From a Lookup List: A list of values in a table or query. For example, instead of entering a CustomerID number, you could select it from a list of customers.
- From a Value List: A list of values or options that you enter yourself. For example, you could add the values “FedEx,” “UPS,” and “AirBorne” to a Shipping field.
Create a Lookup Field
- In Design View, click the Data Type box for the field you want to create a lookup field for.
- Click the Data Type list arrow, and select Lookup Wizard.
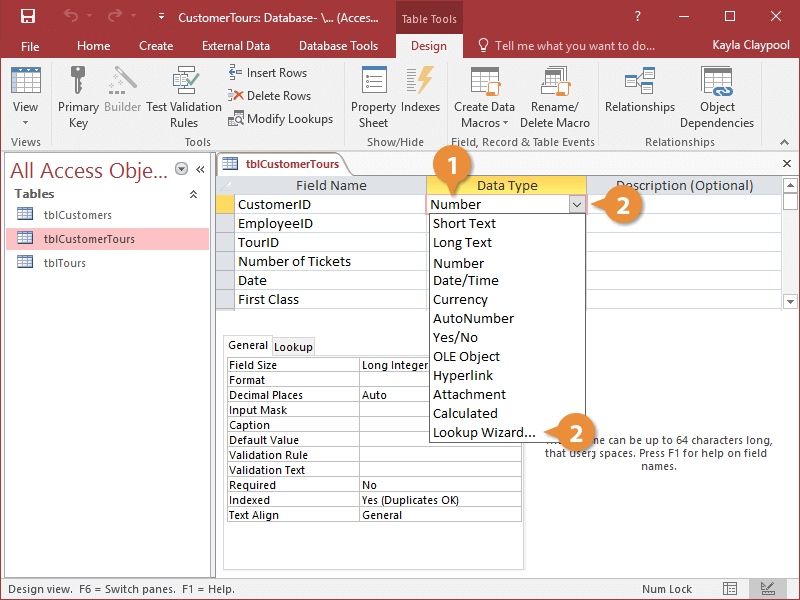
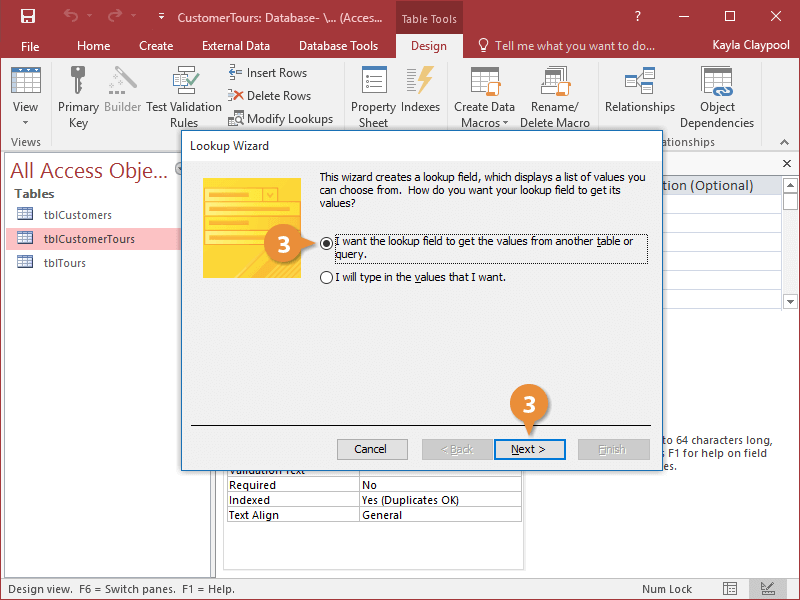
The Lookup Wizard dialog box appears, asking if you want your lookup field to get its values from another table or query or if you want to type a list of options yourself.
- Click the I want the lookup column to look up the values in a table or query option and click Next.
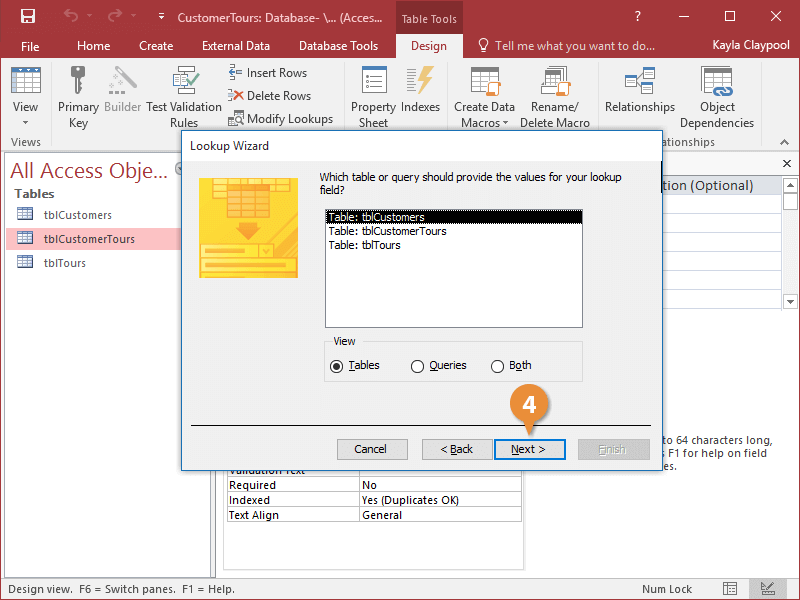
The next step in the Lookup Wizard is to select the table or query that contains the values for your lookup field. Because you can use queries to sort and filter information, consider using them as the source for your lookup fields.
- Select the table or query you want to use for the lookup list and click Next.
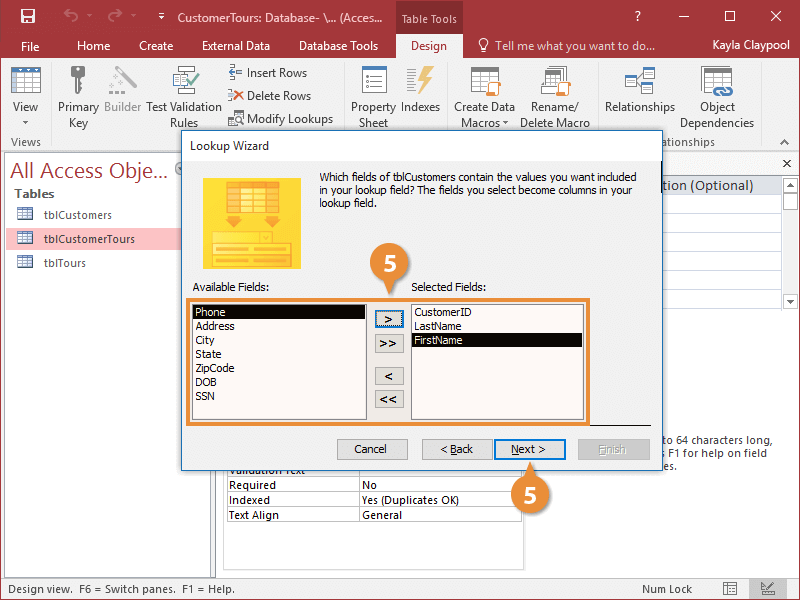
Now you have to select the fields that contain the values you want to display in your lookup field.
This step can be a little confusing at first. You need to add the field that contains the value you want to enter—for example, the CustomerID field—but you also want to add several fields that will display more meaningful information in the value list, such as the LastName and FirstName fields.
- Double-click the fields you want to add to the lookup field and click Next.
You can also add fields by selecting the field in the Available Fields list and clicking the arrow buttons to add or remove them from the Selected Fields list.
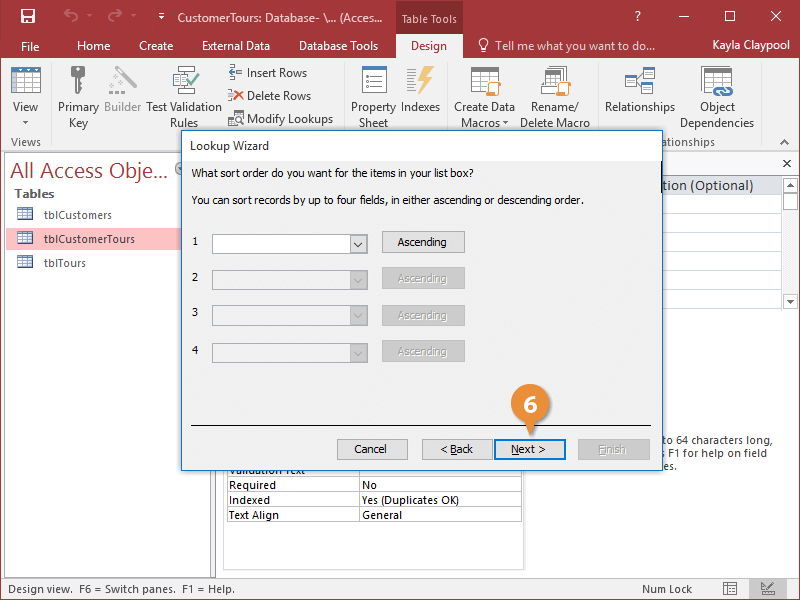
The next step in the Lookup Wizard dialog box is selecting a sort order for your list. You can sort records by up to four fields, in either ascending or descending order.
- (Optional) Select a sort order for your list and click Next.
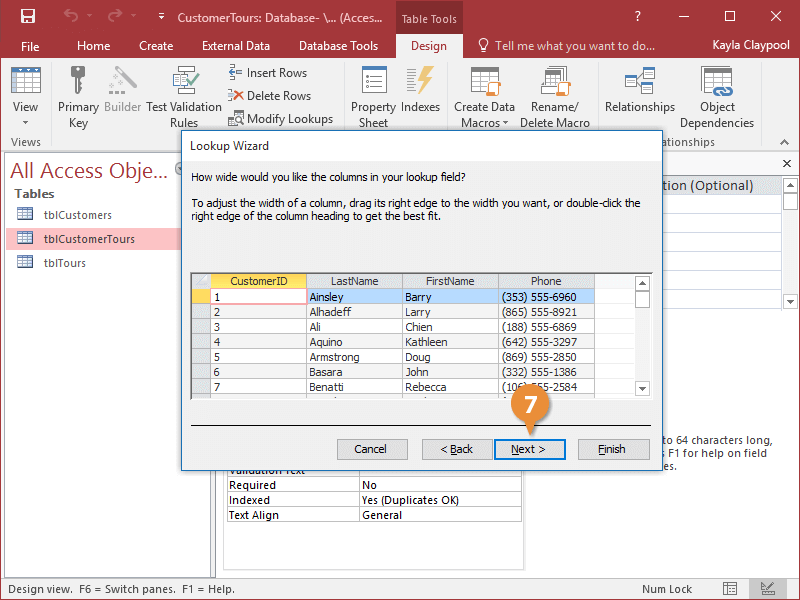
This next step allows you to adjust the width of the columns in your lookup list. To adjust the width of a column, drag its right edge to the width you want, or double-click the right edge of the column heading to get the best fit.
You can also indicate if you want to include the primary key in the column by checking or unchecking the Hide key column check box. Any primary key fields will be hidden by default to make the lookup field less confusing.
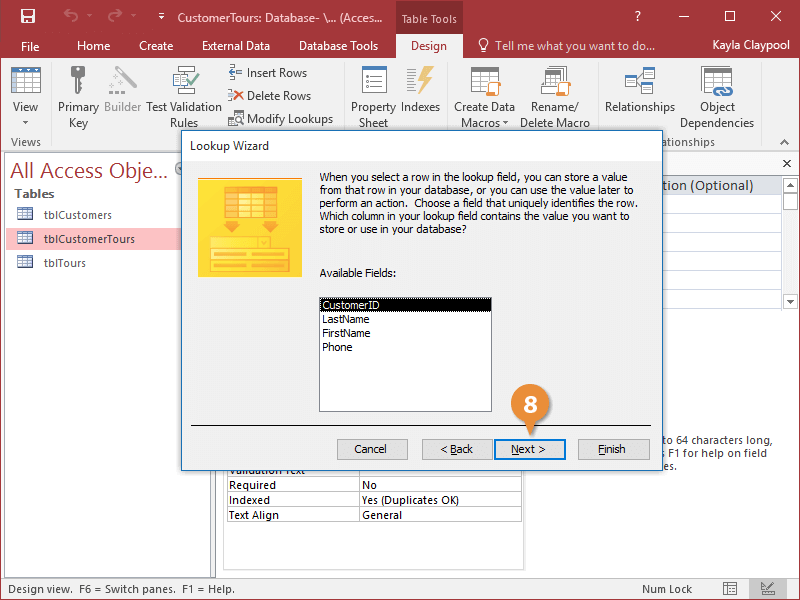
If the table or query you are working with does not have a primary key, the Hide key column check box will not appear. The Lookup Wizard will instead include an additional step where you will be prompted to select the column that uniquely identifies the row.
- Adjust the column width and click Next.
- Select a field that identifies the row and click Next.
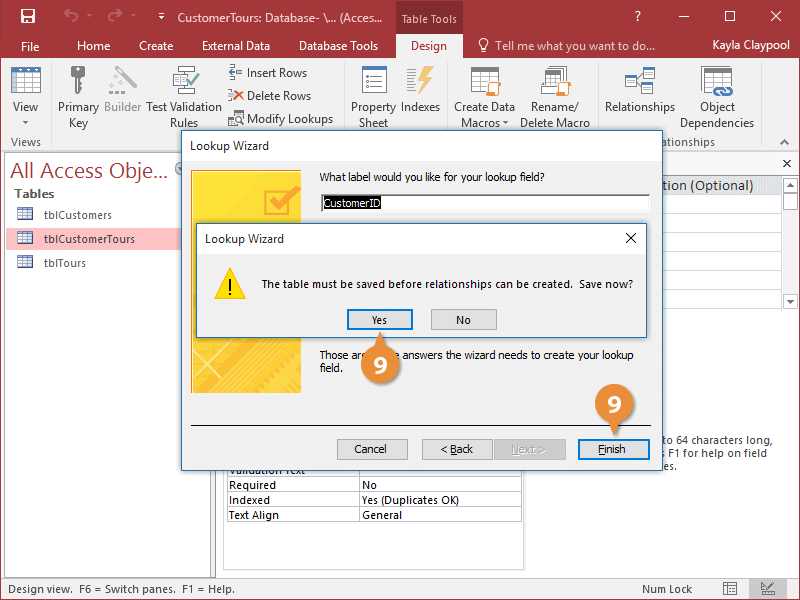
- Enter a label for the lookup column and click Finish. Click Yes to save the table.
You can select to Allow Multiple Values. If you select this box, Access allows you to select multiple values from your list and store them in a single field (a multi-value field) For example, if a single product is made in two different countries, you can display both countries.
Use a Lookup Field
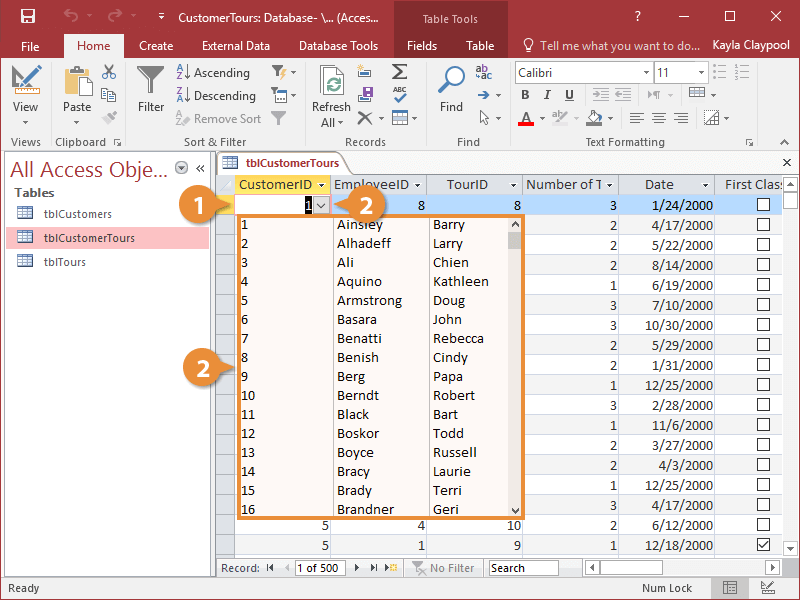
- Click any record in the column where you created the lookup list.
- Click the list arrow and select a value from the list.
You can also select an option from a lookup field by typing the first few values of the entry and then selecting from the results.
Access adds the value you selected to the field.
- Click the I want the lookup column to look up the values in a table or query option and click Next.