
Change Table Style in Word
How to Adjust Table Styles and Alignment in Word
By default, a table is created with the Table Grid style, which includes a basic black border around each cell in the table. Word includes many built-in styles that provide more visual appeal.
Apply a Table Style
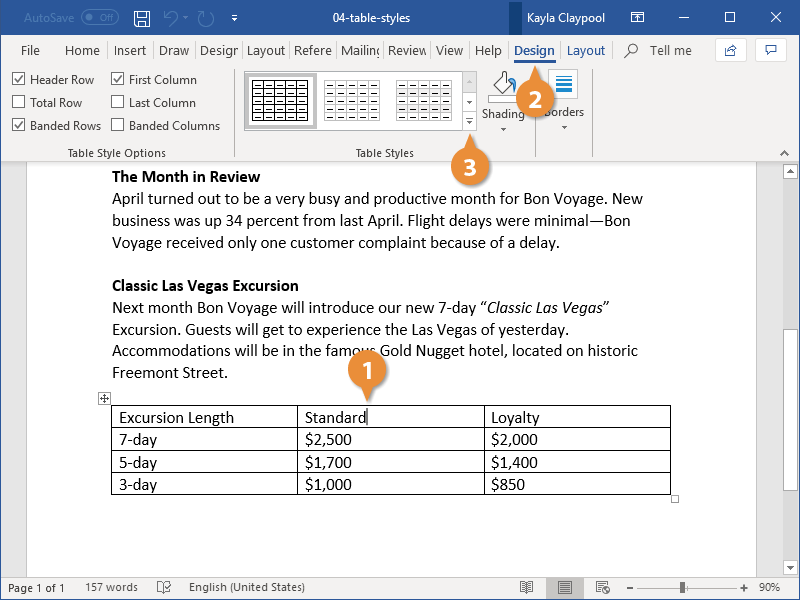
- Click inside the table.
- Click the Design tab in the Table Tools ribbon group.
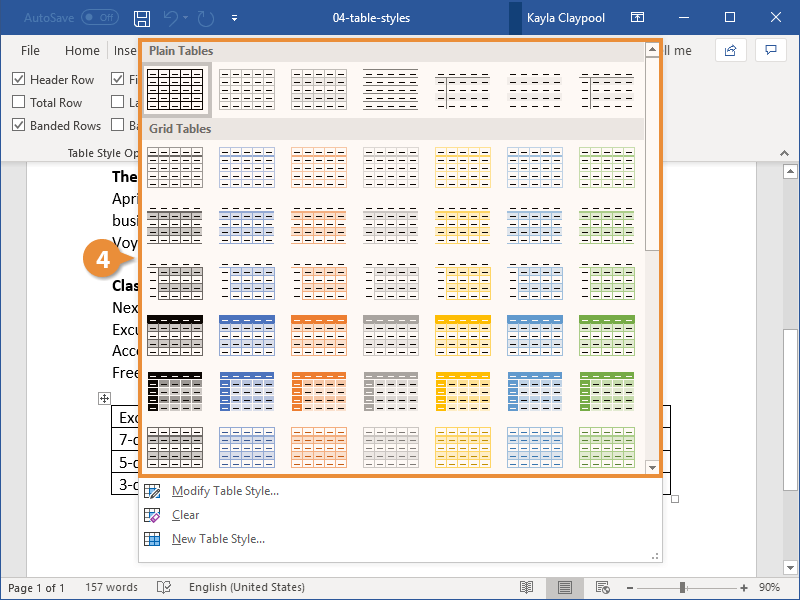
- (Optional) Click the Table Styles More button to see all the available styles.
- Select a style.
The Table Styles group will show a few table styles, but to see the rest, you’ll need to expand the gallery.
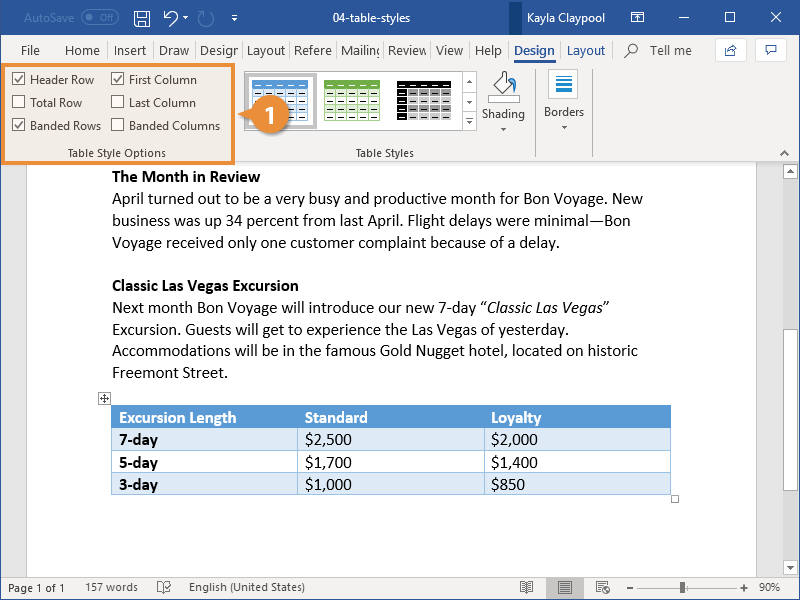
The style is applied to the table, changing the borders, shading, and colors.
You could create a new style by selecting New Table Style or modify an existing one by selecting Modify Table Style and choosing which formatting you’d like.
To remove a Table Style, select Clear from the More Table Styles menu.
Adjust Style Options
You can further customize a table style by changing the table style options.
- Use the check boxes in the Table Style Options group to toggle the following settings:
- Header Row will apply special formatting to the first row of the table. This special formatting can include font effects, or font, background, and border color.
- First Column will apply special formatting to the first column.
- Total Row will add special formatting to the final row of a table, designed to summarize the rows above it.
- Last Column will apply special formatting to the last column to summarize the earlier columns.
- Banded Rows will alternate the background color of rows.
- Banded Columns will alternate the background color of columns.
The special formatting applied by each option is controlled by the style that’s been applied to the table. You can customize these formatting options by clicking the Table Styles More button, then selecting Modify Table Style.
Text Alignment
You can control how text is aligned within a table cell, just like you’d align text on the page.
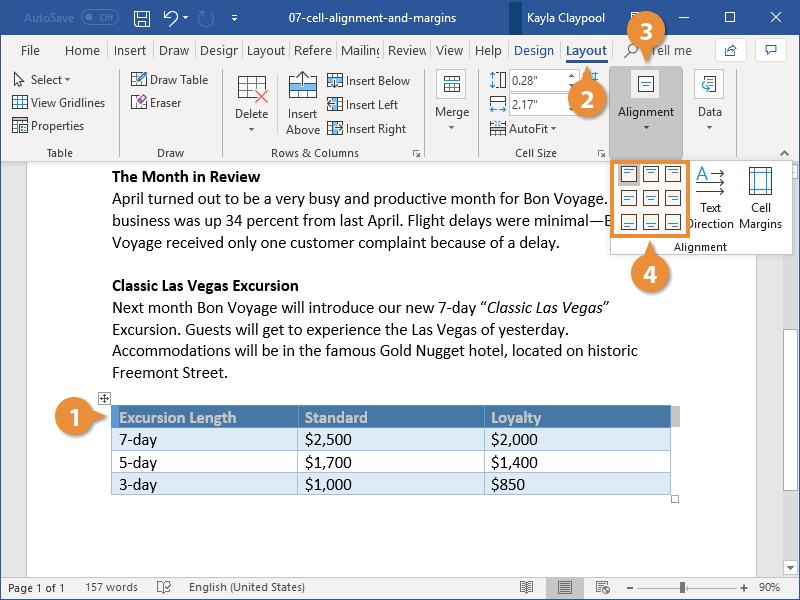
- Select the cell or cells you want to align.
- Click the Layout tab in the Table Tools ribbon group.
- Expand the Alignment group, if necessary.
- Select an alignment option.
You could also select the entire table if you want to align all the text together.
There are nine alignment options, letting you align the content to either side of a cell, any corner, or center it in the middle of the cell.
The text in the selected cell realigns to the selected side or corner.
You can also select Text Direction to change the text from left-to-right to top-to-bottom or bottom-to-top.
Add Cell Margins
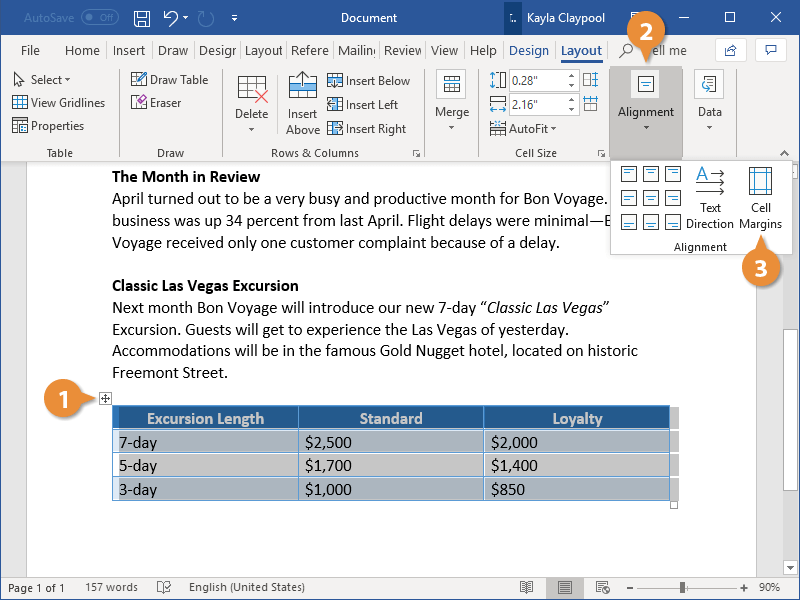
You can also adjust the margins between cell borders and the text within those cells.
- Select cell or cells you want to adjust.
- From the Layout tab, expand the Alignment group, if necessary.
- Click the Cell Margins button.
- Adjust the margins.
- Click OK.
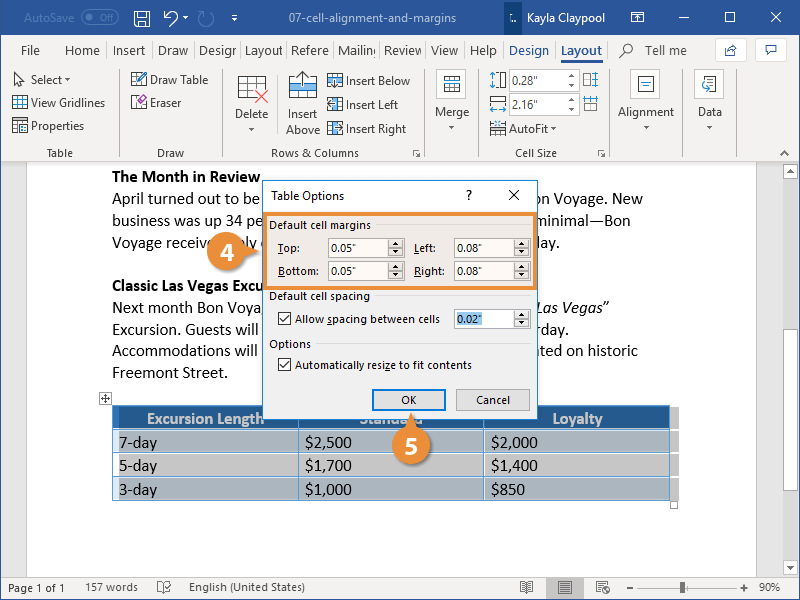
You can select the entire table to adjust all the margins at once.
In the Table Options dialog box, we can adjust the margins for the selected cell or cells. The margin affects how much space there is between the edge of the cell and the contents of that cell.
You can adjust the margin on each side of the cell independently.
The cell margins are changed.

FREE Quick Reference
Click to DownloadFree to distribute with our compliments; we hope you will consider our paid training.
- LinkedIn-ready certificate
- Skill assessments
- Bite-sized, interactive lessons
- Saved progress