
How to Make an Outline in Word
How to Use Outline View in Word
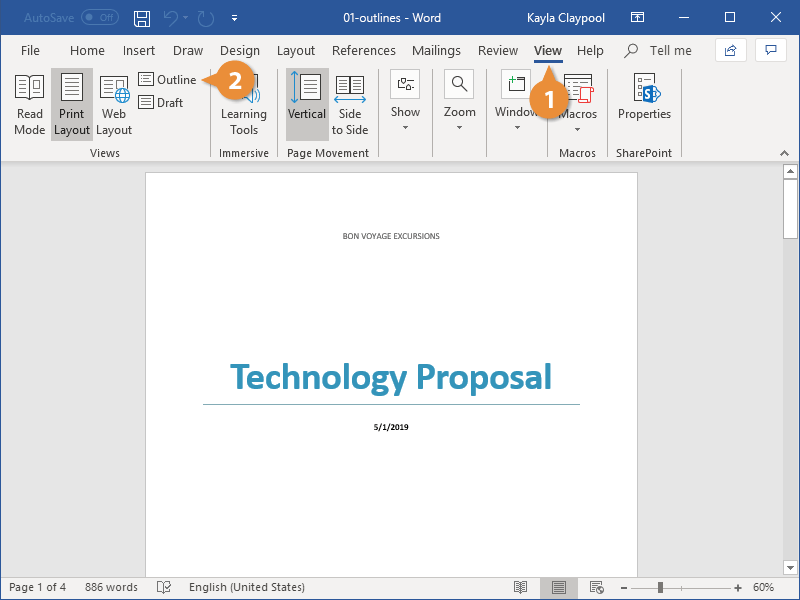
When you're working with a long document, the Outline view helps you arrange your text. It creates an outline based on the styles you use, so it's easy to see and organize all your headings and subheadings.
Outline View
- Click the View tab.
- Click the Outline button in the Views group.
The Outline view breaks the document down so that each heading and paragraph is represented by a single line.
Any text formatted with a Heading style will automatically be set at the specified outline level, but you can adjust a line’s outline level manually using the tools on the Outlining tab that appears in Outline view.
Demote or Promote Items
Outline view makes it very easy to adjust the outline level of a heading.
- Click the item in your document that you want to promote or demote.
- Click a Promote or Demote option from the Outline Tools group.
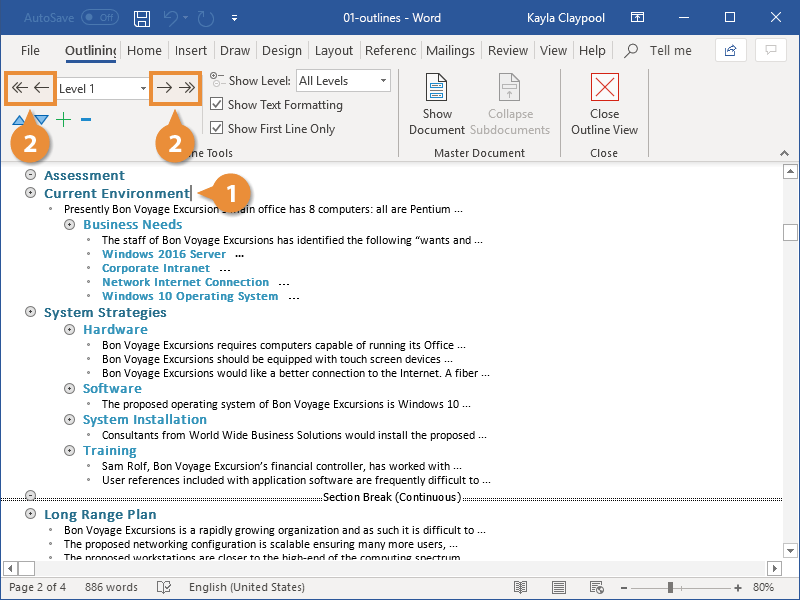
Promoting a topic moves it to a higher outline level, moving it one spot to the left, while demoting a topic moves it to a lower outline level, one spot to the right.
You can also use the double arrow buttons to promote a topic directly to Level 1, the highest outline level, or demote it all the way to body text.
Collapse and Expand Headings
You can collapse the contents of a heading in Outline view to make it easier to see the rest of a document.
- Click the item in your document that you want to minimize.
- To collapse a section, click the Collapse button in the Outline Tools group.
- To expand a section, click the Expand button in the Outline Tools group.
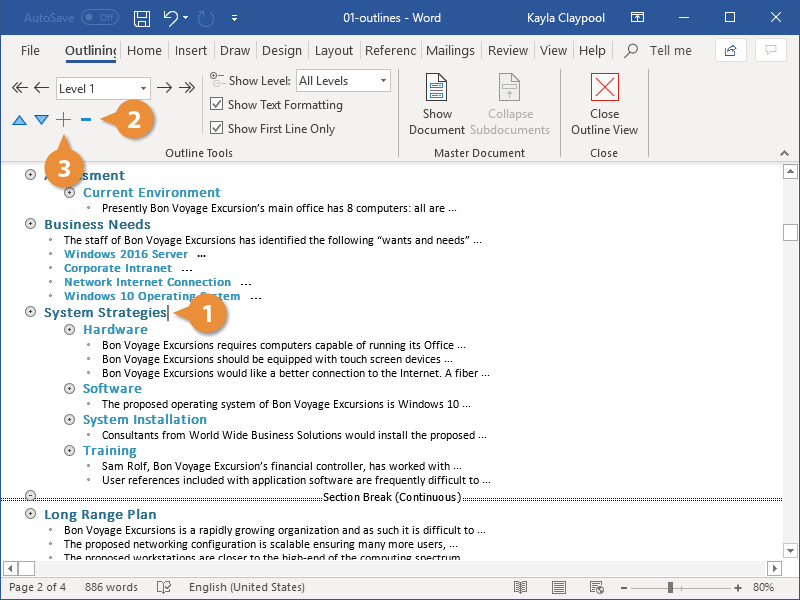
That heading, along with all its subheadings and body text, is collapsed down to a single line.
That section is expanded once again, displaying all the subheadings and body text.
You can choose which outline levels are displayed by clicking the Show Level list arrow and selecting a level. Only sections of that outline level and higher will be displayed.

FREE Quick Reference
Click to DownloadFree to distribute with our compliments; we hope you will consider our paid training.
- LinkedIn-ready certificate
- Skill assessments
- Bite-sized, interactive lessons
- Saved progress